
If you’re a pro photographer or graphic designer, watermarking your images is an important part of protecting your work. But if you’re trying to watermark in Photoshop, it’s an arduous process at best.
Luckily, the clever folks over at Adobe knew that photographers—and everyone else who works with images—needed a way to batch upload, resize, organize, watermark, and export their images all at once. We’re talking seconds here. It was with these needs in mind that they developed Adobe Lightroom.
Unfortunately, many people still see Lightroom as “baby Photoshop,” or alternatively, as too confusing or advanced for the casual user. Not so! This program pairs beautifully with Photoshop to streamline your editing process and improve efficiency, and it’s great all on its own if you’re looking for a quick and easy way to do some basic editing and organize your photos.
To get you started, we put together this simple five-step tutorial using some of our favorite Autumn stock photos to show you how easy it is to watermark your images in Lightroom. We promise—after a time or two this process will take about 10 seconds flat.
Step One: Import Images into Adobe Lightroom
Go ahead and open up Adobe Lightroom. It should open to the Library module along the top navigation bar. Once the screen pops up, click the button on the bottom left that reads Import.
A new screen will open, and often the easiest way to batch import your images is simply to drag and drop them into the center. Once they load, all your images will be visible as thumbnails, as you can see below. For this project, we decided to use autumn landscape photos.
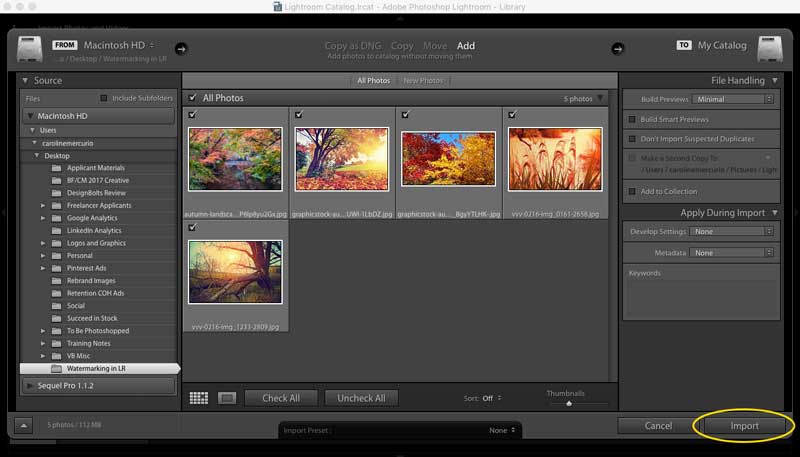
Click on the first thumbnail, hold down shift, and then click on the last thumbnail in the dialogue box to select all of the images. Click Import.
Step Two: Export the Image
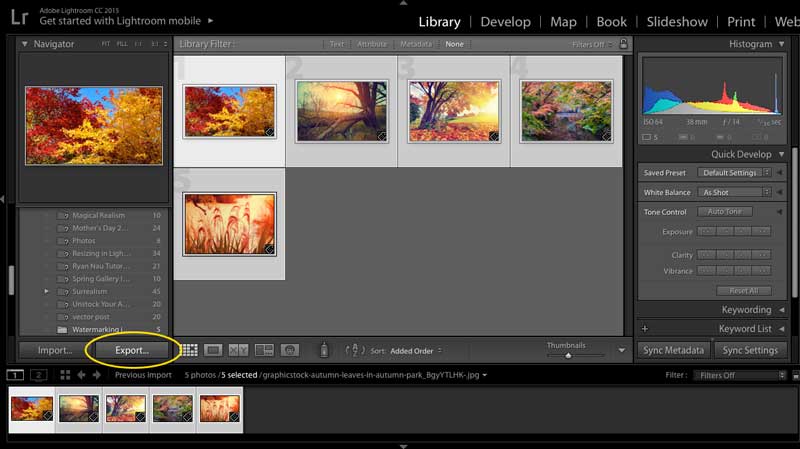
Still working in the Library Module, select the images you want to watermark, the same way you just imported them.
As you can see, the images will highlight and new thumbnails representing each selected image will appear along the bottom of the screen. All of your photos should now be selected, so go ahead and click Export on the bottom left. A new window will pop up, and this is where the magic happens.
Step Three: Scroll down to “Watermarking” and Select “Edit Watermarks”
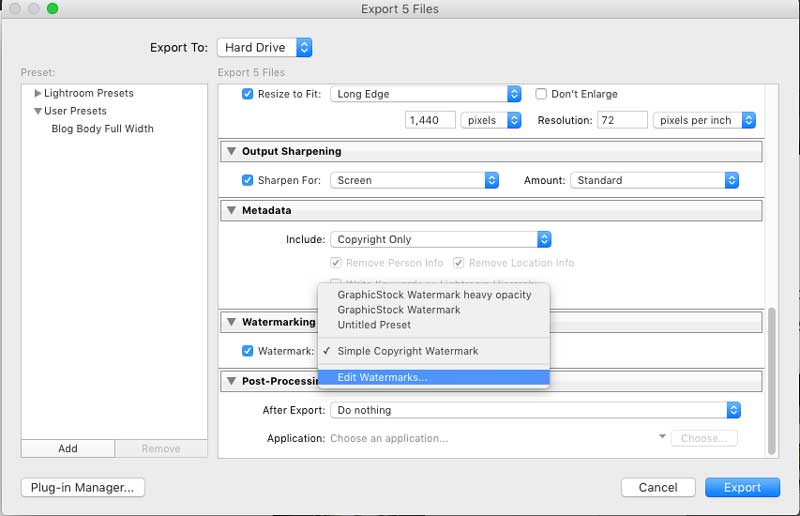
When you select Edit Watermarks, you’ll see a new dialogue box appear. This is where you can select and edit your watermarks. Lightroom comes equipped with a very extensive watermarking editor, and it allows you to work with either text or graphics.
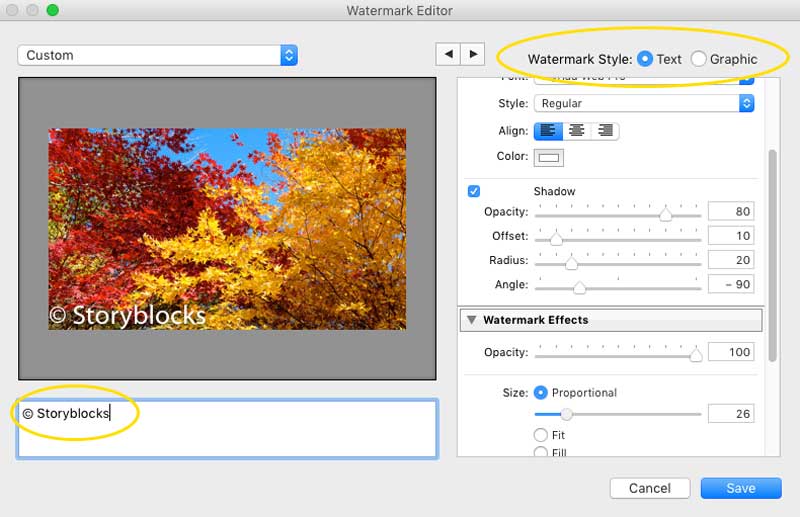
Text:
To add a text watermark—such as your initials or the name of your business—simply select Text at the top right of the screen, then type your desired text in the text box at the bottom.
In the side panel, you can scroll through to find options for different fonts, style, shadow, size, opacity, and anything else you can imagine. You’ll also see something that looks kind of like a tic-tac-toe box. You can use this to select your anchor point, such as the top left, bottom left, or middle.
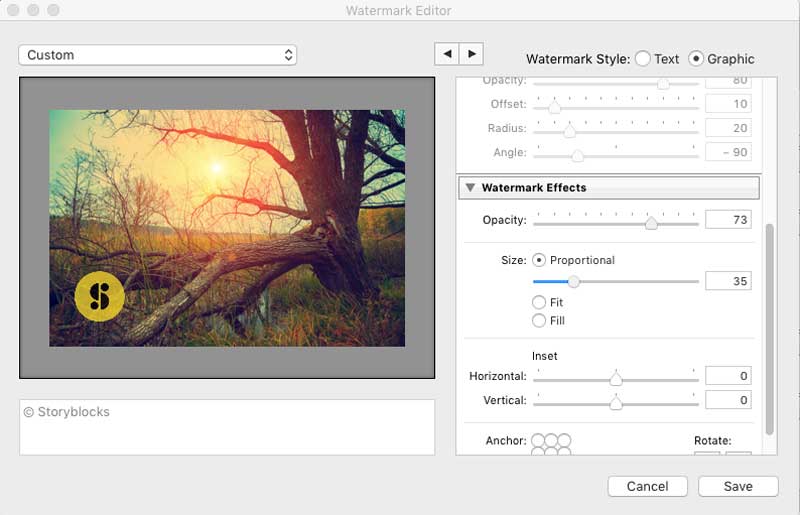
Graphic:
If you select Graphic at the top, Lightroom will open up a dialogue box for you to choose the graphic you want to use, such as a logo. You’ll ideally want this to be a PNG file so that it can be scaled and doesn’t have a white background. Navigate to your chosen graphic and click Choose. Your graphic will now appear in the sample image. With the graphics option, you still have all the options that were available to you with the text option, such as adjusting the opacity, size, and anchor point. All that’s now missing are the text-specific settings like font.
If you choose a graphic but aren’t happy with the way it looks, all you have to do is click Choose at the top of the dialogue box options panel to select a new image.
Pro Tip: If you want to see how your watermark will look on your other photos, you can use the arrow keys at the top of the post to toggle through your selected images.
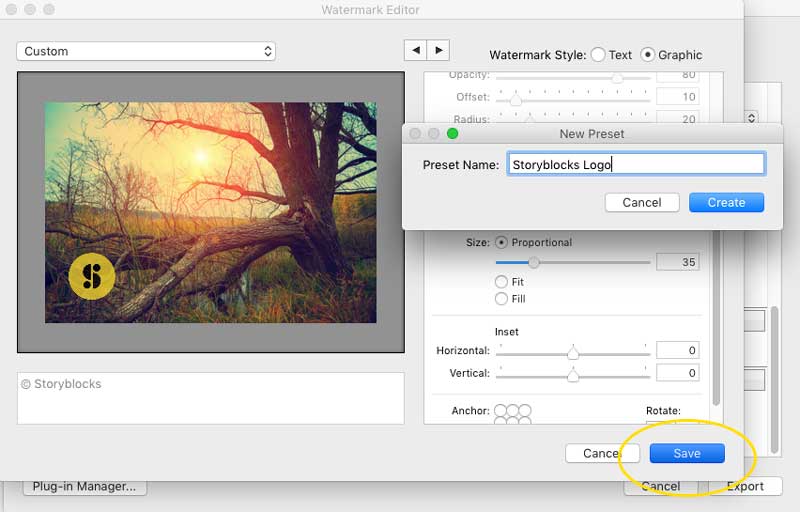
Step Four: Save as Preset
Once you have your watermark when you want it, go ahead and hit the Save button to save it as a preset. Now you’ve saved all those settings for next time, making this process super fast in the future. And don’t worry—you can save multiple presets in Adobe Lightroom without overwriting your previous ones.
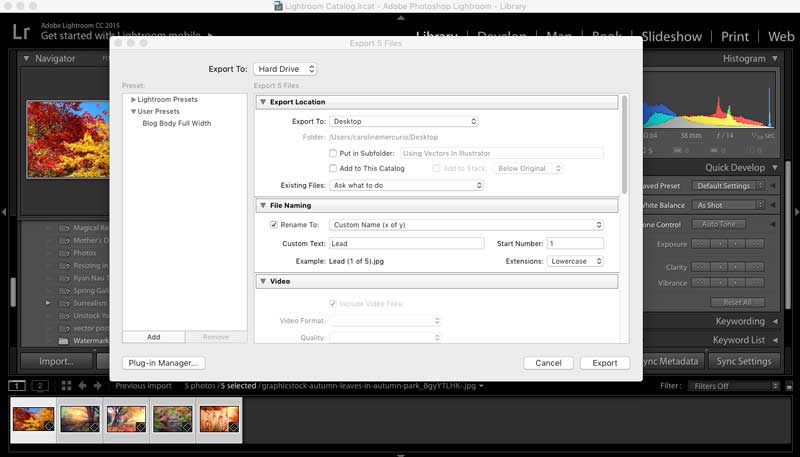
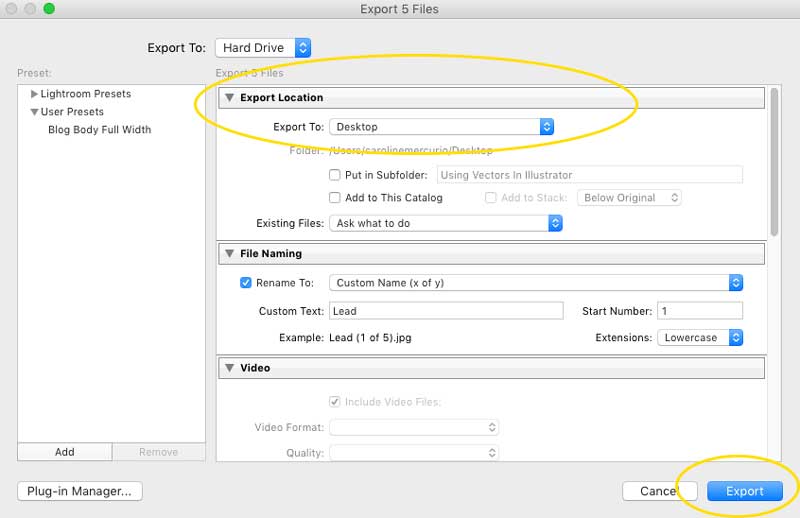
Step Five: Export
After you hit save, make sure your new preset is selected under Watermarking and that the box next to Watermark is checked. Now all you have to do is set where you want these images to go and click Export. All the images will be watermarked, resized, and saved according to the settings you chose in the export dialogue box. For more info on the options available in export—such as resizing images in Adobe Lightroom—check out this post.
And there you have it, folks! It might take a try or two to start really zipping through this process, but like most editing tricks in Lightroom, once you have it, it will save you tons of time and effort. If you’re looking to pick up a few more skills, make sure to check out our tutorials on blurring backgrounds and getting started with presets in Adobe Lightroom.
When you don’t have time to shoot and edit your own image, save time and money with royalty-free stock graphics. After all, even the fastest editing tricks aren’t quite as quick as clicking “Download.”


