Looking for a way to resize your images with a minimum of hassle but a maximum amount of control over export quality or in large batches? Then Adobe Lightroom may be just the photo editing you’re looking for.
There’s a lot that goes into photo editing, and no two images are ever quite alike. But whether you’ve just finished a great photoshoot or you’re putting together a batch of stock photos for a social media campaign, one thing’s for certain: you’re going to have to resize your images if you want them to look their best in your finished product.
Most websites won’t accept large images, and if your photo is too high-res, it might even look weird on some browser screens. Now, we all know the tried-and-true Photoshop method—and that’s great if you want to resize your images one by one—but really, who has that kind of time? Enter Adobe Lightroom.
See, the clever folks over at Adobe knew that photographers—and everyone else who works with images—needed a way to batch upload, resize, organize, and export their images all at once. We’re talking seconds here, people. Yet many people still see Lightroom as “baby Photoshop” or, alternatively, as too confusing or advanced for the casual user. Not so! This program pairs beautifully with Photoshop to streamline your editing process and improve efficiency, and it’s great all on its own if you’re looking for a quick and easy way to do some basic editing and organize your photos.
To get you started, we put together this simple tutorial to teach you how to resize your images in Adobe Lightroom. We promise—after a time or two this process will take you mere moments.
Step One: Import Images into Lightroom
Go ahead and open up Adobe Lightroom. It should open up to the Library module along the top navigation bar. Once the screen pops up, click the button on the bottom left that reads “Import.”

A new screen will open, and often the easiest way to batch import your images is simply to drag and drop them into the center. Once they load, all your images will be visible as thumbnails, as you can see below. For this project, we decided to use images of a stock wedding couple.

Step Two: Export the image
Still working in the Library Module, select the images you want to export. To select all of them at once, simply click the first image, hold down SHIFT, and then click the last image. All of your photos should now be selected.

As you can see, the images will highlight and new thumbnails representing each selected image will appear along the bottom of the screen.
Now it’s time to get busy. Click the Export button (or Ctrl+Shift+E) at the bottom left of the Library module. A new window will pop up, and this is where the magic happens.

Step Three: Define Your Parameters
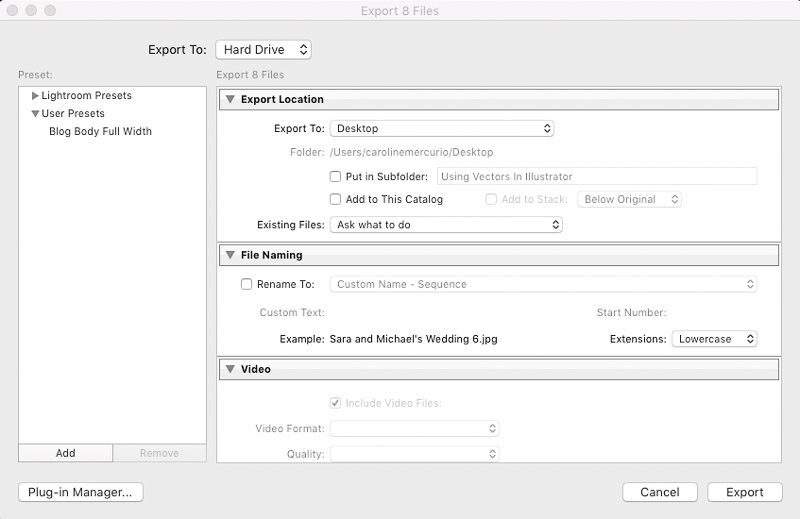
Export Location: At the top of the pop up window is a box saying “Export Location.” within this box you will see “Export to” with a drop down beside it. This is where your edited photos will end up, so go ahead and specify the folder your want to use. For our purposes, we’re using the Desktop.
The next drop-down under “Export Locations” is “Existing Files.” This option determines what happens to existing files already in your destination folder with the same name to avoid confusing duplications. In our experience, ”Ask what to do” is the safest bet.
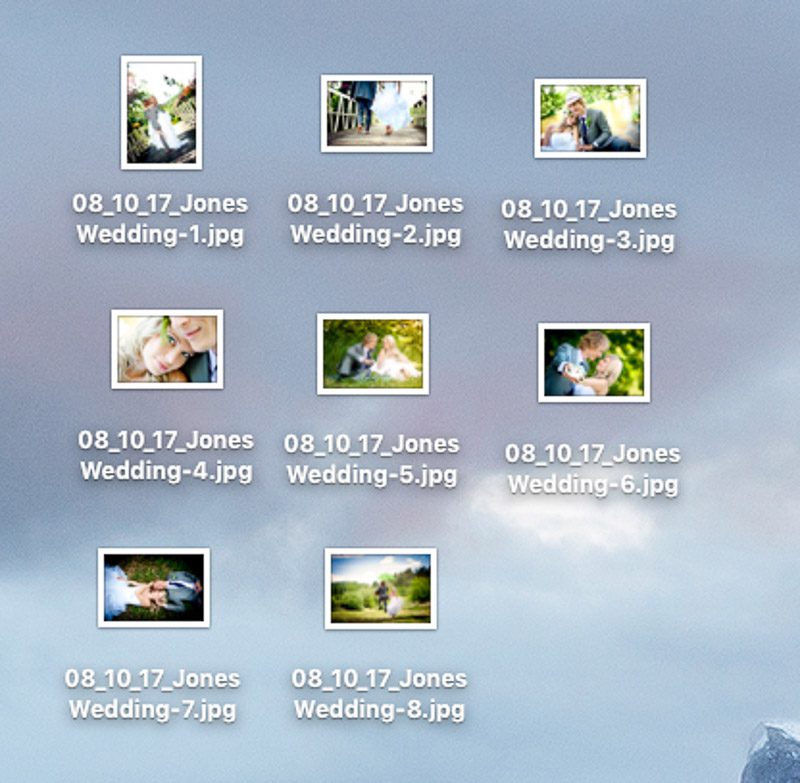
File Naming: The next box is the “File Naming” box. “Rename To” gives you the option to have your files renamed something different than the existing file name you uploaded. For this project, we put a custom name in the custom text box with the date and the name of the project, and selected “Custom Name – Sequence” as my our naming convention. This means that the first image will be named “08_10_17_Jones Wedding” and the subsequent images will have a number added, for example “08_10_17_Jones Wedding-1”
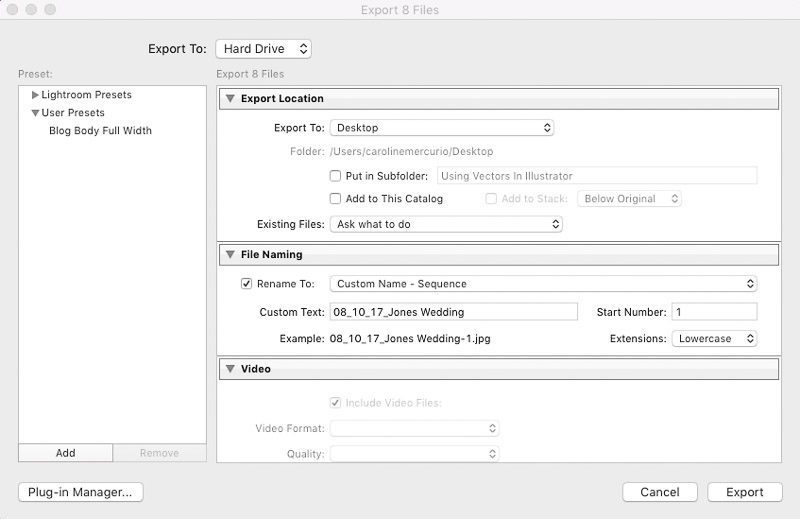
If you select filename, your edited images will have the same filename as the original images. You can also create your own file naming template by selecting Edit from the dropdown list.
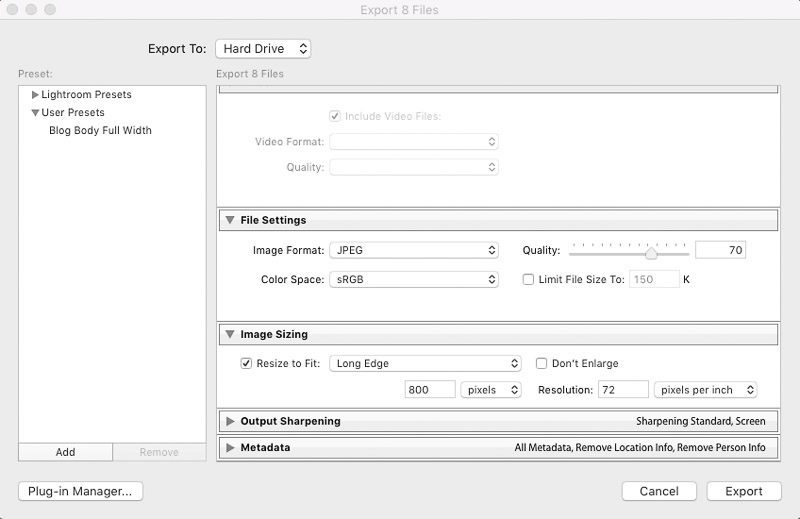
File Settings: Now let’s scroll down to the “File Settings” box. Here’s where we can manage the quality of our final images. First off, we’re going to want to select “JPEG” as the file format, because this is the most commonly used format for web images. We also want to set the Color Space to sRGB, because it’s the color mode most monitors see best.
Now it’s time to think about image quality. Sliding the quality bar all the way to the right might seem like a good idea because it will give you the highest quality, but it will also leave you with giant image sizes, which can slow down your page load speed or even crash your site. For digital images, it’s a safe bet to set your slider to 65-80.
Don’t check “Limit file size to,” because we don’t want Lightroom to override your selections later on.

Image Sizing: The first thing we’re going to do is check “Resize to Fit.” The dropdown will now give you several options to choose from. What you are essentially doing is selecting which edge you are sizing by—whether it’s the long or short edge, or both—from the dropdown next to the checkbox.
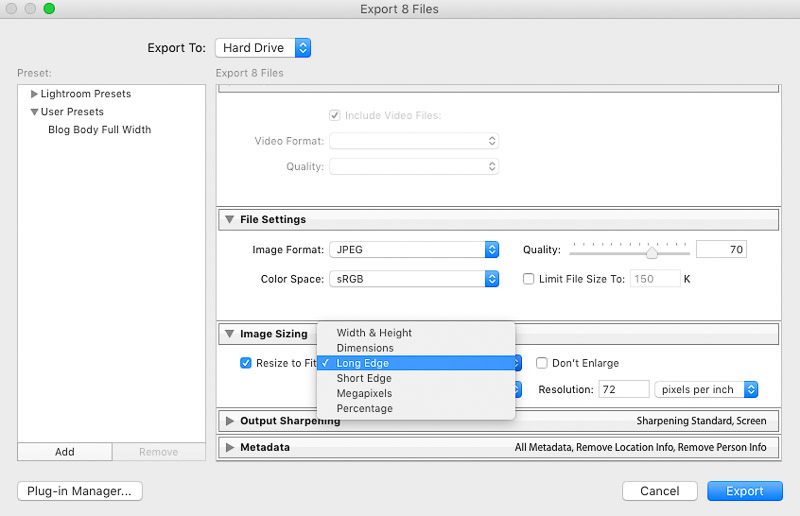
Each option has it’s own specifications and nuances, so we’ve broken them down below:
- If you select “Dimensions,” Lightroom will size the images as closely to the selected pixel dimensions as possible within their current aspect ratio (their width to height), and one measurement will match the specified length. For example, if we specify 1200 x 800 pixels as the dimensions, some images may be 1200 x 600 or 800 x 800. The images will not be larger than 1200 x 800
- If you select “Width & Height” you can set the longest dimensions in both directions, therefore depending on the aspect ratio of the image, it is possible that both dimensions will differ from your specifications. The image will be sized so that the width and height are no larger than the value you set.
- “Long Edge” and “Short Edge” are both pretty self-explanatory. The images will be sized so that the edge you specify will match the dimensions you choose, and the other dimension will vary according to the image’s aspect ratio. It’s worth noting that Lightroom will apply these changes to images regardless of their orientation. For example, if you limit only the width of the image, your portrait-oriented images will likely come out much larger than your landscape images.
- Megapixels are the measurement system used by camera companies and combines both width and height into one number. Basically, if you’re primarily concerned about actual file size, this setting may be for you. It’s particularly useful in stock photography because these images are often priced according to image size. Downsizing an image can also help salvage an image that isn’t the best quality or one with noise issues.
- Percentage is the newest option for resizing in Adobe Ligtroom, and it allows you to—you guessed it—resize by a certain percentage.
Another thing to keep in mind is that if you select “Do Not Enlarge,” your images may end up smaller than intended if the original photo is smaller than your specified sizing.
We’ve decided to limit only the long edge of these images to make sure they fit properly on a specific blog page, which is 800 pixels wide with a sidebar. Your pixel size may differ according to your needs. For example, Facebook and most other social media platforms have specific sizes that work best for them.
Now select your resolution. Resolution is mostly for printing purposes and doesn’t really matter for web, provided that you are measuring your image size above in pixels instead of inches. That being said, 72 ppi is pretty standard for screen display. However, if you are looking to print your images, standard ppi ranges from 240 to 300ppi+.
If you are measuring your image size in inches, suddenly ppi matters quite a lot, but this is generally only done when working with print materials.
Sharpening, Metadata and More: Everything else is pretty optional and doesn’t have anything to do with image resizing, but it’s amazing how much post processing you can do in this simple “Export” box. Output sharpening allows you to sharpen your images, and there are a ton of great resources on the web that go into the various settings you can use here. For now, we’re happy with the sharpness of our images so we’re going to go ahead and move on.
You’ll also see that you have the option to add metadata, and it’s a good idea to remove your personal and location info from the image embeds. Removing unnecessary data also reduces image size.
Watermarking: If you want to watermark your images, go ahead and click the “Watermark” box, and select your watermark from the drop down. To add or edit your watermarks, select “Edit Watermark” from the drop down. If this is the first time you’re adding a unique watermark to Lightroom such as a logo, select “Graphic” where it says “Watermark Style” and upload it using the “Choose” button under “Image Options.”


Finally, you want to make sure “Do Nothing” is selected from the drop down under “Post-Processing”—unless you want the images to immediately open up in Photoshop, Finder, or another application after they export.
Step Four: Save Your Settings
We know it seemed like a lot, but the good news is that this process takes only seconds once you’re used to it—especially if you save your settings! If you want to use these settings again, save them by clicking the “Add” button at the bottom left of the Export Window, under the Preset list. Give your new preset a name and select a folder (or just leave it set to “User Presets”). Click Create.

Now, the next time you want to use the preset, just open to the Export dialogue box and choose your setting.
Step Five: It’s Time to Export!
Just click that beautiful blue Export button in the Export dialogue box and that’s it! Your images will appear in your specified folder—in this case, the desktop—resized and ready for all your web projects.
There you have it, folks! What used to take an hour can be done in five seconds, leaving you more time to focus on what really matters—like binge watching Game of Thrones on your DVR. Or, you know, working.
Save even more time—and money—with royalty-free stock graphics. We can’t be everywhere at once, and honestly, some shots are just better left to—well, other people.


