If you’re looking to add movement and action to a still image, the Ken Burns effect is the perfect solution. Learning how to add this popular effect to your video projects in Adobe Premiere Pro is a great way to make more engaging videos for any audience. Especially when you don’t have footage or film to work with. In this post, we’ll dive into what the Ken Burns effect is and how to add a Ken Burns effect in Premiere Pro in just six easy steps.
What is the Ken Burns Effect in Premiere Pro?
The Ken Burns Effect in Premiere Pro is a relatively simple effect you can use to add movement to images and video footage. It creates a gradual zoom or pan effect across a still image, helping to draw attention to specific details or break up multiple monotonous still images. It’s named after Ken Burns, the legendary documentary filmmaker who used this technique throughout his films.
While there is no preset function for this feature, you can create your own Ken Burns preset in a few simple steps using keyframes and Effects Control. Once you have it saved as a preset, you can easily use it again and again in future projects.
Download this clip of the Ken Burns effect showing autumn tree fall foliage
How to add a Ken Burns Effect in Premiere Pro
In just six quick steps, you can easily add a Ken Burns Effect to an image in Premiere Pro.
1. Open Premiere Pro and create a new project
First, open Premiere Pro and create a new project.
2. Import your image
Next, navigate to the editing window and import the picture you want to add the Ken Burns effect to.
3. Add your image to the timeline
Once your image is imported, drag it to the timeline so you can add effects to it. Use the Effect Controls to add keyframes and start editing the image.
4. Adjust the settings
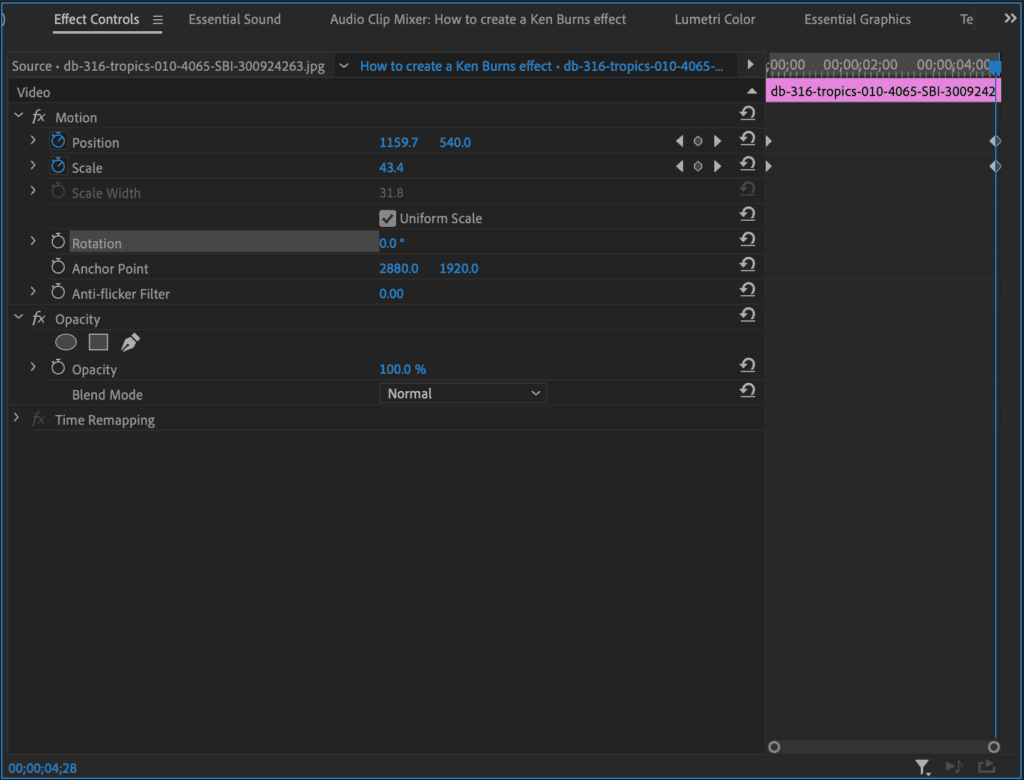
Next, you’ll want to adjust your settings. In the Motion section of Effect Controls, change the Position, Scale, and Rotation settings to your preference.
5. Add keyframes for your Ken Burns effect
Now, select the frame where you want to start the Ken Burns effect. Then, drag the playhead to where you want the effect to start.
Once you’ve chosen where the effect will start, click on the Scale animation button that looks like a stopwatch. This will add the first keyframe.
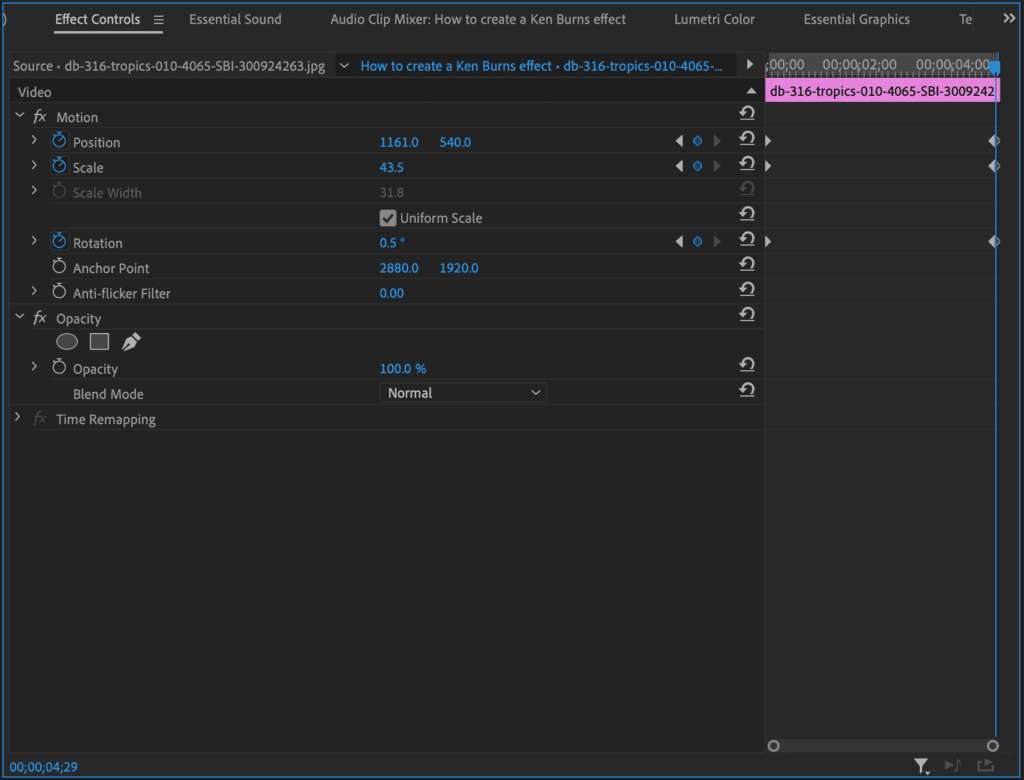
Click later in the clip where you want the effect to end and increase the scale value. This will create your second keyframe. Repeat this process for the Position and Rotation properties, if you want all effects to happen at once.
6. Finalize the effect
Continue adjusting Position, Scale, Rotation, and keyframes, as needed, until you achieve your desired result. Once you are satisfied, you can export the video.
Download this clip of the Ken Burns effect showing beautiful snow covered trees
How to save your Ken Burns Effect as a preset in Premiere Pro
To save yourself some time for future projects, you can save the Ken Burns effect as a preset.
1. Finalize your effect
Make sure that you’re completely happy with all the settings on your project.
2. Save the preset
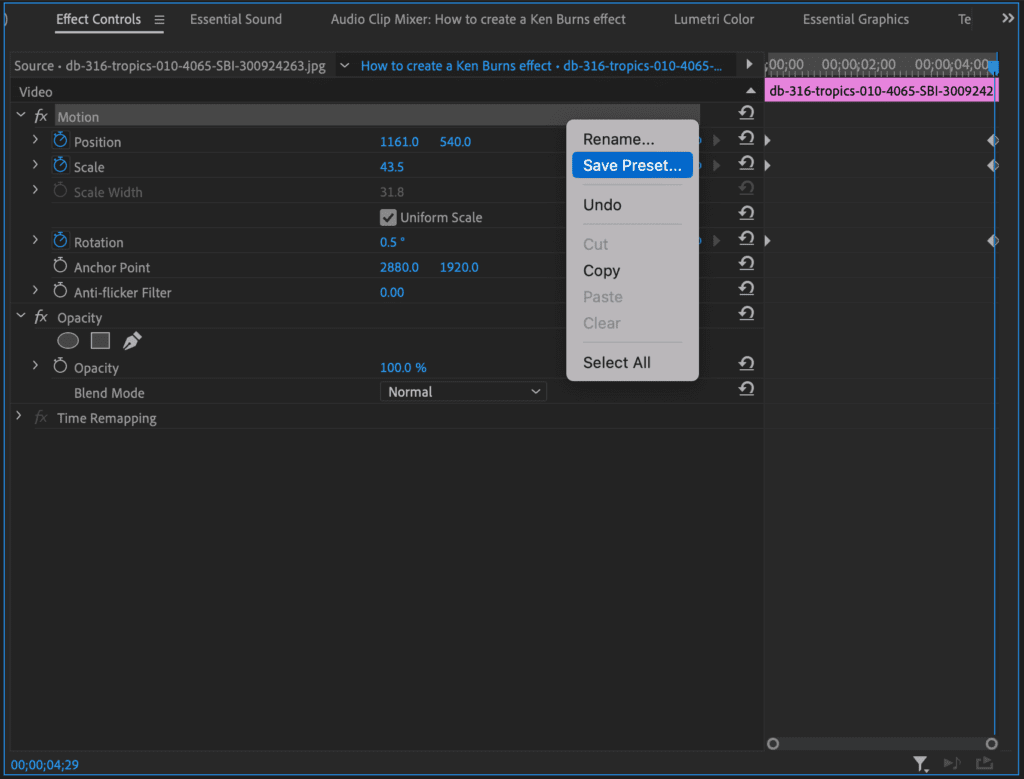
Then navigate to the Effect Controls Panel. Right-click on Motion and choose the Save Preset option.
3. Choose the settings
After you click on Save, you’ll be asked what type of preset you want to save it as. Select Anchor to In Point.
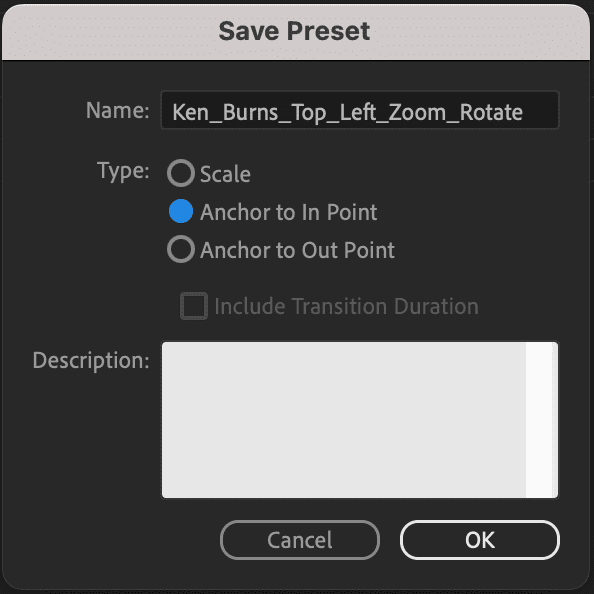
Keep in mind that you will likely have to make some adjustments for each effect, since not all images are the same and you don’t want to use the same Ken Burns zoom every time.
Tips for Creating Ken Burns Effects in Adobe Premiere Pro
The Ken Burns Effect can quickly become a favorite tool, especially if you use a lot of still images. However, to keep your work looking professional, here are a few tips on using the Adobe Premiere Pro Ken Burns Effect.
Pay attention to timing
Pay close attention to the timing of your zooms. If they are too fast or slow, they can stand out to the viewer and ruin the effect.
Add variety with each one
If you use the Ken Burns Effect frequently, be sure to adjust the settings for each image. Adjust the direction of the pan, how closely you zoom, and how long the effect lasts.
Avoid zooming too close
The resolution of your starting image or video footage will dictate how close you can zoom in before the quality gets too low.
Use as a transition
Using a Ken Burns Effect as a transition from one image to the next can improve the power of your storytelling.
Utilize Storyblocks Templates for Easy Video Content Creation
Knowing how to create basic effects like the Ken Burns Effect in Premiere Pro takes you a step closer to becoming a VFX master. But if your’re looking for ways to speed up your video creation process, pre-made templates are an amazing time-saving option. Templates for Premiere Pro or After Effects let you easily add advanced effects to your projects in just a few clicks. And if you’re looking for ways you can speed up editing in Premiere Pro, check out our tips for fixing lag.
With a Storyblocks subscription, you can get access to unlimited downloads of not only customizable templates, but high-quality, royalty free footage, music, motion backgrounds, sound effects, images, and much more. Take your video creation to the next level with unlimited creative possibilities, industry-leading licensing, and workflow tools to help you create faster than ever.
Ready to accelerate your content creation? Join Storyblocks today.

Editor’s Note: This post has been updated to include additional information. It was originally published on September 23, 2022.


