
Wouldn’t it be amazing if you could edit motion graphics created in After Effects directly in Premiere Pro?
Well, with the After Effects Essential Graphics panel, you can build graphic templates and import them directly into Premiere Pro as Motion Graphics Template (MOGRT) files. This allows you to change parameters like text, font, size, color, and much more, without needing to leave Premiere. If you’re less experienced with After Effects or just prefer to stay within Premiere, this is a perfect solution for you.
If you’re brand new to After Effects, check out the Beginner’s Guide to Advanced Tools and Techniques for a primer. And head over to Storyblocks Video to download After Effects title templates you can practice with.
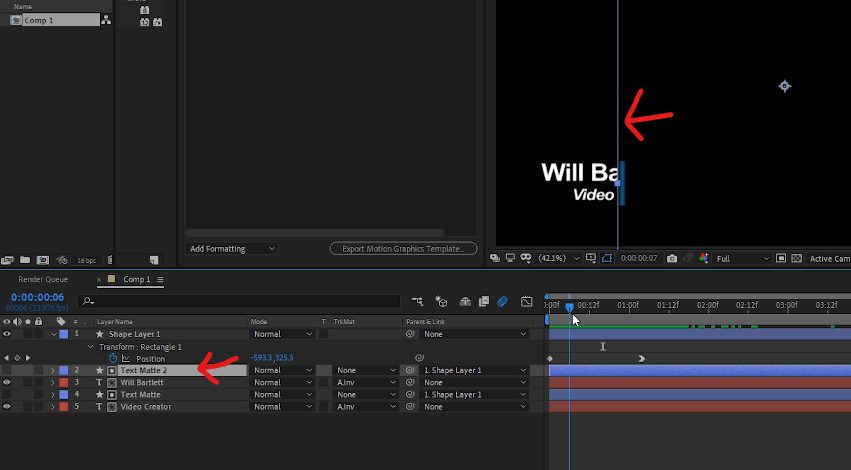
This tutorial will focus on creating and working with a .mogrt file, and will not cover creating the actual After Effects lower third graphic. However, I’ll briefly walk you through how our example is set up — I’m working with a lower third motion graphic title created in After Effects that includes a small rectangular shape element that animates across the screen to reveal the text layers.
Start Your Graphic in AE


The effect was created by adding another shape layer above the text layer and parenting it to the small rectangular shape layer mentioned above, and then setting the text layer to ‘Alpha Inverted Matte.’
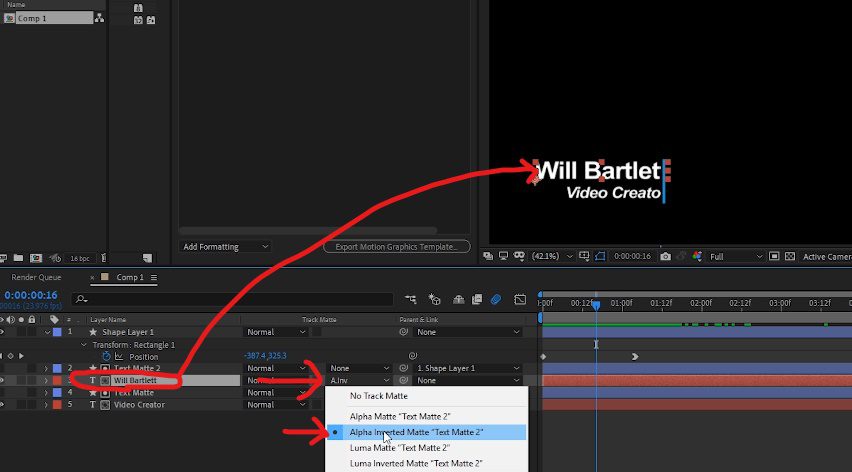
The result is the shape layer turns into a matte that will effectively hide part or all of the text whenever the shape layer matte is partly or wholly covering the text:
Alright, let’s get started!
Build the Graphic Settings
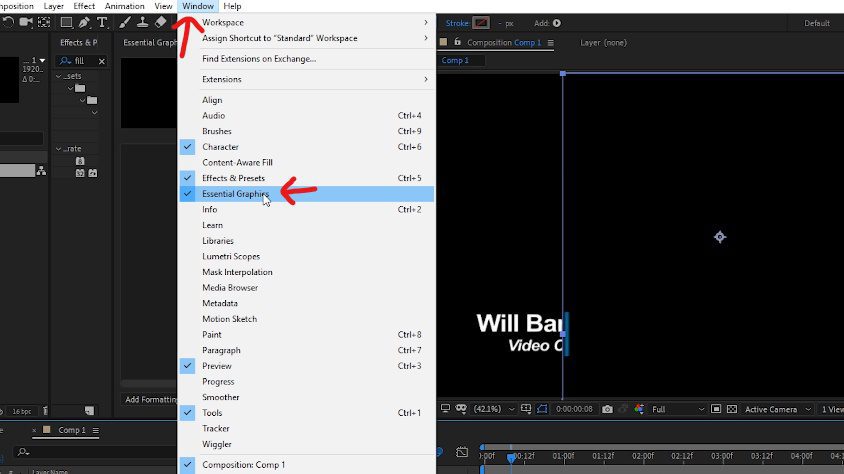
NOTE: It’s important to understand that not every After Effects project will be set up and designed in a way that allows for all the parameters to be editable inside Premiere. For example, adding keyframes for position or scale to a layer in AE, and then trying to make that function work within the .mogrt file installed in Premiere will result in that keyframe animation not working. With After Effects open, go to ‘Window’ and open the Essential Graphics panel.
1. With After Effects open, go to ‘Window’ and open the Essential Graphics panel.
2. Within the Essential Graphics panel, add a custom name of your choice, and then select the main composition for your After Effects project.
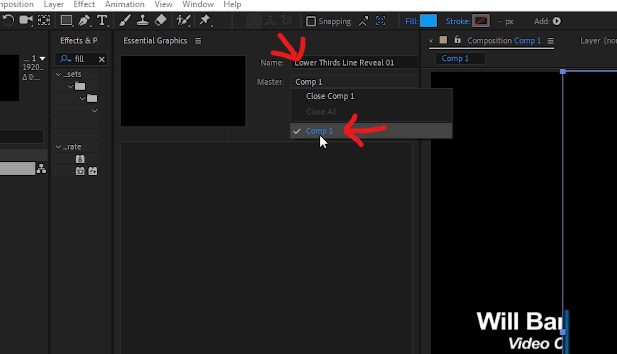
The Essential Graphics panel is where you will be building all of the settings for your graphics template; one by one, you’ll be dragging specific parameters from within your layers in your composition:
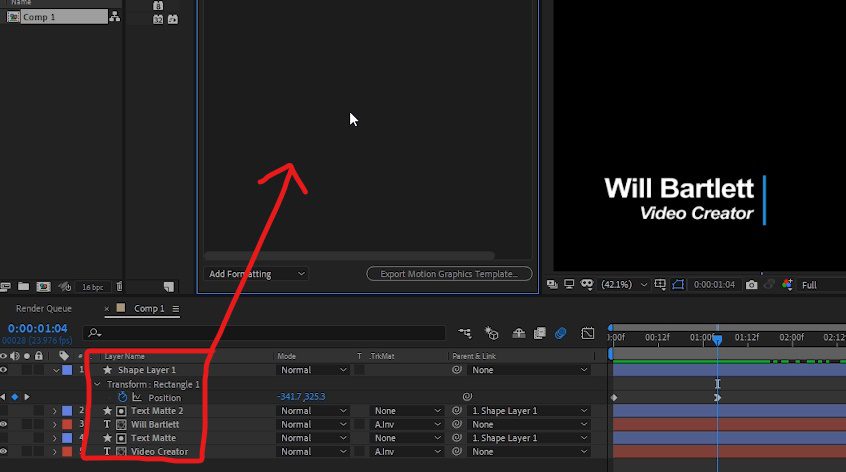
3. For the first template setting in our example, we will be creating a scale setting on our shape layer that will become editable within the .mogrt file in Premiere. Within the shape layer > Contents > Rectangle 1 > Transform, click and drag the scale and drop it inside the Essential Graphics panel.

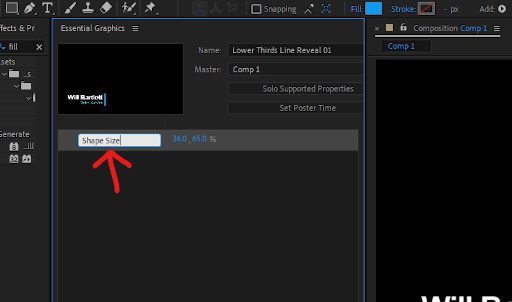
4. Edit the name so that it’s easy to understand its function; in our example, I renamed the scale property to ‘Shape Size,’ since, in Premiere, this will become the setting to adjust the size of our rectangular shape layer.
5. Next, we would like to have the option in our template to change the lower third name to something else if we wanted, as well as change the size, font, and some other options. Open up the Text layer to reveal the ‘Source Text’ option, then click and drag it into the Essential Graphics panel.
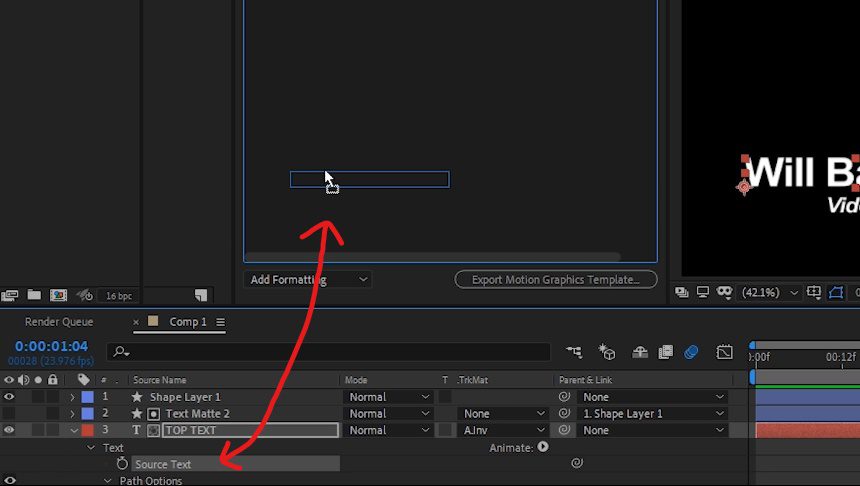
6. Like we did in step 4, rename the new layer; In our example, I changed it to ‘Top Text.’
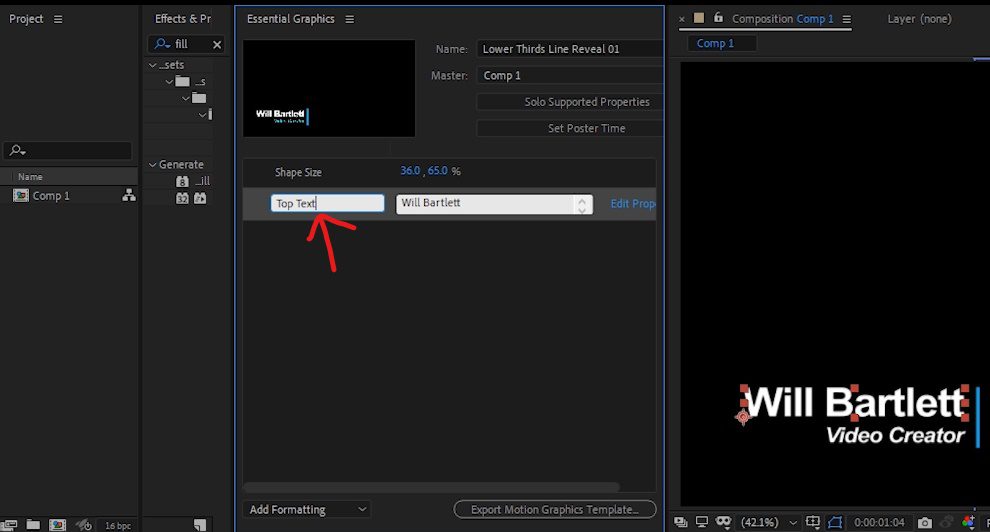
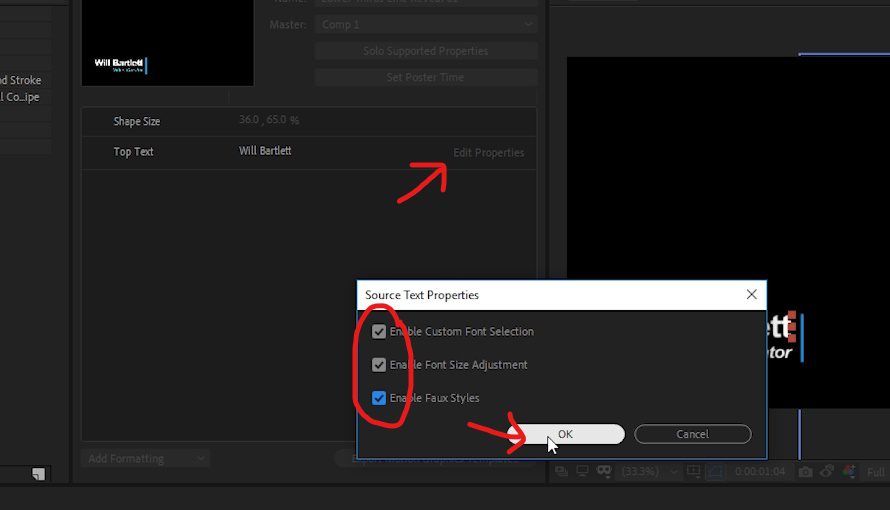
7. To the right of your text setting, click on ‘Edit Properties,’ then enable the three options and click OK. This will reveal additional text options within your template.
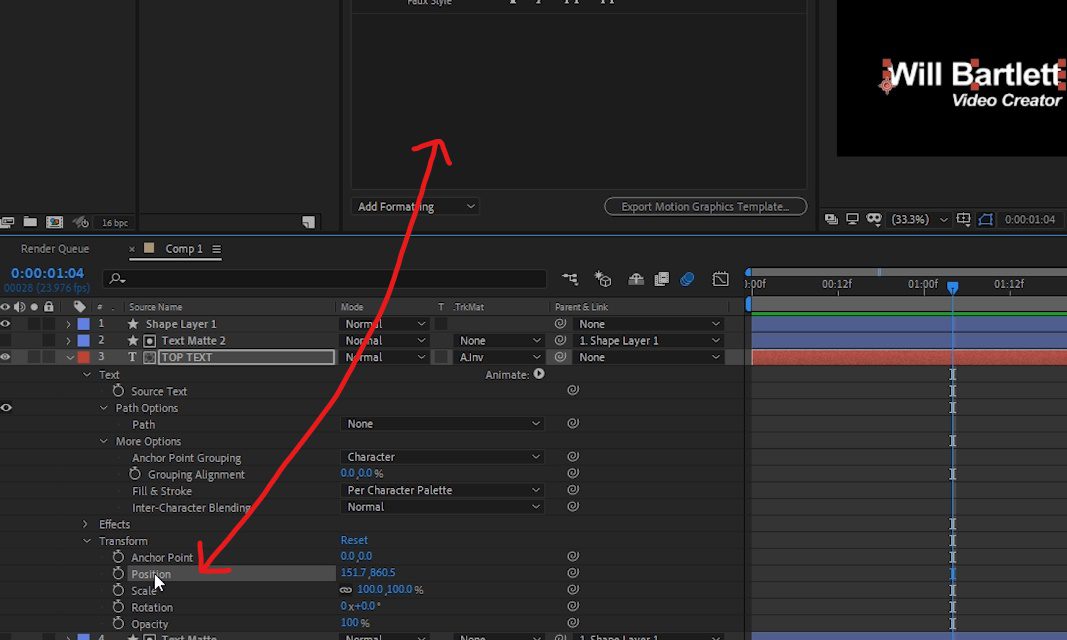
8. Next, create a position setting to be able to reposition the text within the template. Within the Top Text layer, under Transform, click and drag the Position setting into the Essential Graphics panel, then rename it accordingly; In our example, I renamed it ‘Top Text Position.’
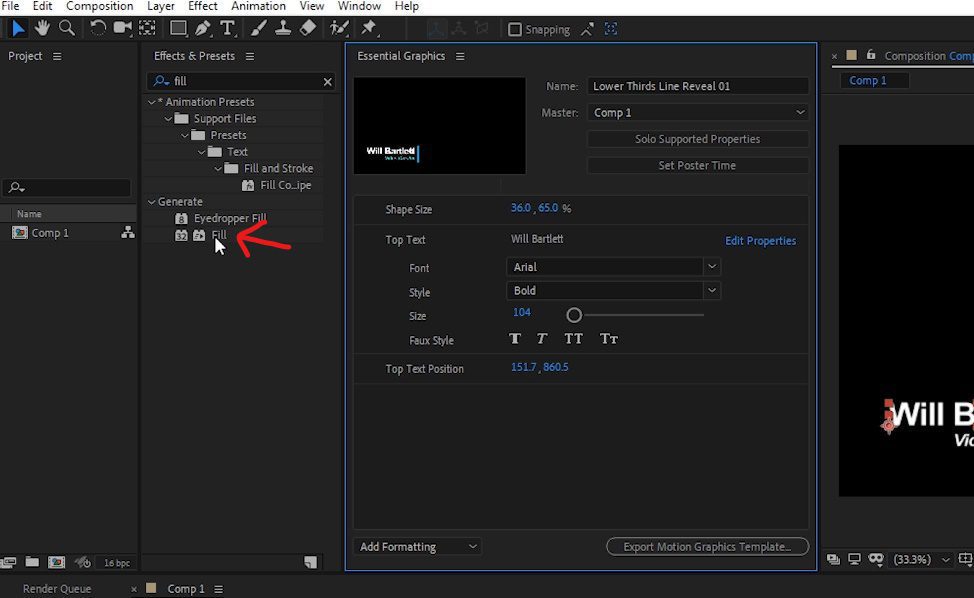
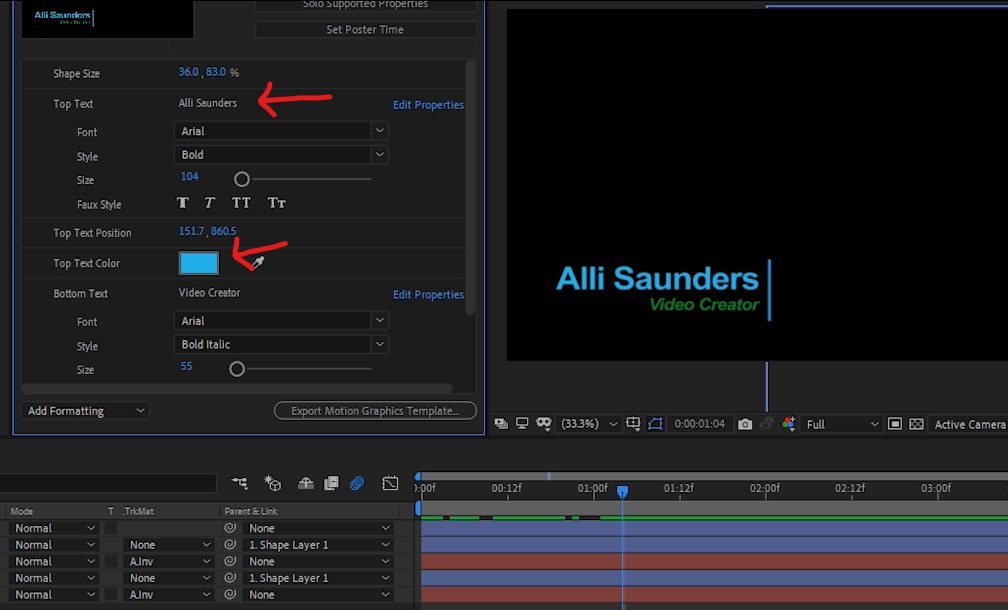
9. To create a color setting within the .mogrt template, within the Effects & Presets panel, type in ‘fill’ and then add it to your text layer.
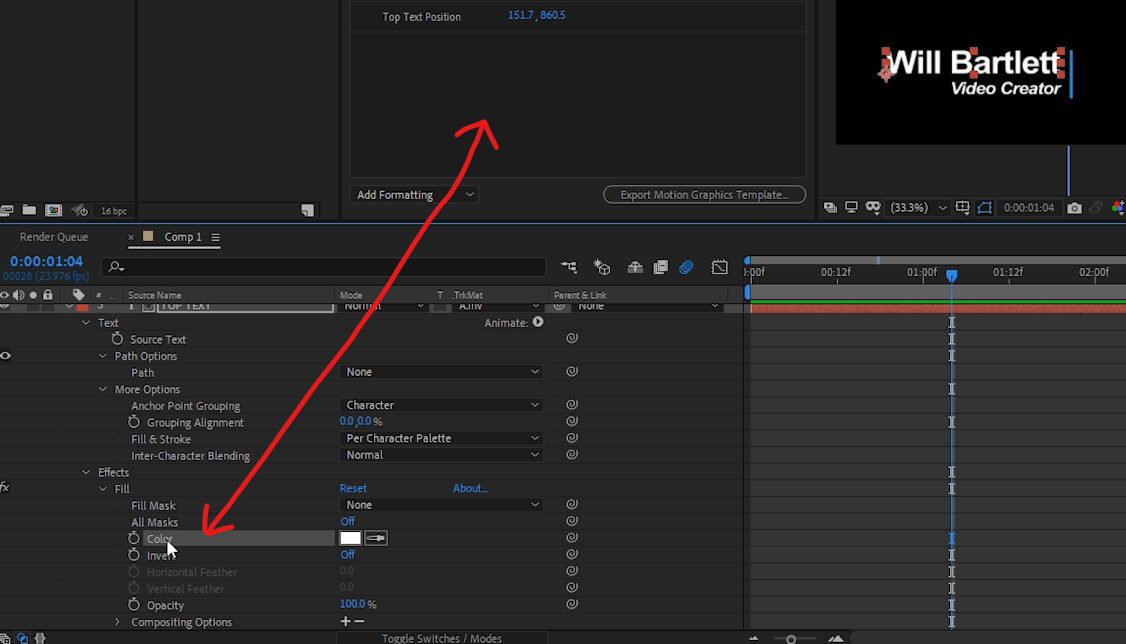
Within the text layer, under Effects > Fill, click and drag the Color property to the Essential Graphics panel, and rename it accordingly; I named ours ‘Top Text Color.’
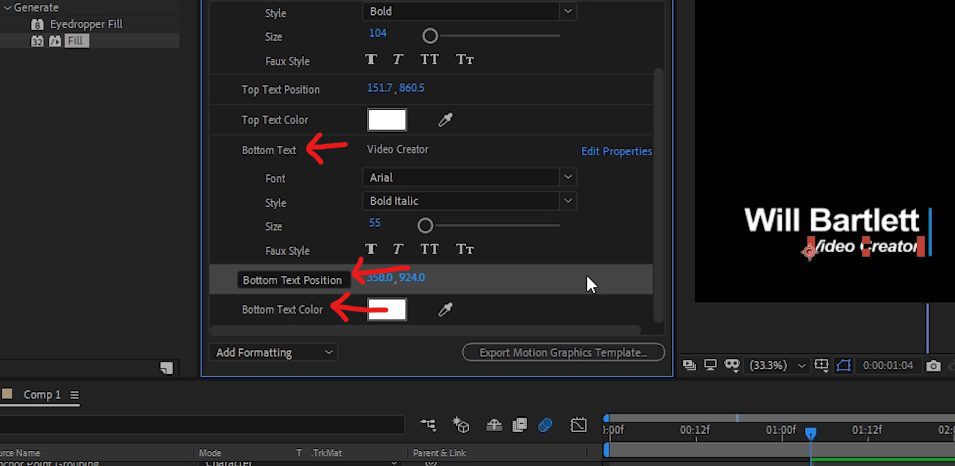
10. Continue adding the same parameters into the Essential Graphics panel for the second text layer:
- Source Text renamed to ‘Bottom Text’
- Position renamed to ‘Bottom Text Position’
- Fill Effect renamed to ‘Bottom Text Color’
11. We have now added all of the editable parameters that we’d like in the Essential Graphics template. By adjusting and editing these parameters, we can easily change how the graphic looks, such as changing the name and color of the text, without using the composition.
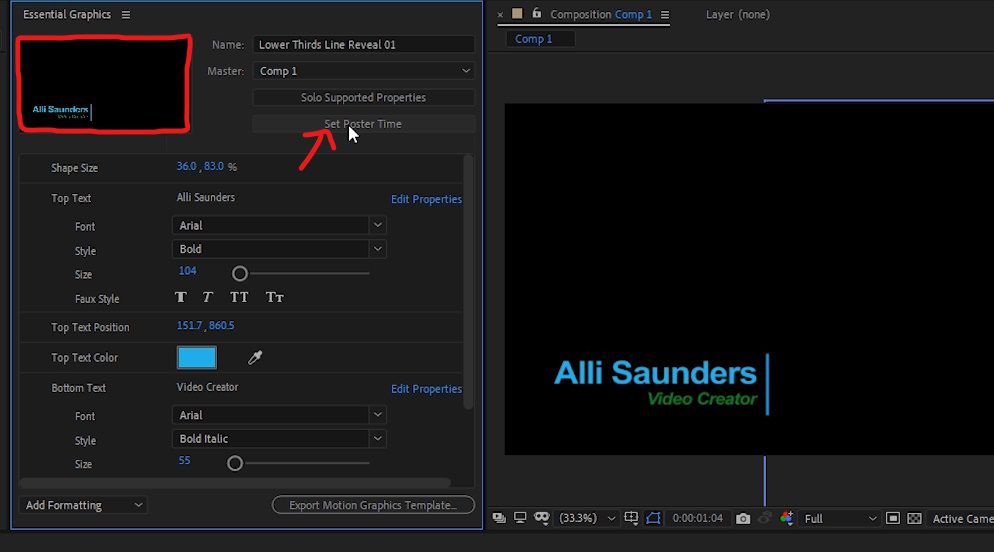
12. The last step before creating the .mogrt file is to move the timeline cursor to a spot where the full graphic is shown, and then inside the Essential Graphics panel, click on ‘Set Poster Time.’ This will set the current frame as the thumbnail image for the template.
Export Your MOGRT File
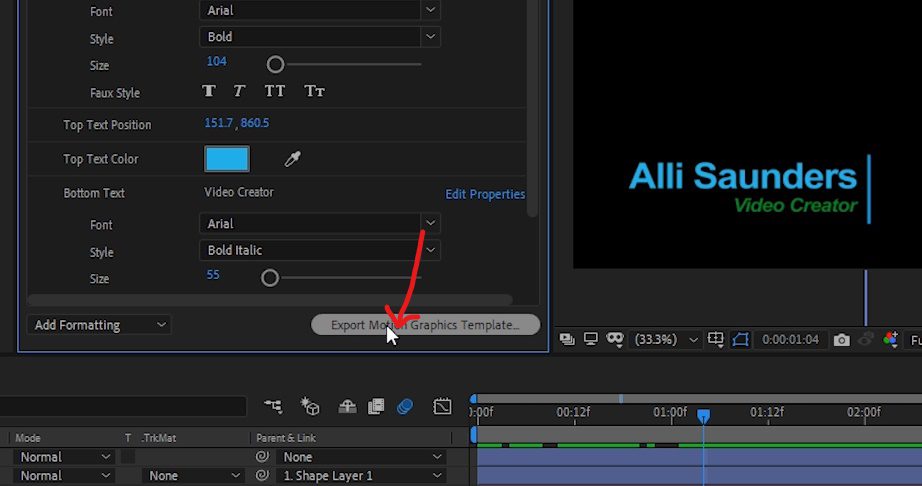
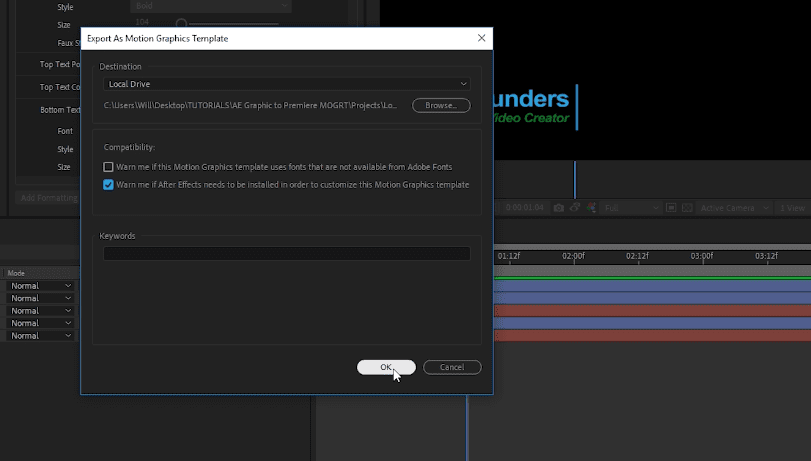
13. Next, let’s export a .mogrt file by clicking on ‘Export Motion Graphics Template’ located at the bottom of the Essential Graphics panel. Then, choose where to save the file, and select the checkboxes for any compatibility warnings you’d like; I selected the second checkbox. Then click, OK.
14. Now that the .mogrt file has been created, open up Premiere and under Window, open the Essential Graphics panel.
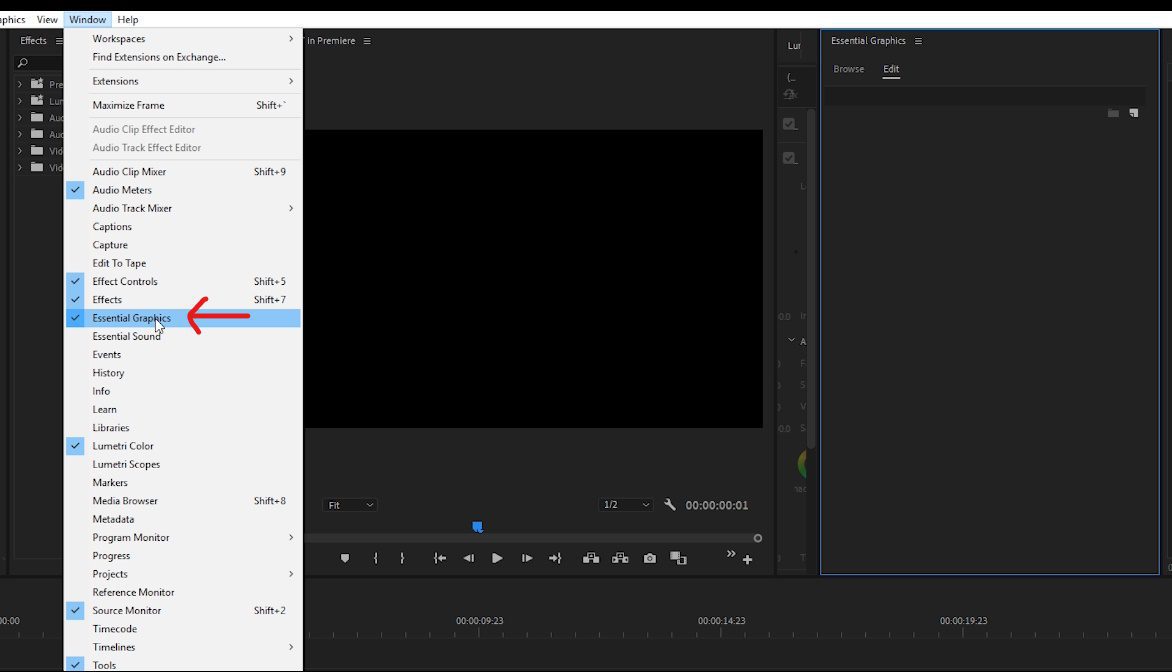
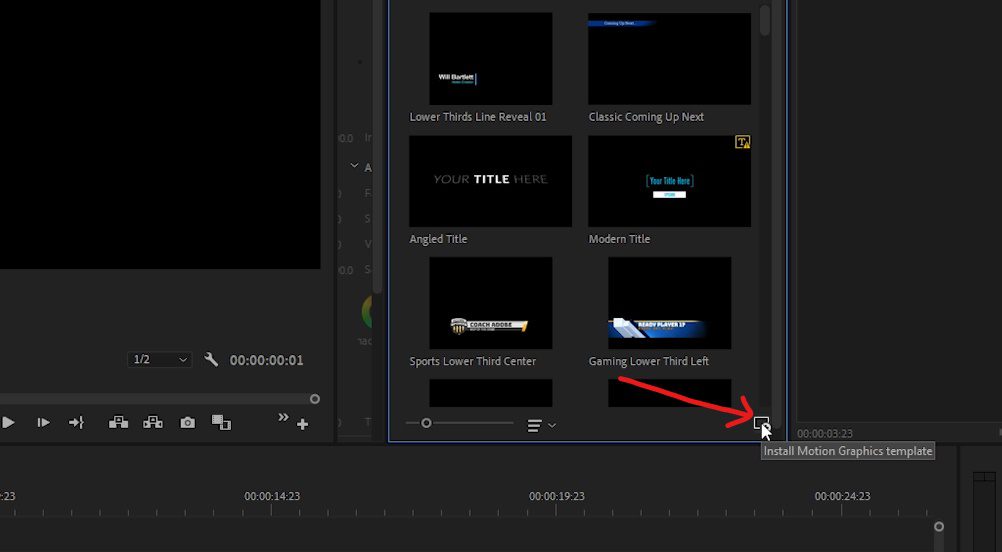
Click on Browse; in the bottom right corner, click on the button to install a Motion Graphics Template. Then, navigate to the .mogrt file and install it.
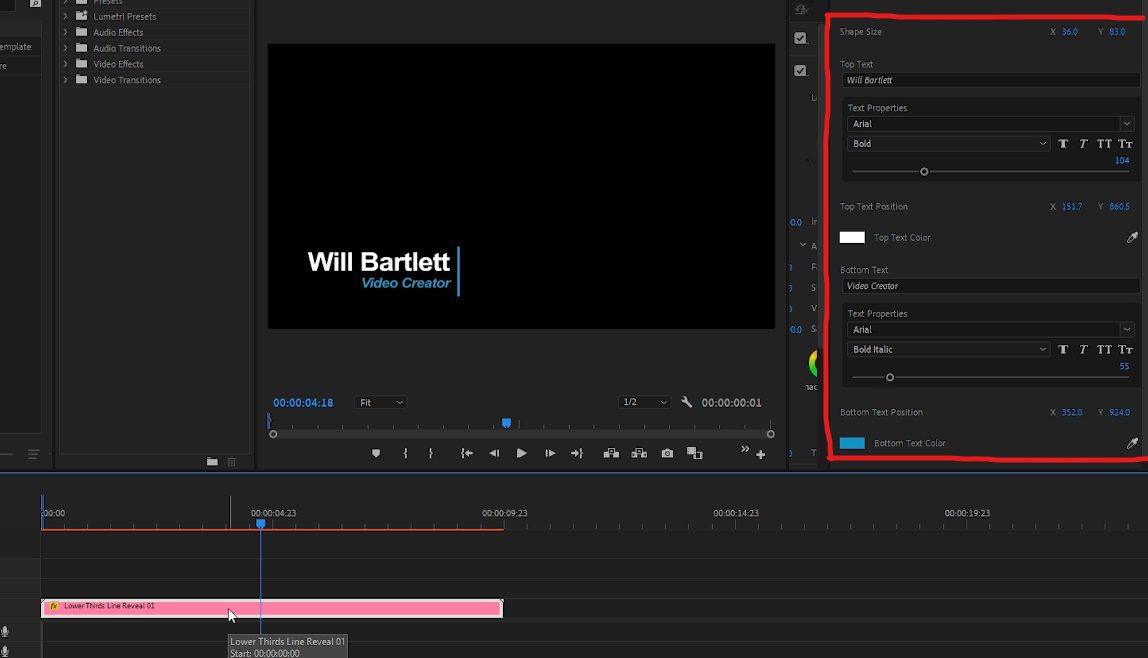
15. Click and drag the .mogrt template into the Premiere sequence.
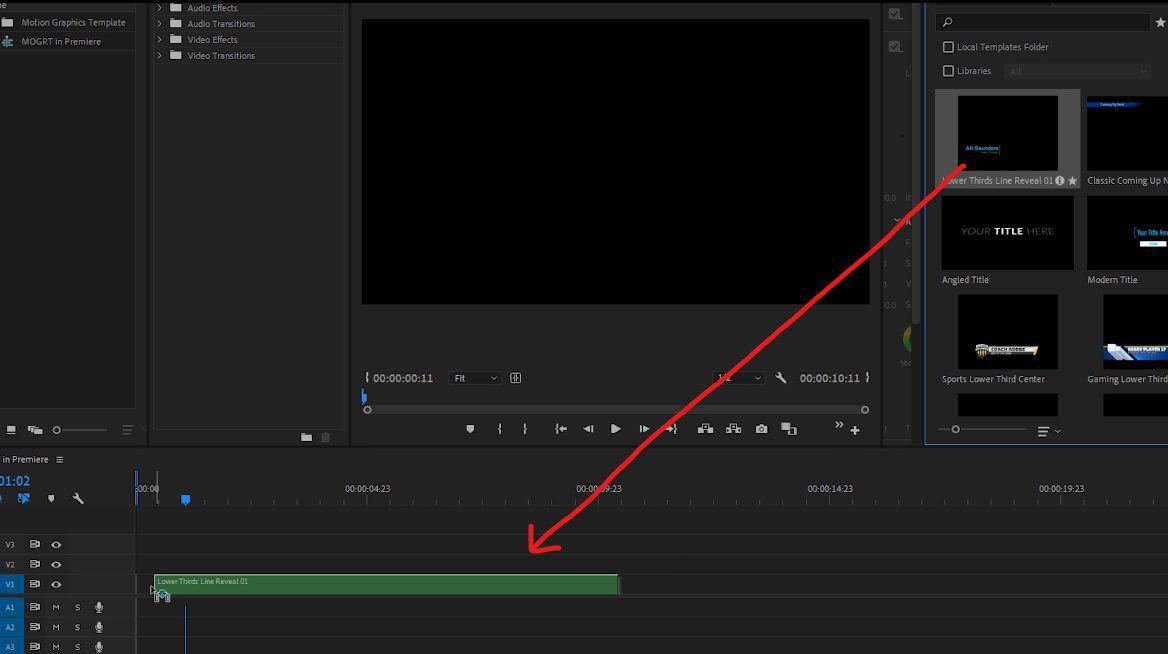
Now, from within the Essential Graphics panel in Premiere, all of the parameters that were created in After Effects are editable!
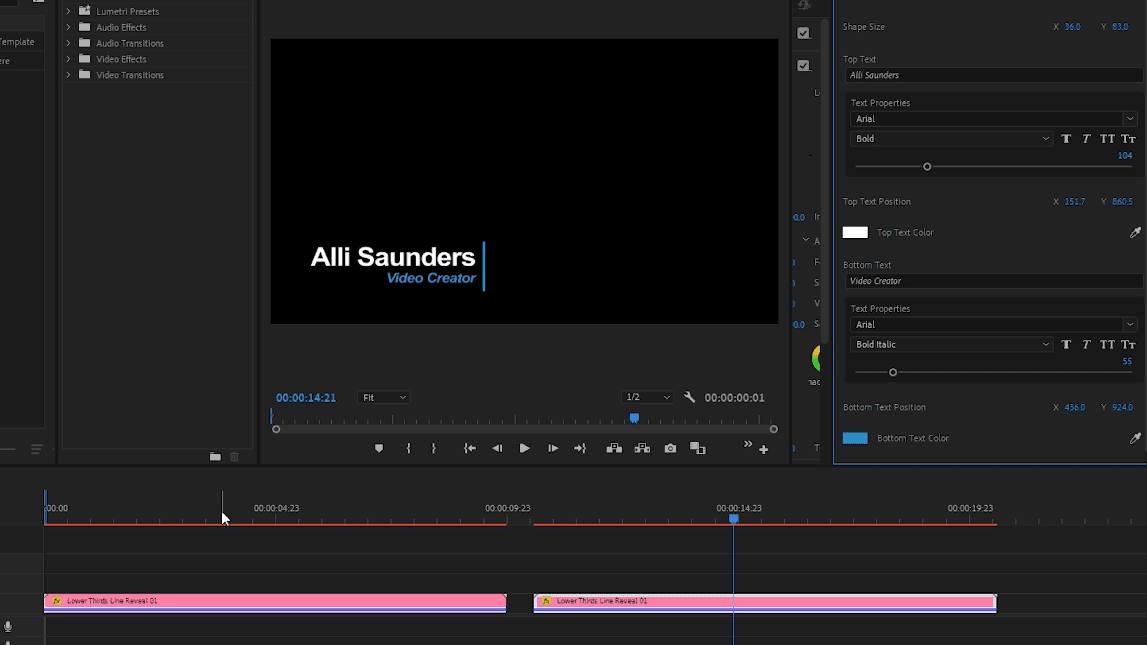
This workflow allows for swift changes to After Effects graphics within Premiere, and gives you the ability to duplicate the graphic in your Premiere sequence and quickly change the parameters of the duplicated item independently of the first graphic.
And that’s it! You now know how to create MOGRT files in Adobe After Effects CC that are editable in Premiere Pro! You can use this trick to create consistent or branded graphics and titles for your videos without having to run After Effects every time.
If you’re ready to make your own MOGRT files, an After Effects title set like this, is a great way to start.
Want to see more from Will Bartlett? Look for more tutorials to come on the Storyblocks blog or subscribe to his YouTube Channel, Alli and Will.


