
In video production, if you want to place your subject someplace else—on a beach, for example, when you live in the midwest—you probably know you need to shoot against a green screen. In post-production, the green color is digitally removed, and the subject is composited against a background. This visual effects technique is called chroma key compositing, and nowadays, even free video editing software like iMovie will have the capability to key out greens from your footage. That being said, chroma-keying can get tricky in post, and there are a lot of factors to consider when shooting to set yourself up for success and ensure excellent results.
The Screen
The first item of business is to confirm that you do, in fact, want a green screen. Using a green screen is typically the best because green is the color furthest away from human skin tones. Camera sensors tend to be the most sensitive to greens as well. But, in the scenario where you have to shoot something green, or your subject must wear green, you can alternatively opt for a blue backdrop.
Next, consider the material. An ideal green screen is a painted green wall, but that isn’t always possible. The next best thing is a smooth fabric screen with no wrinkles or reflective material. Screens are available that hang from stands, or the portable pop-out style is great for using on-the-go and for storage. This smaller style is perfect for talking heads clips. If you need to shoot a person’s full body, you will need a full seamless backdrop.
Lighting
Lighting is by far the most important aspect of shooting against a green screen, and there are two main points to consider: lighting the subject and lighting the green screen.
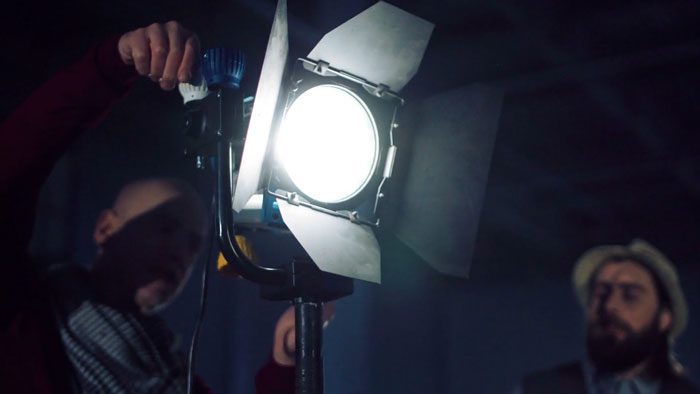
Most attention should be paid to making sure your subject is lit to match the final composited shot. Even if you correctly separate your subject from the background, if you can’t get the final lighting and color to match, then the end result still won’t look natural.
Next, light the green screen as evenly as you can, so in post-production, you only need to key out one shade of green. If you can’t get the whole screen lit evenly, focus on the area touching the subject, as the other parts can be masked out pretty easily.
Finally, triple-check that your subject is not casting any shadows on the green screen, and consider using a diffused backlight to further separate your subject from the background. To avoid shadows, make sure your subject is at least six feet away from the green screen.
Movement
The most basic green screen setup is a talking head. If you want to level up and incorporate movement, there are a couple more considerations:
When shooting, raise your shutter speed to reduce motion blur to help get a clean effect. You can also reduce motion blur by using a tripod and limiting camera movement. Add a motion blur effect back in later to still get that cinematic look.
Make sure your subject stays in front of the screen. In rehearsal, have your subject go through all movement and keep an eye on your shot. If their hand goes out of the background, for example, you pretty much lose the shot.
Finally, remember that a perfect green screen is not always possible. That being said, keeping these best practices in mind can save you hours in the editing room. Ready to give green screen a shot? Storyblocks has green screen footage you can practice with and plenty of motion backgrounds to back it up!


