Whether you’re a musician, songwriter, or video editor, knowing how to manipulate audio in a variety of different programs is an essential skill. One popular effect is adding reverb to an audio or music track to create a reflection of the original sound, similar to an echo. Reverbs are used in video edits and music regularly to create depth and add an interesting twist to an audio track. In this post, we’ll walk you through the steps of how to add reverb to audio in Premiere Pro using the audio track mixer. If you’re more of a visual learner, you can watch this quick YouTube shorts tutorial to see the steps in action.
Steps to add reverb to audio in Premiere Pro
1. Add your audio and video
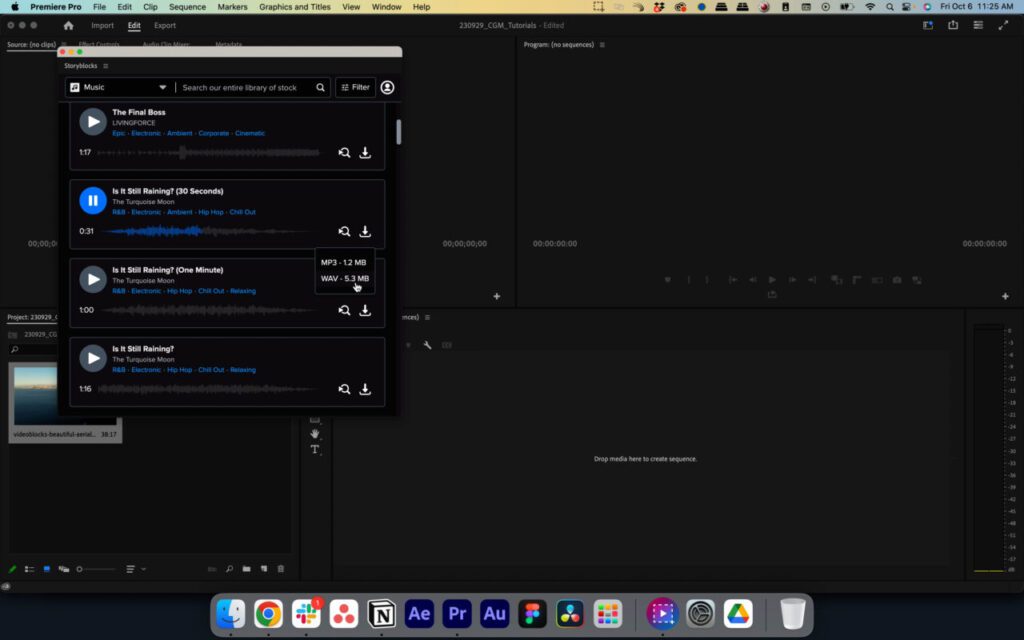
First, you’ll want to import an audio track into Premiere Pro, along with a video clip. If you’re looking for an easy way to add footage, music, or sound effects into Premiere Pro, the Storyblocks plugin is designed to do just that.
2. Create a cut in your audio
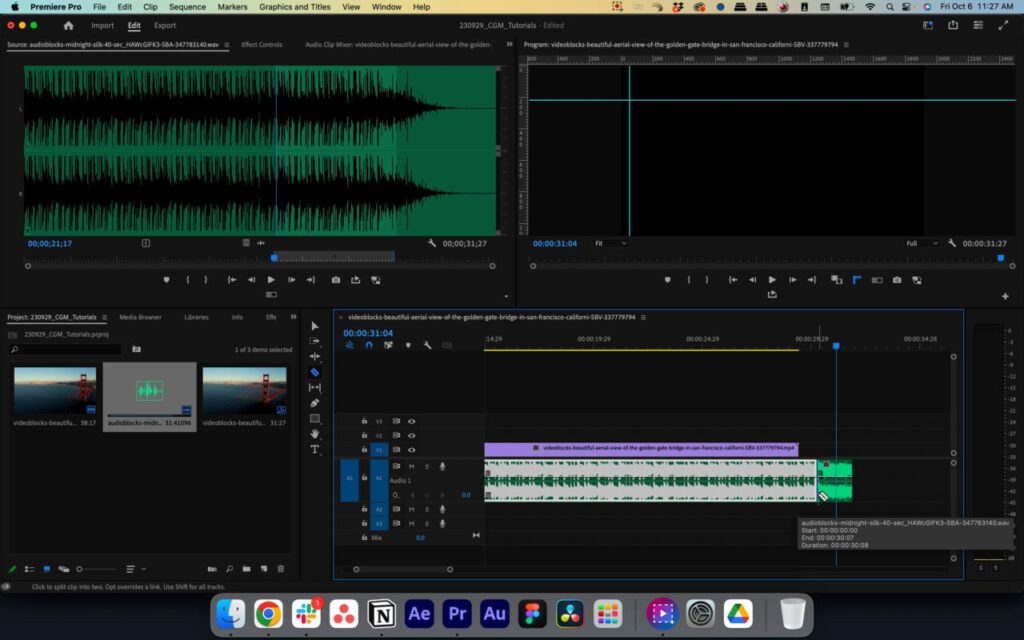
In the audio you imported, select where you’d like the song to end and create a cut using the razor tool.
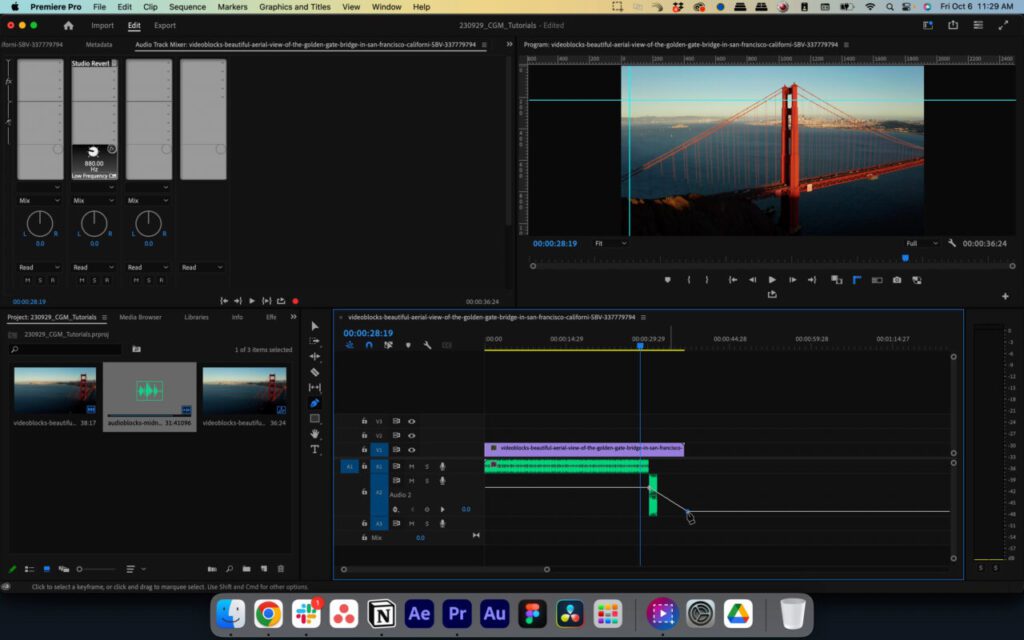
3. Shift cut audio to new track
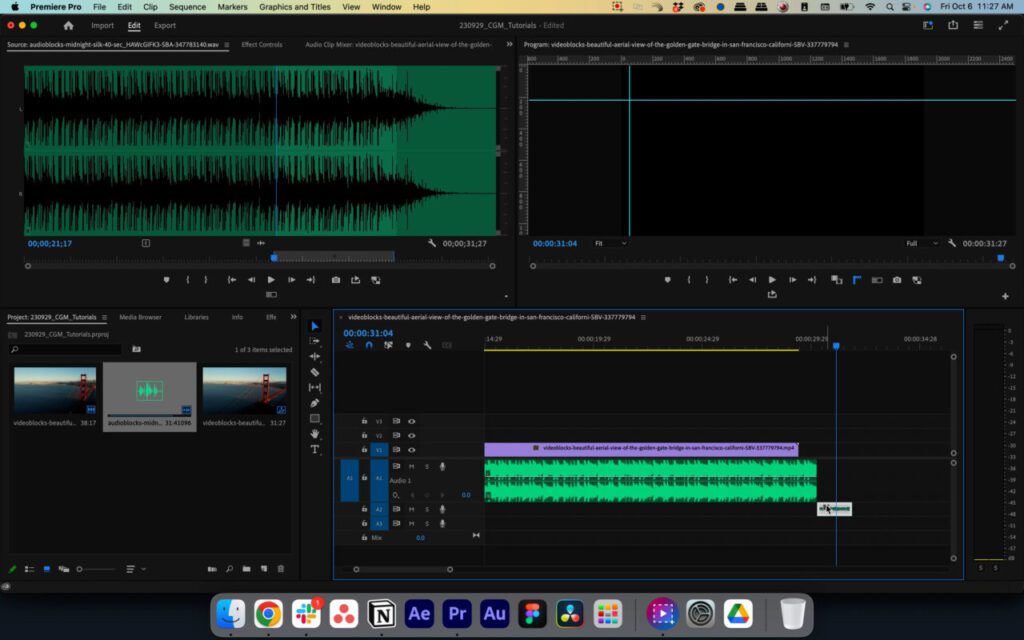
Then drag the excess audio you just trimmed off with the razor tool onto the second track in your timeline.
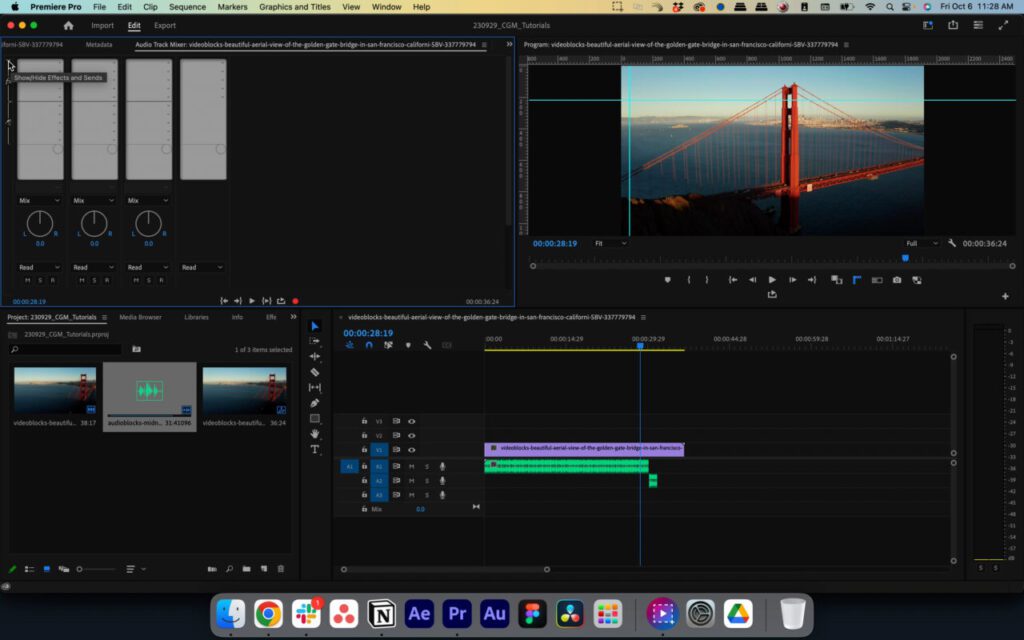
4. Navigate to Audio Track Mixer
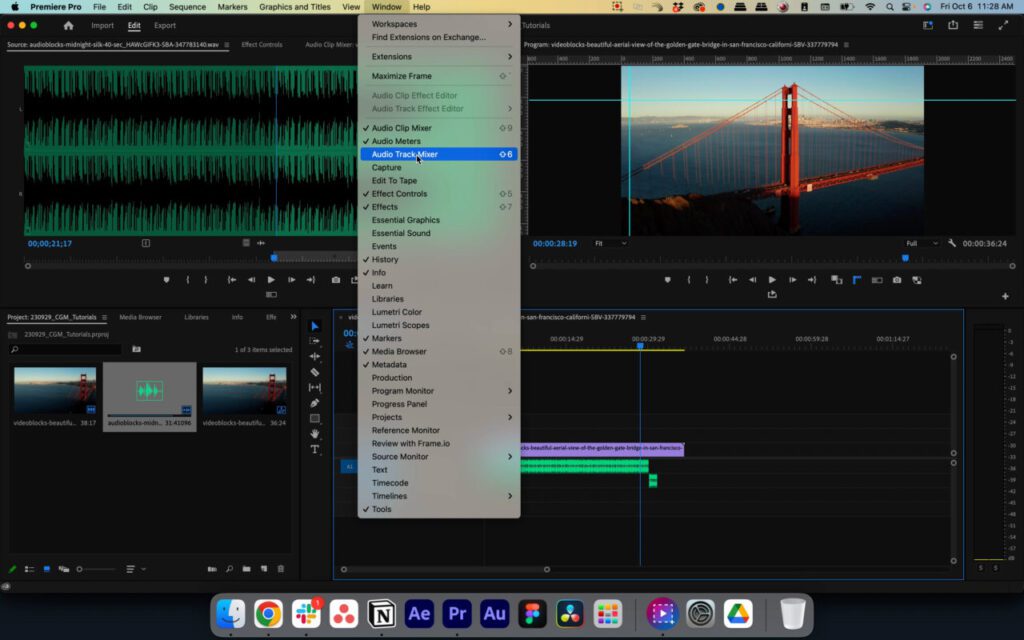
Next, go to the top bar in your Premiere Pro window and select Window > Audio Track Mixer.
Then click the twirl down in the top left of your window and go to the track containing the second half of your audio.
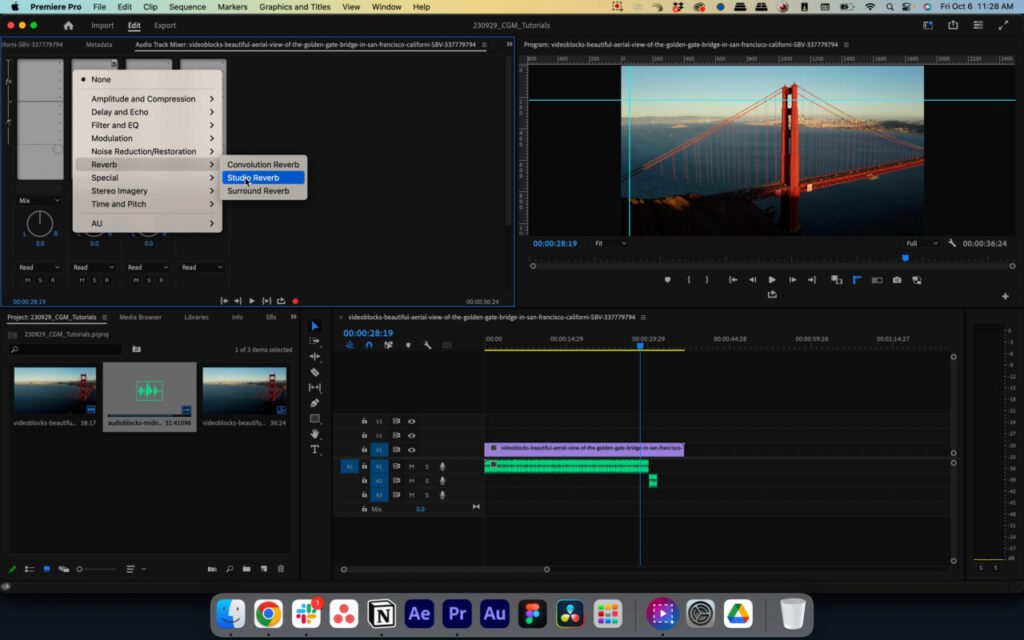
5. Add Studio Reverb
In the top slot of the effects rack, select Reverb > Studio Reverb. This will be the effect that lets you add reverb to audio in your project.
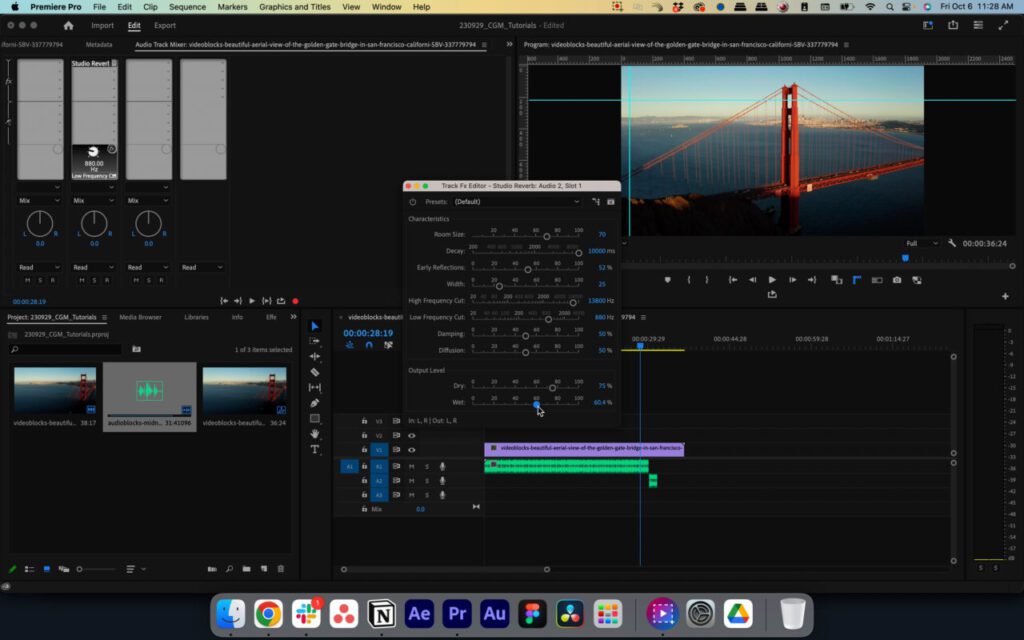
6. Adjust parameters of your reverb
Once you’ve selected that, you can double click the effect to add reverb to your audio and get your reverb sounding exactly how you want it. For a reverb with the largest impact, we recommend boosting the “Decay” and “Wet” settings.
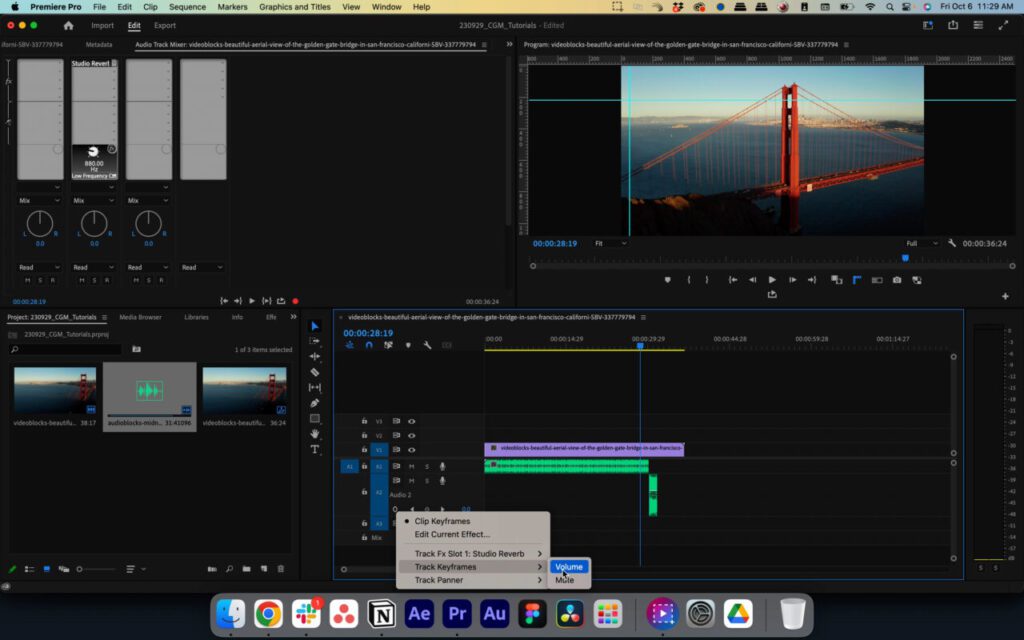
7. Adjust fade out of track
To control exactly when you audio fades out, click on the keyframe icon on the same track as your audio. Then navigate to Track Keyframes > Volume and create keyframes to fade your audio out.
Once you’ve completed all those steps, play your project back to hear your reverb or echo effect. Congratulations! You’ve successfully learned how to add reverb to audio in Premiere Pro.
Learn how to do even more in Premiere Pro
Now that you’ve mastered adding reverb to audio, you’re ready to take on your next editing challenge. You can find tons of Premiere tutorials on the Storyblocks blog to help you practice.