
The demand for video is higher than before. With the prevalence of video on social like TikTok or YouTube Shorts, you can generate awareness more easily than before for your brand. But in order to meet the demand for video today, you need to be creating video faster than ever before. If you’re new to creating video, iMovie is an accessible tool for any video editor.
iMovie – available only on Mac OS X – allows you to cut video clips and utilize a range of effects. In this post, we’ll go over the basics of iMovie so you can easily create videos for TikTok, YouTube, Instagram, or any other platform.
What is iMovie
iMovie offers a modern interface and nonlinear editing. This software is best for making cuts and edits to clips or music in any spot on the video timeline. It can be a powerful tools for filmmakers and are used to edit almost all of today’s Hollywood films. Professional-grade editors like Adobe Premiere Pro and Final Cut cost a fortune and because iMovie is free, it’s a great place for beginners to start.
There are a ton of video editing platforms for beginners – like iMovie. Not everyone is a professional editor with years of experience, and the developers of iMovie know that. This doesn’t mean it isn’t an effective tool. You can still create jaw-dropping projects in iMovie—all it takes is a little practice.
Can I use iMovie on Windows or a PC
Unfortunately, no. iMovie is only available to included Apple products – including iPhone, iPad, and Mac OS X. This also means there’s no version of iMovie for android or iMovie for chromebook. If you have an Apple device, you can download iMovie from the App store to edit on your device.
Now, we’ll dive into the basics of iMovie, starting with how to cut a video.
How to import footage and upload video into iMovie
Bringing video or footage into iMovie is called importing, and is the first thing you’ll need to do before you can start editing in the software.
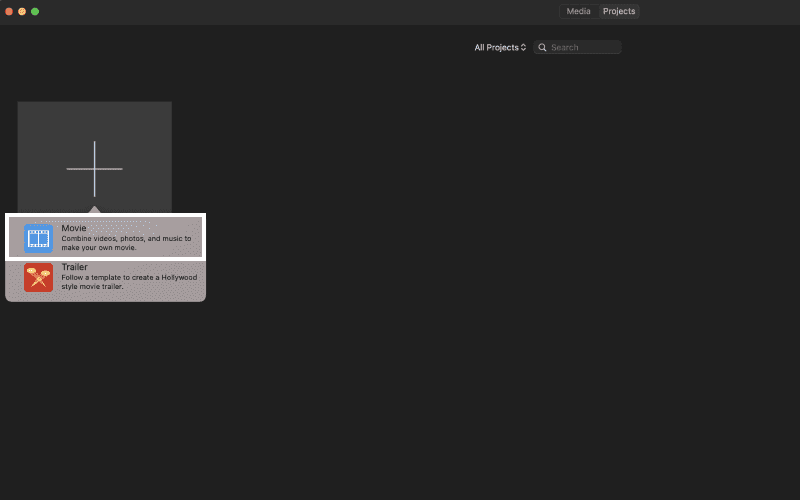
Step 1: Create a new project and select movie
First, select the large create new button in iMovie.

Then select Movie from the drop-down options.
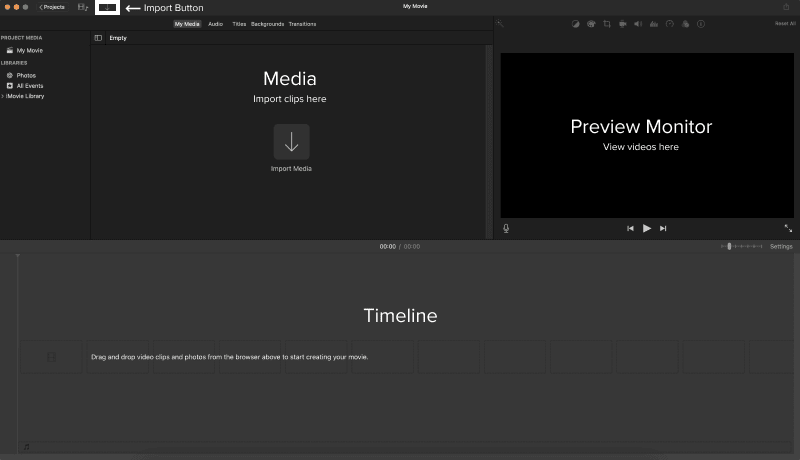
Step 2: Click on the import button or press ⌘ + I
Next, you’ll want to import any video or audio for your project. Click on the import media button with the downward facing arrow, or press ⌘ + I to import your files.
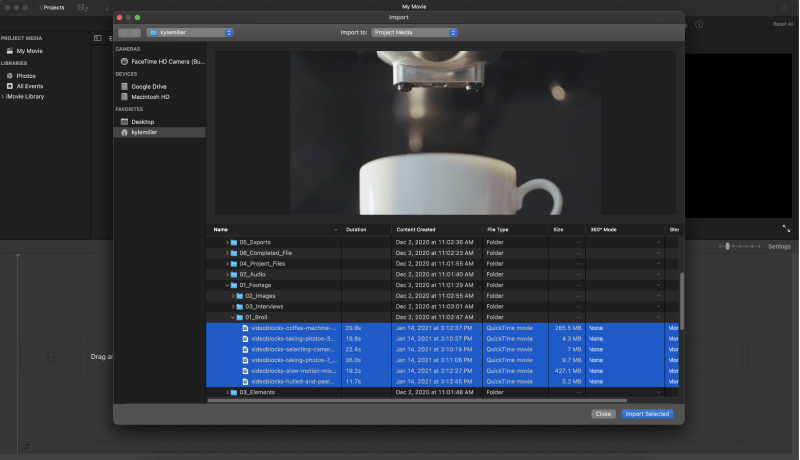
Step 3: Select files and import
Once you’ve selected your files, click Import Selected.
How to edit in iMovie
Now that all your clips are imported into iMovie, you can start editing! There may be a lot of clips to juggle so it may be intimidating at first but you can easily create content by keeping this 3-step process in mind.
In the editing process, you edit your video clips and add additional effects like music and title graphics. Once you’ve mastered these iMovie basics, you’ll be able to do a lot in any post-production stage with the right tools. Follow these next six steps to learn how to edit and cup clips successfully in iMovie.
How to cut a clip in iMovie
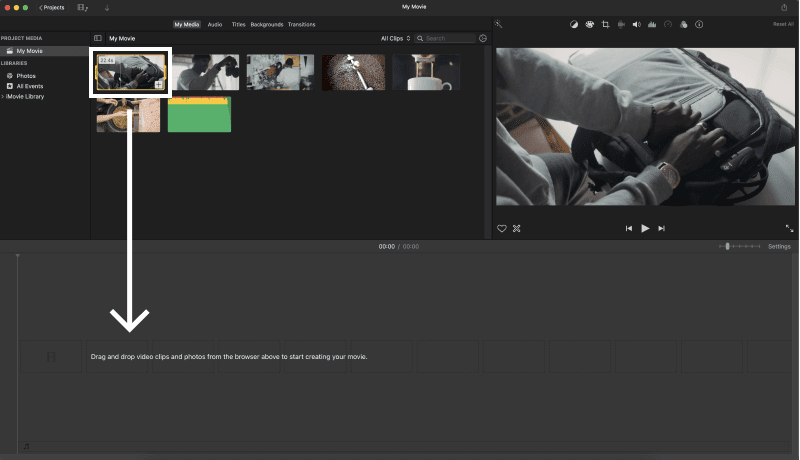
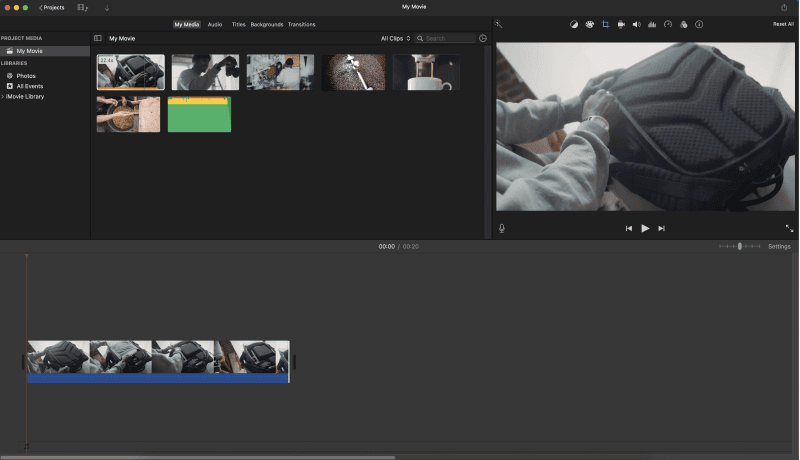
Step 1: Drag a clip into the timeline
First, click and drag the clip you want to edit onto your timeline in iMovie.
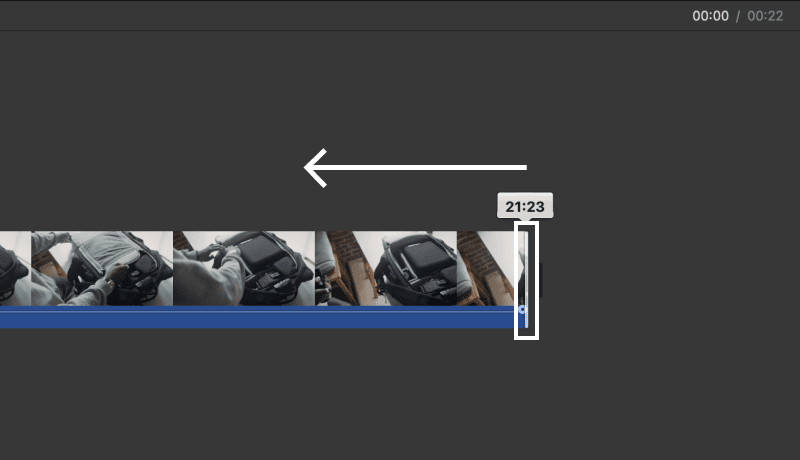
Step 2: Adjust and trim your video clip
To trim your clip, click and drag the edges of either end of the clip.
Step 3: Repeat with other clips
Add other clips that you’ve imported onto your timeline and adjust accordingly.
How to add a title in iMovie
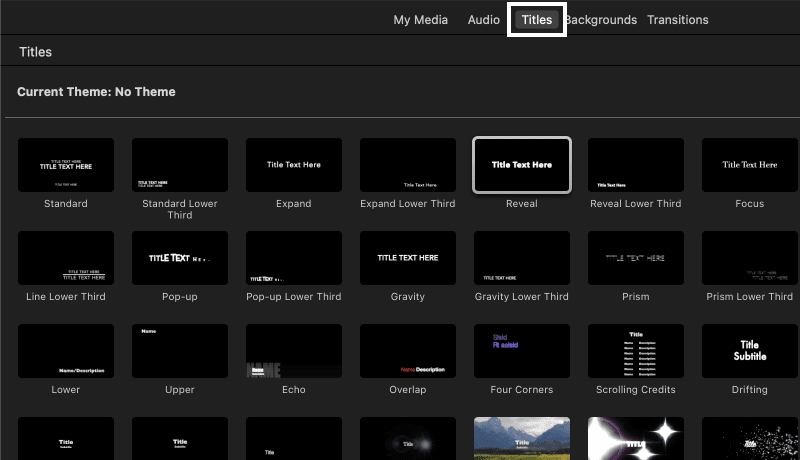
Step 1: Navigate to the title tab
First, find the titles tap in the top navigation and select it. You should see an assortment of different pre-rendered title animations available to choose from.
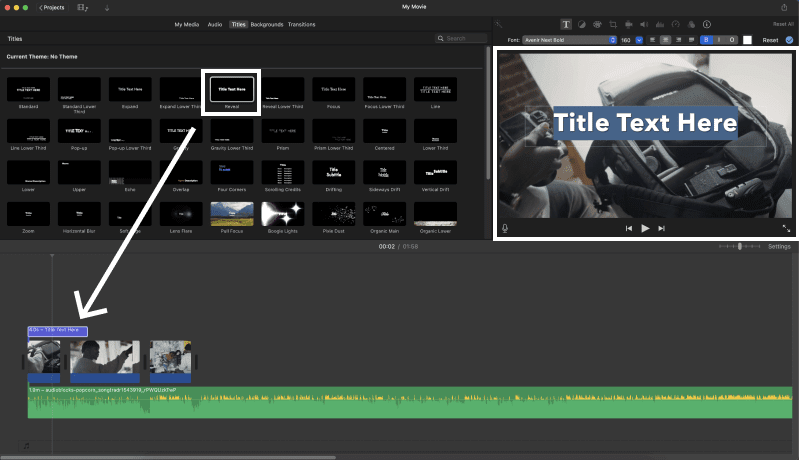
Step 2: Drag a title template into your timeline
Choose a title template, then click and drag it into your timeline above your video clips. Adjust the text accordingly to fit the size and style of your video.
How to export in iMovie
Now it’s time to hit export and publish your newest video on social! When you export, you are compressing your project into one video file – like an .MP4 file – and iMovie packages it altogether in just a few clicks.
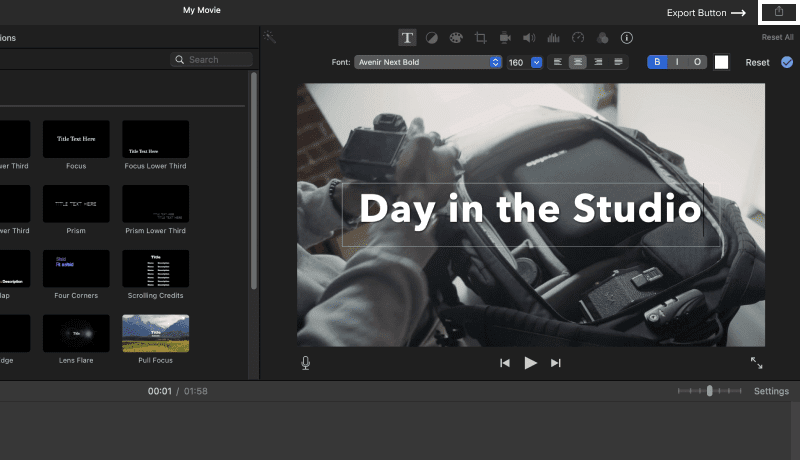
Step 1: Select the export button
Navigate to the top right corner of iMovie and select the Export button.
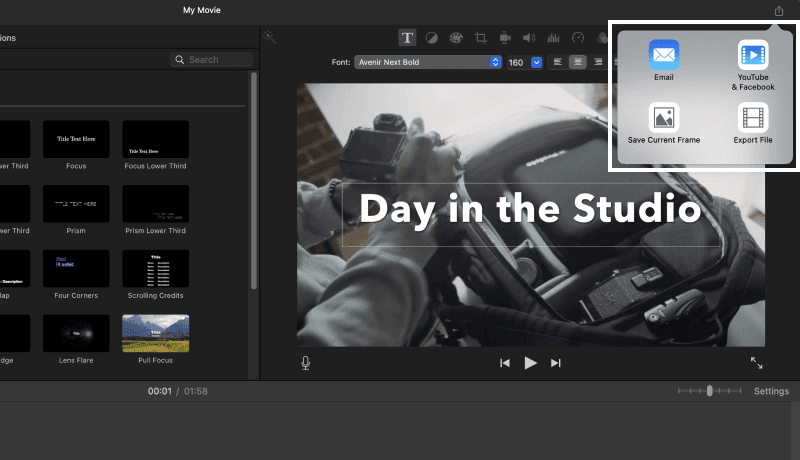
Step 2: Select your desired platform
Choose the platform you want to upload your video to (like YouTube or Facebook), and iMovie will export and publish it for you.
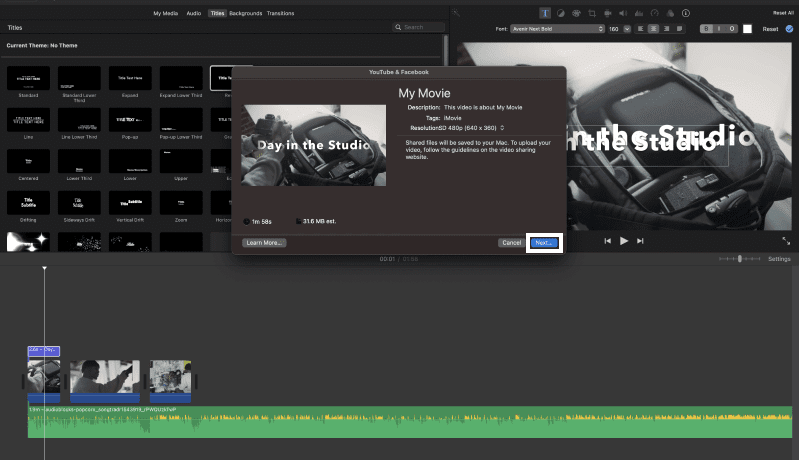
Step 3: Click next and save
You should see a popup appear with information about your movie project. Once you’re happy with the settings, click Next.
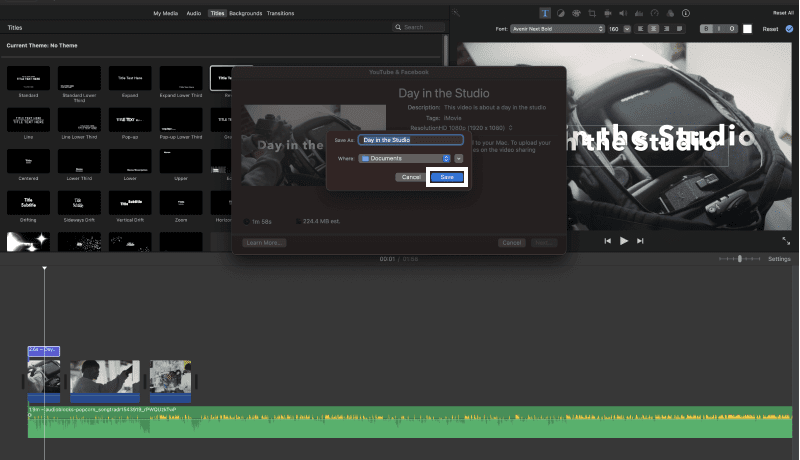
Simply press save on iMovie and voila! Your exported video is ready to publish to your desired platform. You don’t have to worry about all of the complicated settings that look like hieroglyphics.
Now you’ve successfully mastered the basics of iMovie!
Troubleshooting in iMovie
With learning any new software, you’re going to run into problems. We’ve covered some of the most common iMovie issues users face below.
iMovie is frozen or stuck
If iMovie freezes or becomes stuck while you’re working in it, there’s a few different steps you can take. If you were in the process of importing or exporting a file when it froze, the issue may resolve itself if you’re patient. Larger files can take longer to process within iMovie in both circumstances.
If iMovie froze while you were doing something else, you can try force-quitting the application by pressing Command + Option + Esc, then try re-launching it. If that doesn’t work, you’ll most likely need to restart your computer as your entire system is frozen. If it starts freezing on a regular basis, contact Apple Support for help.
iMovie is not exporting
If iMovie isn’t exporting, the first thing we recommend is checking where your files are exporting to. If it’s saving somewhere on your computer, make sure you have enough storage space to accommodate it. Larger or complex files are more likely to cause export troubles. Try exporting a smaller section of your video or removing more complicated effects or graphics from your project.
A corruption in your video can also be the cause of export issues. To check for it, go through your video frames to see if any have been corrupted. As a final step, if you’re still experiencing issues after trying all of the previous suggestions, try resetting or deleting your export preferences. To do this, open iMovie while holding down Option + Command. A window will pop up that gives you the option to delete your preferences.
iMovie is slow
If iMovie is lagging, close any other running applications so that iMovie doesn’t have to share memory with anything else. You can also try optimizing your project by deleting unused media and rendering your timeline before exporting.
Learn how to do even more in iMovie
By now, you were able to export your first video in iMovie and add additional elements to your video. But there’s more to learn on iMovie to be a pro. Maybe you might want to add music or add text to your video on iMovie. Or you might want to go more technical and learn how to create stop motion and timelapse on iMovie. You can explore all of our video editing tutorials here.
Regardless of your next step, iMovie is a great software to leverage regardless of your professional video editing experience. And with the Storyblocks library, you can access unlimited stock footage at your disposal, and tell your story more easily.
Editor’s Note: This post has been updated to include additional information. It was originally published on March 1, 2021.