
A vertical frame is very different from a horizontal frame, and there’s a certain amount of creativity required in using the format. It’s important for vertical video to feel intentional—not like you simply cropped a horizontal video.
But the reality is: you probably are cropping a horizontal video. Your camera might not shoot vertically, you might be working with stock, or you may want to re-use footage across multiple platforms. All of these situations are commonplace, but creators and brands are pulling out all of the stops to ensure their vertical content receives the same care—and therefore viewership—as their horizontal content.
In this post we’ll share tips and tricks to create vertical videos that take full advantage of the tall frame.
Getting Started With Vertical Video
The first thing you can do is simply shoot with the consideration that you will likely need to crop or repurpose the footage. Ensure that important information is not spanning the width of the frame. Use vertical subjects, like people. Can the content on either side of the frame be cropped out? Shoot with ample space around your subject to ensure the most flexibility when you go in for the crop. Finally, consider your plan for post-production: will you use styles like a split screen to fill the vertical space? Read on for more ideas.
How to Crop Vertical Videos for Social Media
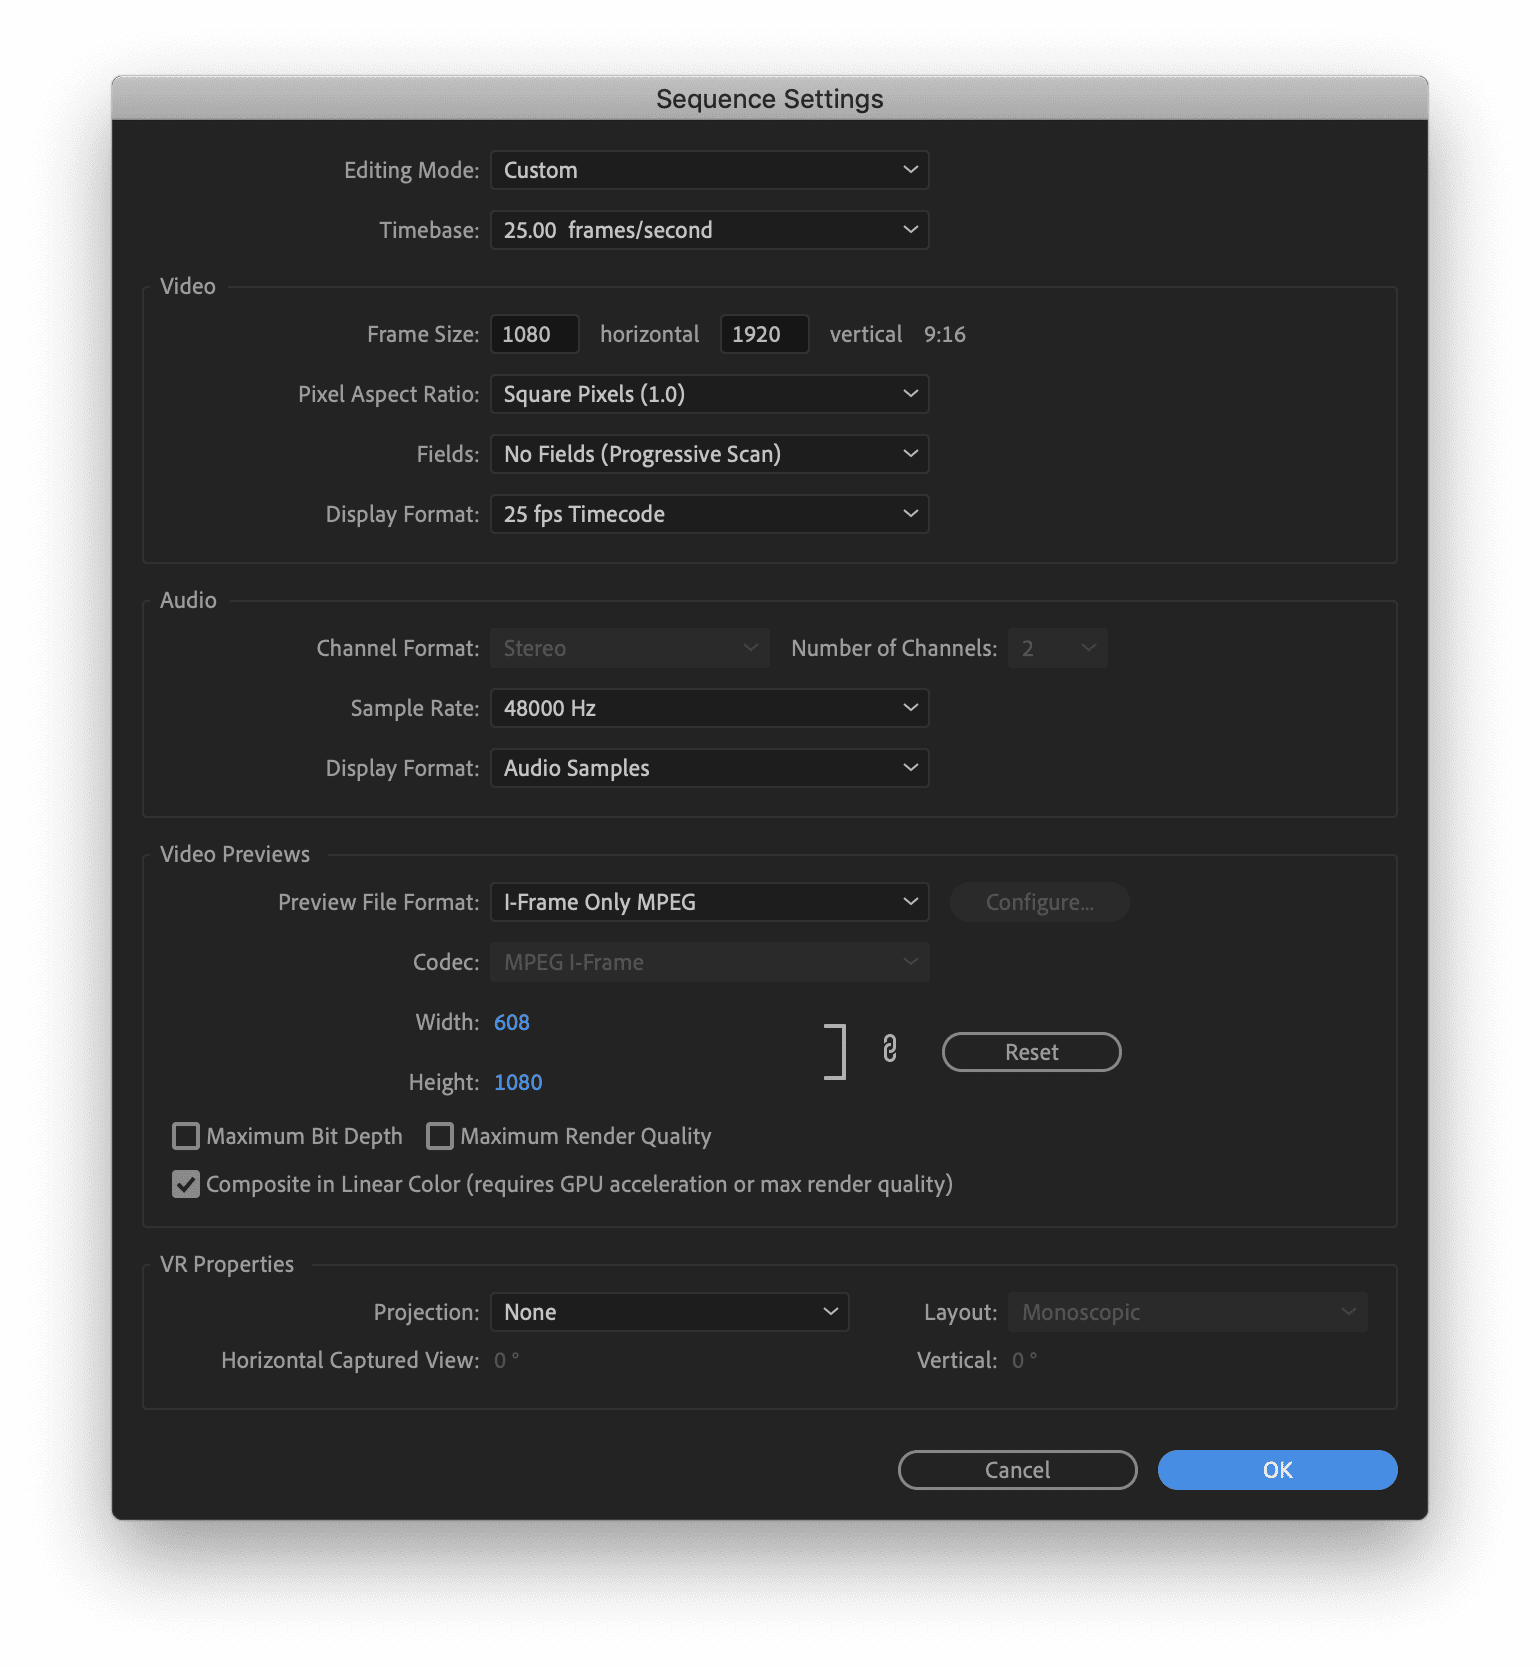
The first step in preparing a video for vertical is cropping it. Once you’ve set up your Sequence settings to a 9:16 ratio, you can adjust your framing and edit any additional elements like title treatments.
This process is very similar in across video editors, but let’s look at Adobe Premiere Pro. Right-click your sequence in the Project Panel and choose Sequence Settings. Select Custom for the Editing Mode and set the Frame Size to 1080×1920, or a 9:16 ratio. For the pixel aspect ratio, choose Square Pixels.
Learn more about cropping video in other editors here.
Optimize for Vertical Viewing: Tips and Tricks
Creating the crop, however, is just the first step in preparing your video for vertical viewing. Let’s look at some ways to optimize footage in post-production.
Split Screen
A split screen is a great way to take advantage of the vertical space. The Daily Show often uses this method. On TV, The Daily Show is in a horizontal format, with an image of a news item over host Trevor Noah’s shoulder. To optimize for IGTV, editors instead place the news overlay in the upper third of the frame. This is a perfect trick for whenever someone is talking about something, and you want to simultaneously show what they are talking about.

Another idea is using thirds: three horizontal clips stacked on top of each other will essentially make up a vertical frame. This one has fewer practical use cases, but is good to keep in your back pocket. Check out this video from Refinery29 that splits the screen up to five times for a stylized look:
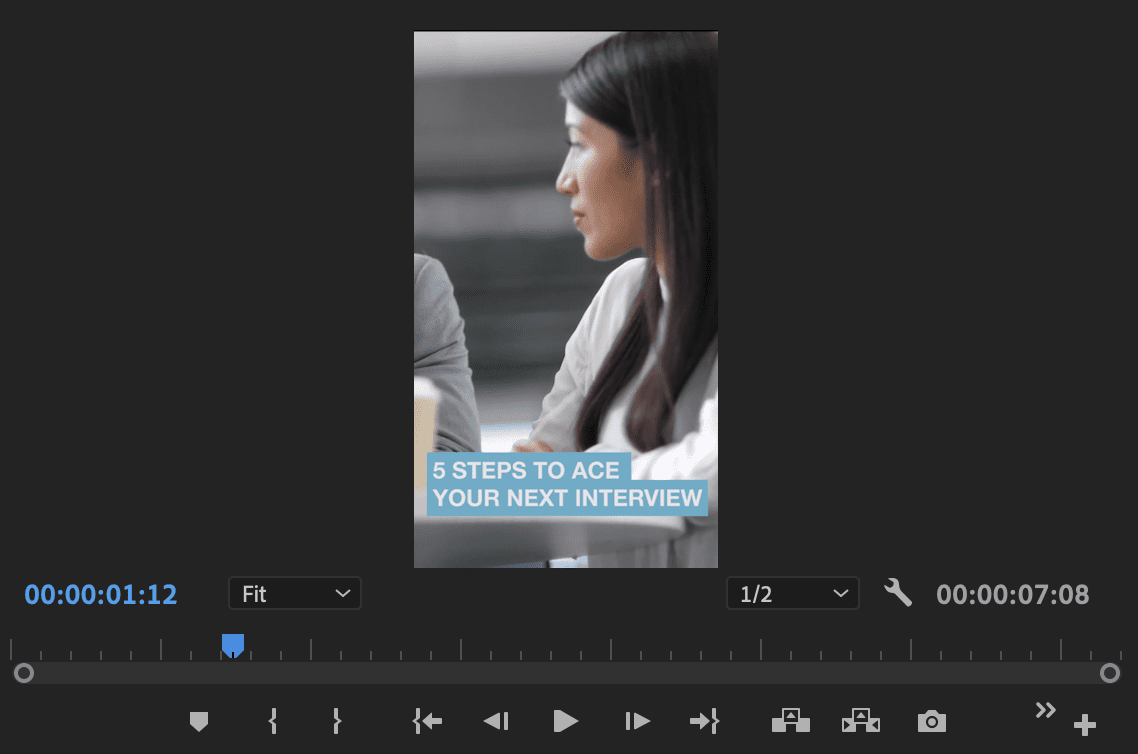
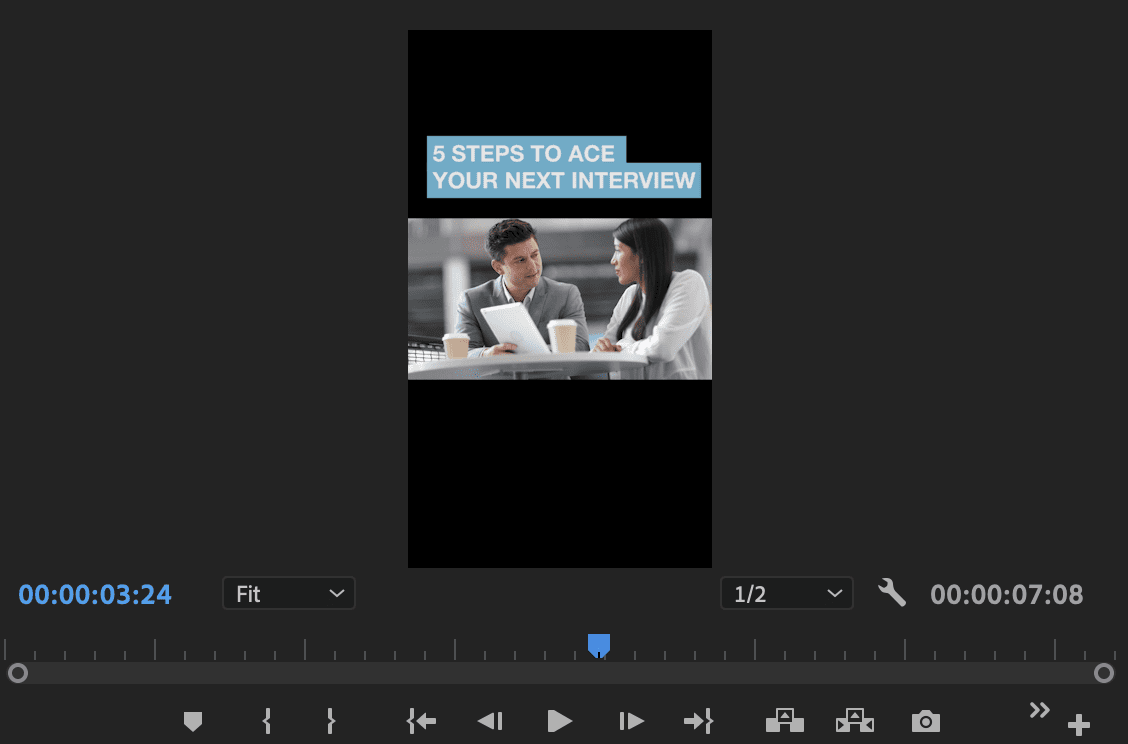
Vertical Title Treatments
If you incorporated any kind of text overlay in your video, you may need to hop into your editor and create line breaks so your title treatments properly fit the vertical space. It’s worth taking the time for this step not only to ensure your video looks its best, but that your title treatments are readable.
Horizontal:

Vertical:
If a cropping solve isn’t working out for your footage, you can zoom all the way out. But don’t just leave the plain black bars. Add graphics or title treatments to fill the space.
Blur the Background
Another way to fill the vertical space without cropping your footage is to create a blurred background in lieu of black bars. To create this effect, duplicate your clip and add a Gaussian Blur effect to the bottom clip. Use the Scale and Position properties in the Effects Panel to position your clips.

Combine this effect with other elements like title treatments to create a more intentional look.

Create a Digital Pan
Another solution to fill the vertical frame without losing important subjects is to manufacture camera movement like a pan. For example, in an interview clip, you can simply pan across the frame to focus on the person speaking.
In the Effect Controls Panel, create keyframes for the starting and ending points of the movement. Learn more about keyframing here.
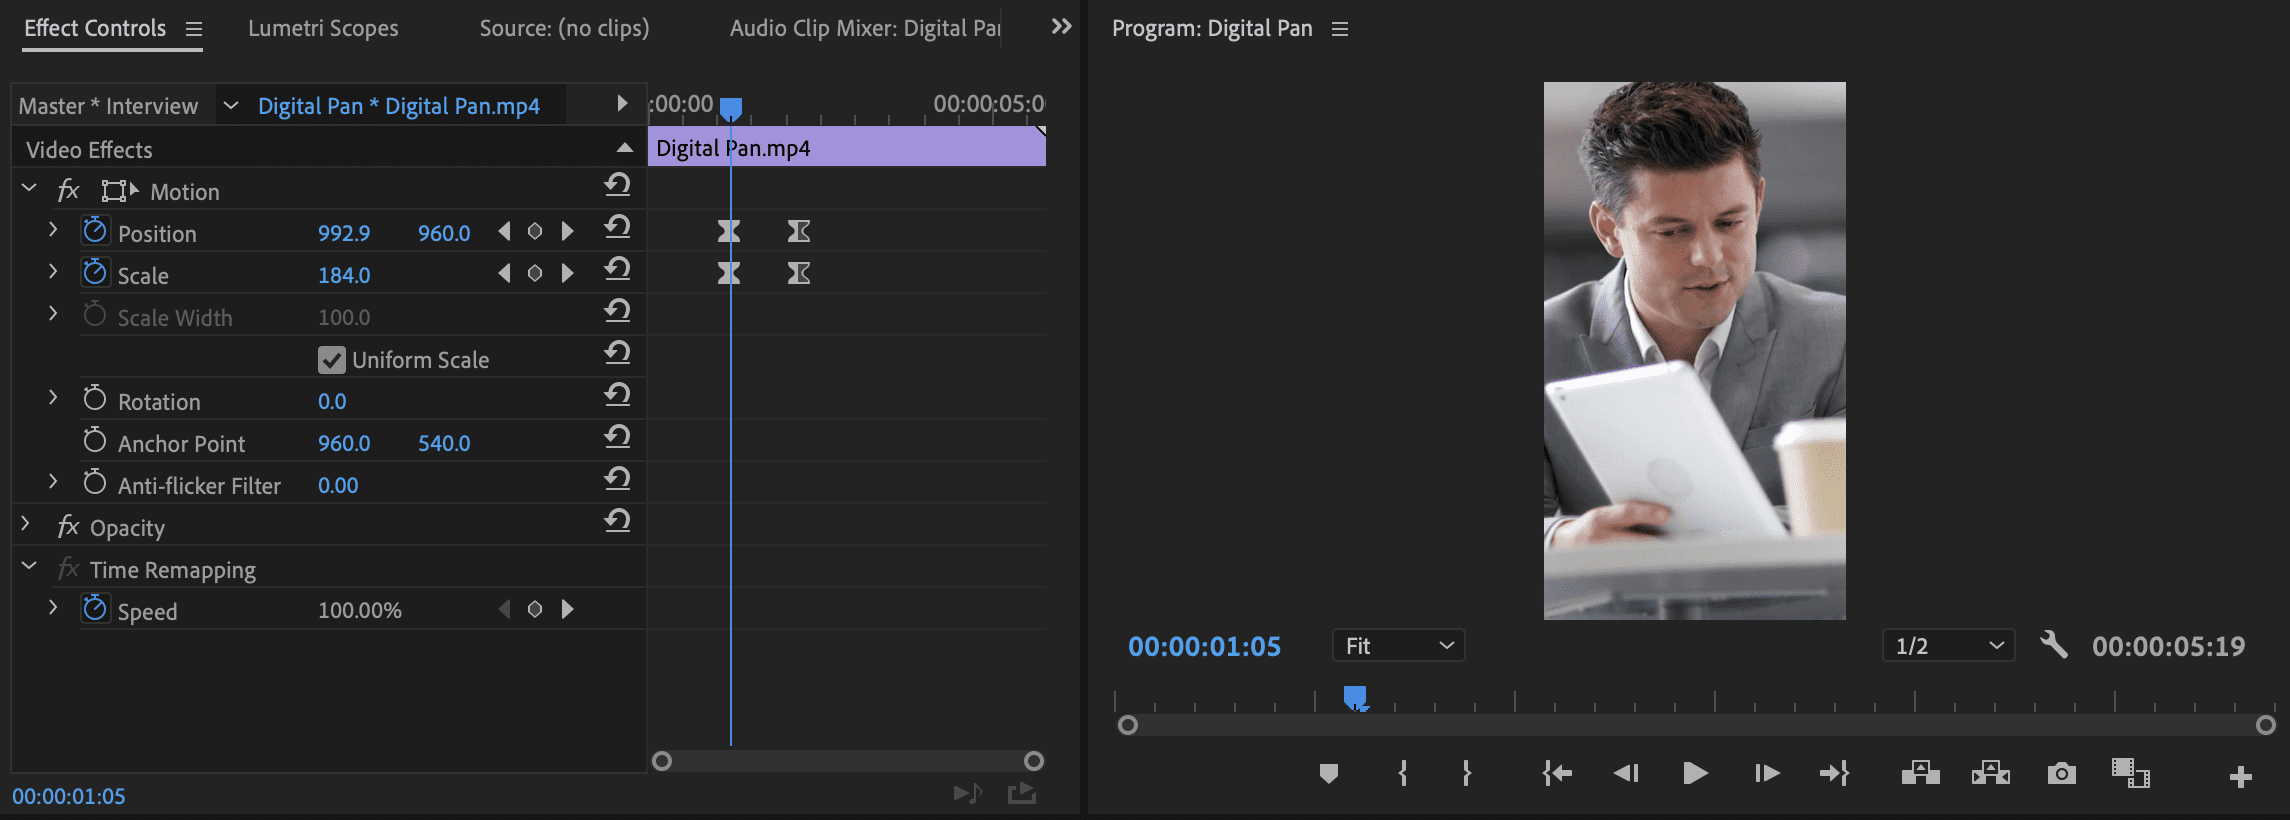
To create a smoother “camera move,” right-click your first set of keyframes and find Temporal Interpolation for a few options. Try Ease Out for the beginning of the movement, and Ease In for the end.
Finally, remember that you can mix it up! Use two or more of these methods on your channel, or even in the same video. Consider the footage you’re working with and incorporate the different techniques to best serve your content. The most important thing is to never allow important information—like text—to be cropped out. Finally, remember not to approach editing for vertical as a chore or afterthought. Once you’ve mastered the basics, there are a ton of opportunities to get creative and have fun with the vertical space!


