
Today, creators and digital marketers need to make a lot of content. From Instagram to Facebook to TikTok, you can use many social platforms to maximize your reach. But creating unique content for every single post can quickly lead to burnout. One way to combat this is to repurpose your video content across social platforms. For instance, a video you post to YouTube can also be posted to Instagram or Facebook. I’m going to help you do that.
The first thing you need to know when repurposing content is that different platforms require different media aspect ratios. Some work best with horizontal content. Others are optimized for vertical viewing (like content you would typically watch while scrolling on your phone.)
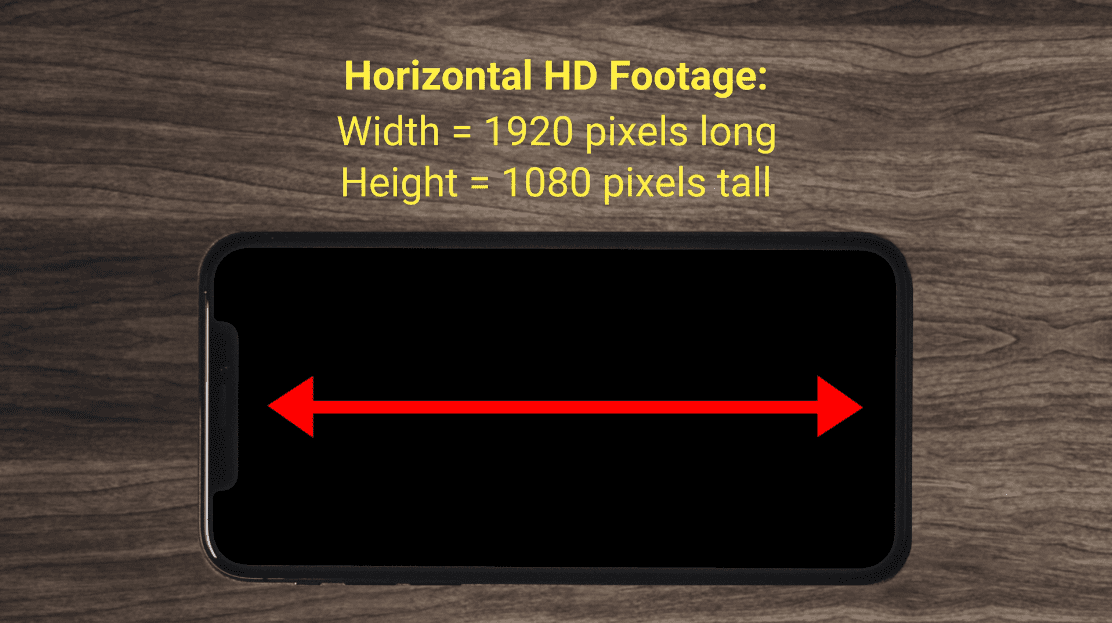
Videos uploaded to YouTube should be horizontal to fit the YouTube player. Videos uploaded to Facebook can also be horizontal (although preference is starting to shift to vertical.)
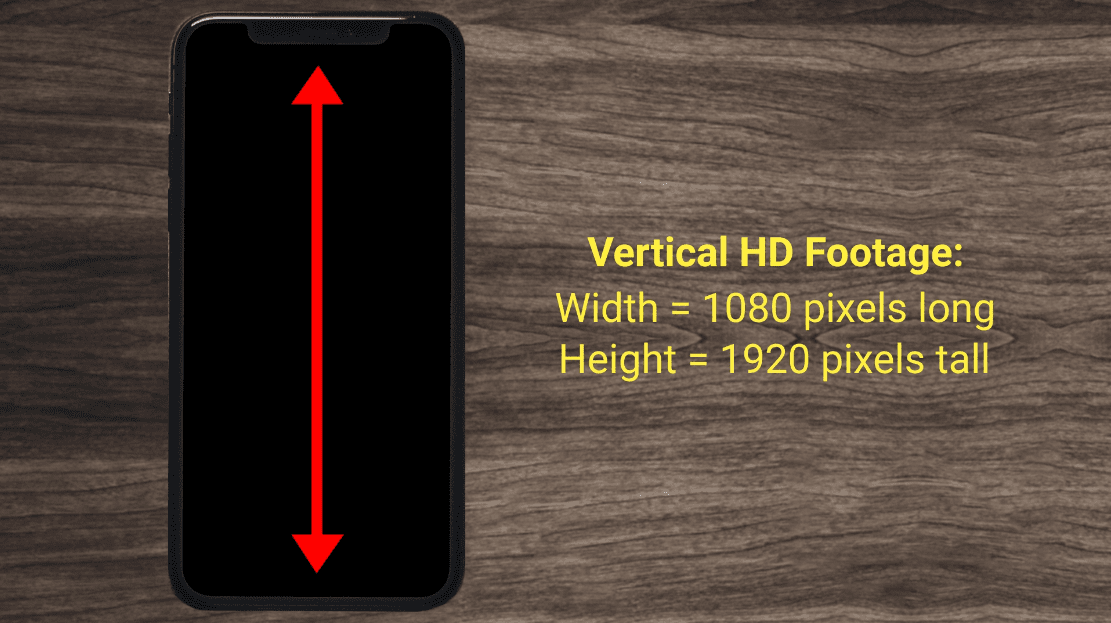
For Instagram feed posts, you can post horizontal videos, but since the majority of people who use Instagram view it from a smartphone that’s being held vertically, a horizontal video will only fill up a small fraction of the already small screen. So a vertical video is preferred.
Instagram Stories, Facebook Stories, IGTV and TikTok are all vertically formatted. For this reason, it’s best to convert native horizontal video to vertical format so it fills the entire vertical viewing screen.
Reformatting Horizontal Video to Vertical Video
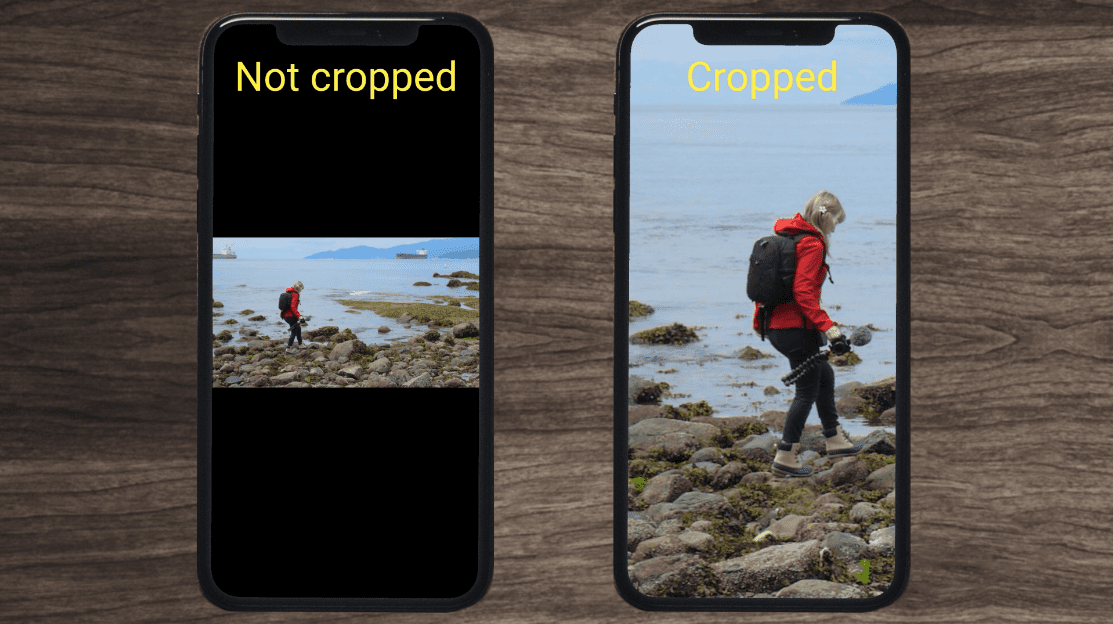
If you have a horizontal YouTube video and want to post it vertically on other social media channels, it can be a bit tricky. When a video is repurposed for vertical viewing, it needs to be heavily cropped to fill the frame. That means cutting quite a lot from the left and right sides.
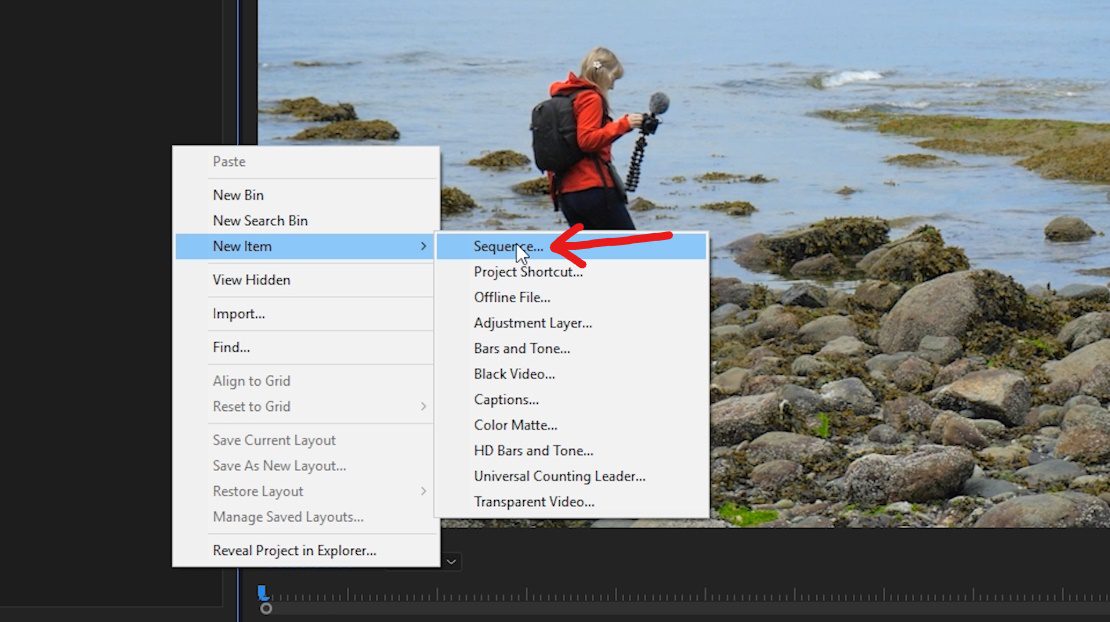
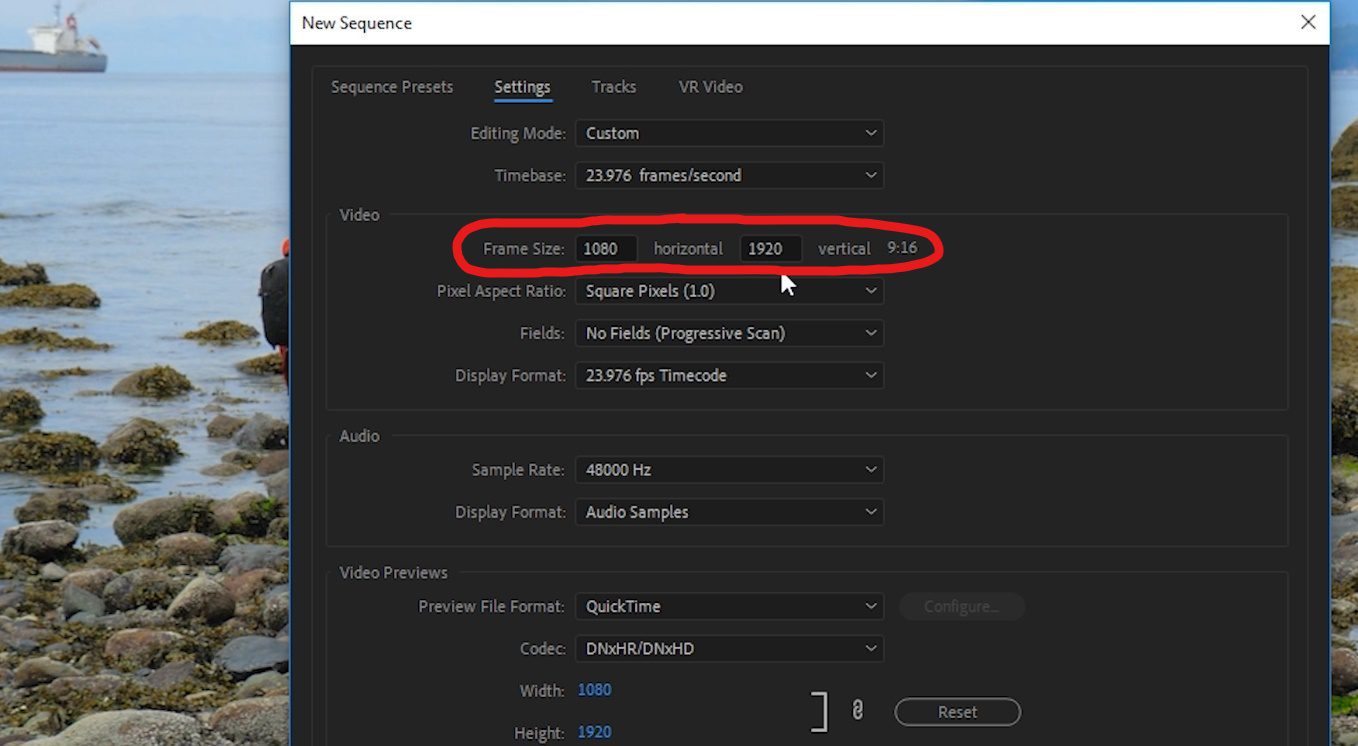
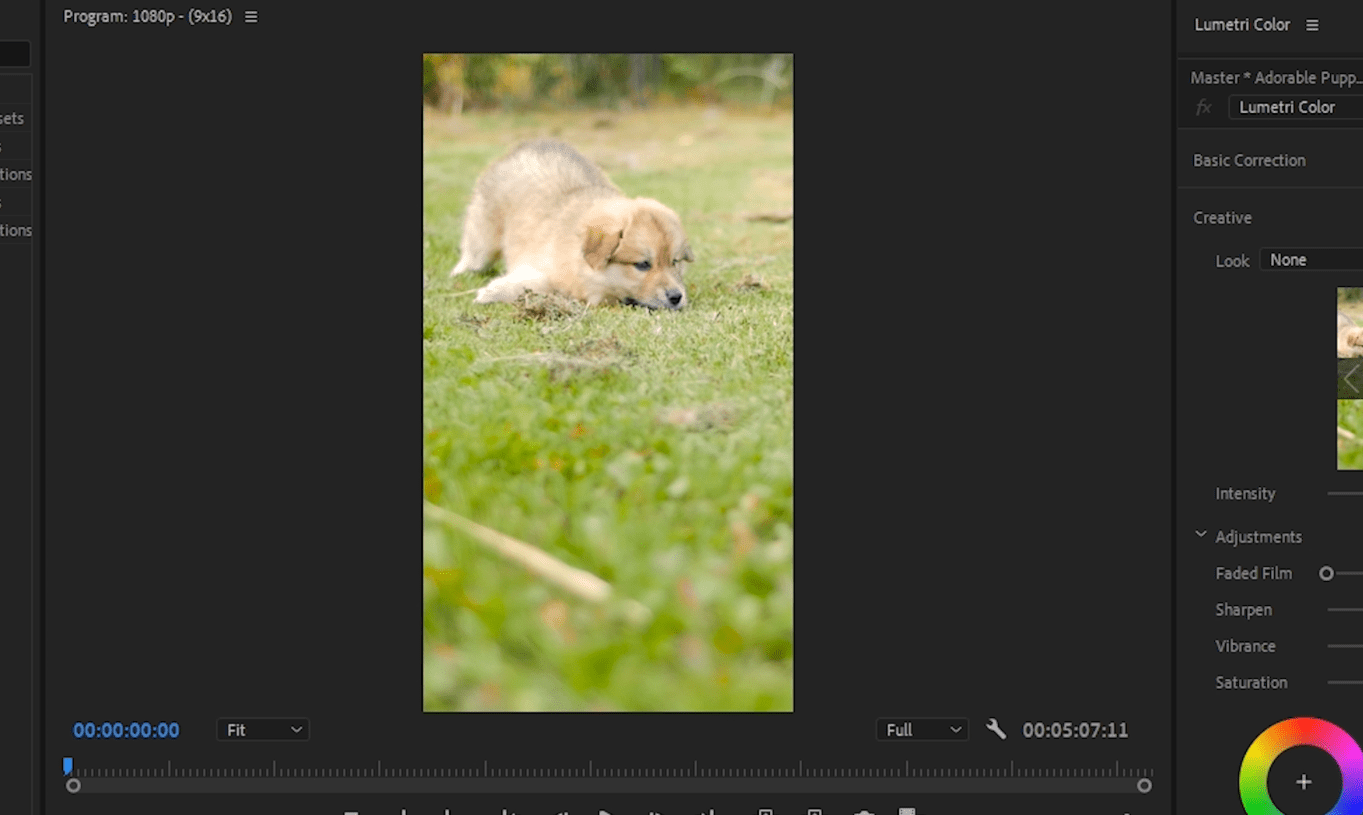
To do this, I typically convert my horizontal footage to vertical by creating a vertical sequence of 1080×1920 inside Premiere Pro.
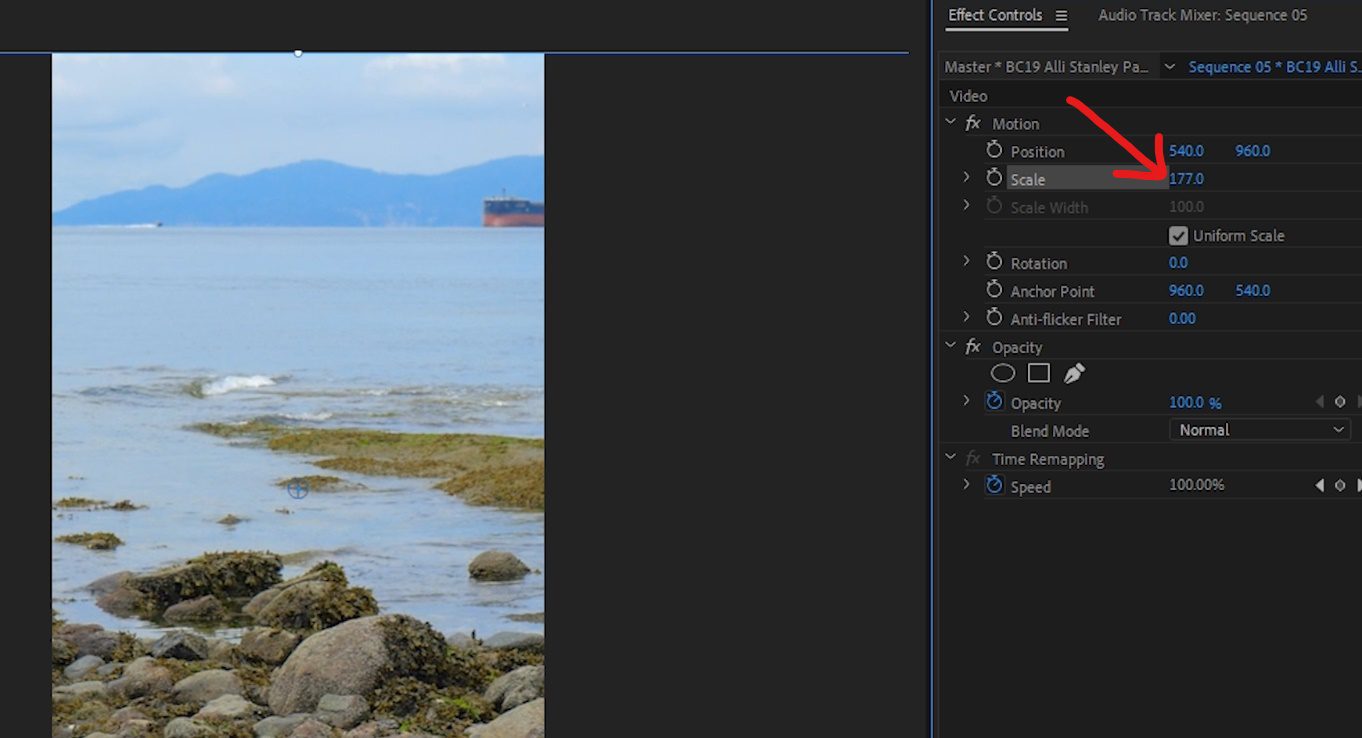
Then I zoom into the footage until it fills the vertical frame.
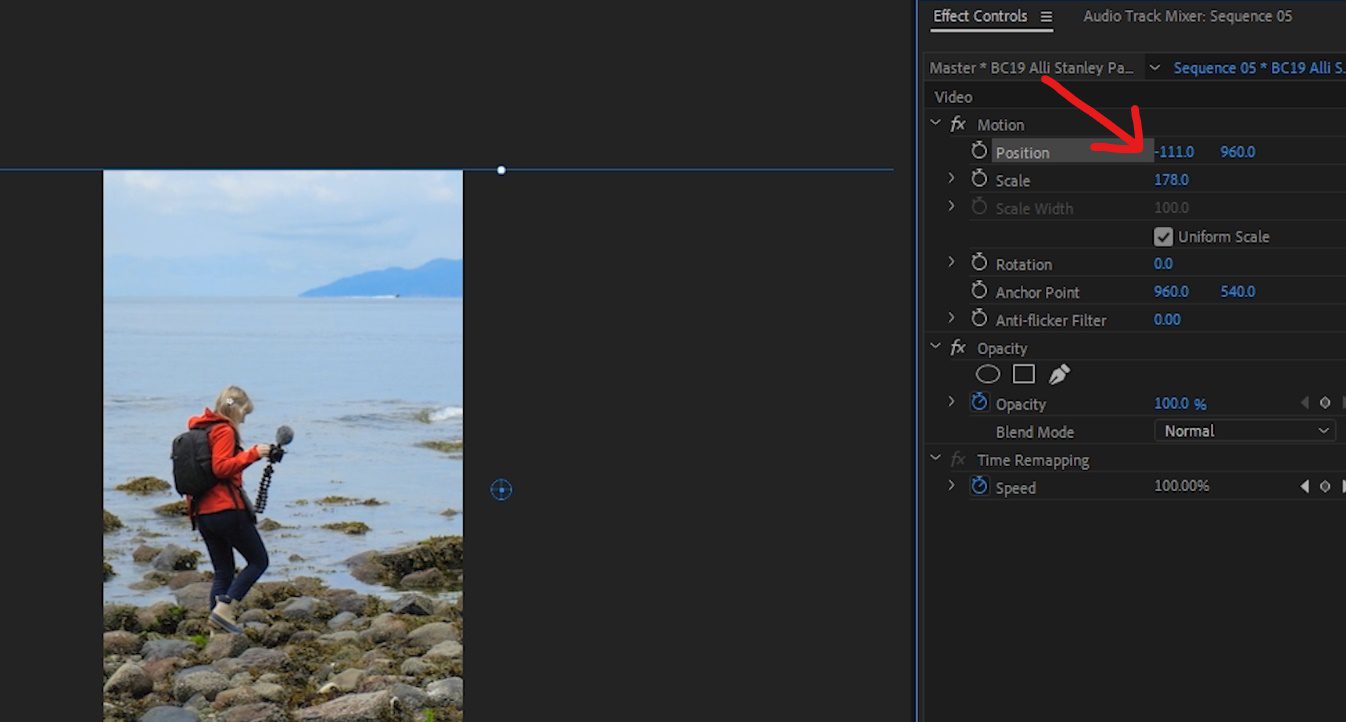
From there, I move each clip left or right to align the best part of the footage in each clip so that it looks good.
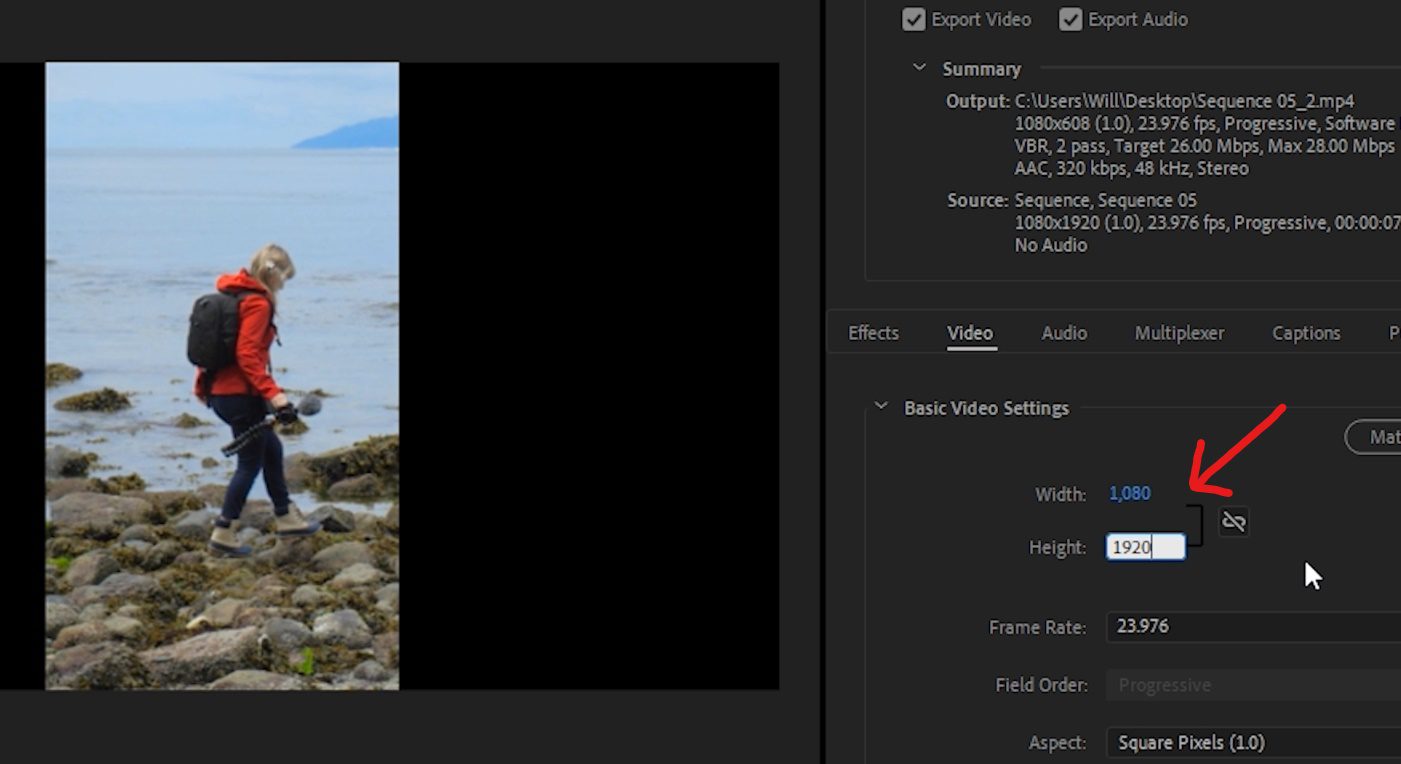
After that, I export the footage at the same 1080×1920 vertical resolution, and then that’s what I use for Instagram posts.
Once the video is converted to a vertical resolution, I can use that same video file for any other platform that would benefit from vertical video.
Tips for Repurposing
YouTube
Vertical videos are growing increasingly popular for most social media platforms since most smart devices primarily use a vertical orientation. YouTube is an exception. It’s known as the longer-form video platform where horizontal video makes sense. A lot of people still view YouTube content from their computer or TV. That being said, even YouTube now has a Stories section where you can upload vertical videos. If you are a YouTube creator, it’s a good idea to plan your shoots, or choose your footage with vertical in mind.
For Instagram Stories, they allow each post to be 15 seconds long, and Instagram will split up videos into 15-second clips automatically up to a certain length.
TikTok
For Tiktok, videos can be up to 1 minute in length. However, for a couple reasons, I would recommend keeping them much shorter. Songs available on the platform are only usable up to about 15 seconds in most cases. And shorter videos tend to perform better within the TikTok algorithm. If you have a longer video you want to repurpose for TikTok, think about how you can shorten it or use a snippet.

I believe the vertical video trend will continue as more and more people move away from desktop computers and continue to use vertical orientation smart devices. Apps like Instagram and TikTok tend to promote the use of vertical videos.
A Vertical Video Editing Shortcut
If you’re looking for a simple video editing app to help you repurpose video content, Adobe Premiere Rush is a great choice. And of course, any professional video editing app such as Premiere Pro will also allow you to edit your content with a lot of options.
Specifically, using the new auto-reframe feature in Premiere Pro CC can automatically change your footage to various frame sizes quickly. That’s going to save you a lot of time!
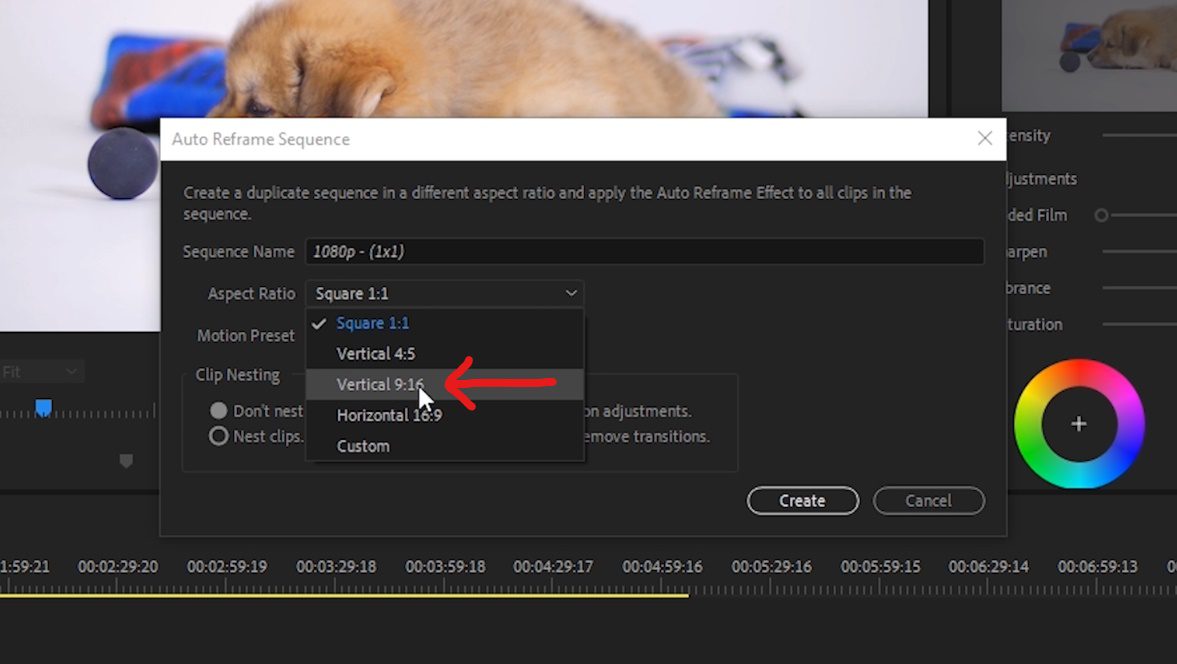
Right-click your horizontal sequence in Premiere Pro’s Project panel window and select Auto Reframe Sequence.

Then choose a vertical aspect ratio. In our case, I’m working with 1080p footage, which has a 16:9 aspect ratio, so I will select Vertical 9:16.
–
Premiere Pro will then analyze the footage and select the best part of the image to automatically reframe!
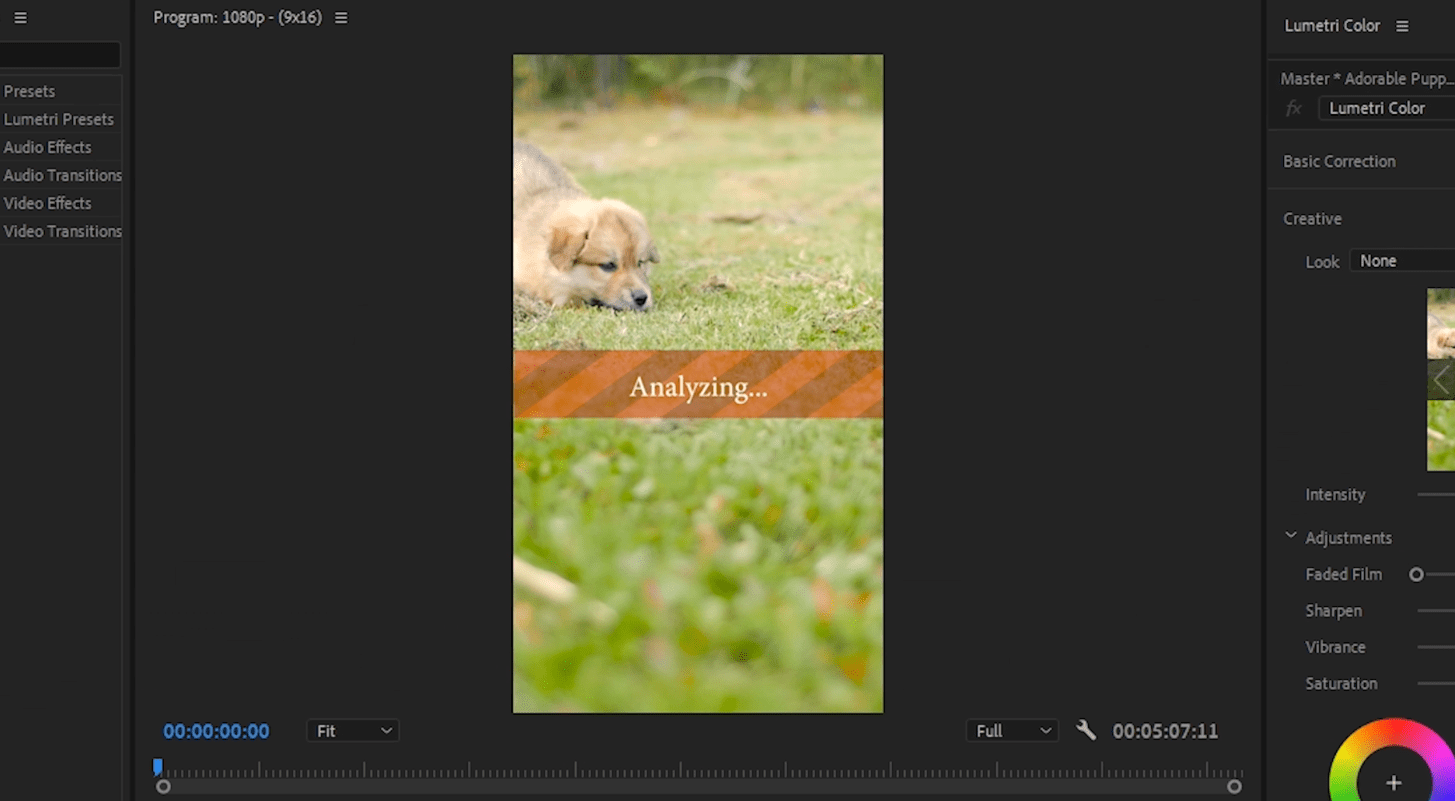
In our example, Premiere automatically chose to center the puppy in the frame, which is exactly what I would have done.
Repurposing videos can be time-consuming, but there are a few simple ways to do it. You just need to learn what format works best for the platforms you are using and plan ahead. Once you get the hang of it, you can start repurposing content across all your different social media platforms.


