“Vintage” is always one of the top search terms in our library, and we can see why! Vintage graphics are a great way to inject some pizzazz into any project, so we’re going to show you how to turn stock photos into a vintage masterpiece. Whether you’re ramping up for your next advertising campaign or trying to make your friends jealous, this tutorial is an easy way to create show-stopping graphics.
Adobe Illustrator can be a little intimidating, but if you take your time (and take a deep breath) we promise that you’ll become a master of this vintage postcard technique. We’ve already done some of the leg work and created a gallery of stock travel photos that are perfect for this tutorial.
Step 1. Create a New Illustrator File.
Open Adobe Illustrator and create a new file. Typically, postcards have a height of 3-4 inches and a width of 5-6 inches, but feel free to branch out! You can create a vintage postcard on almost any canvas size, which makes it great for marketing campaigns.
Note: If using your design for postal mail, most carriers require extra postage for square and over-sized postcards.
Step 2. Create the Large Text.
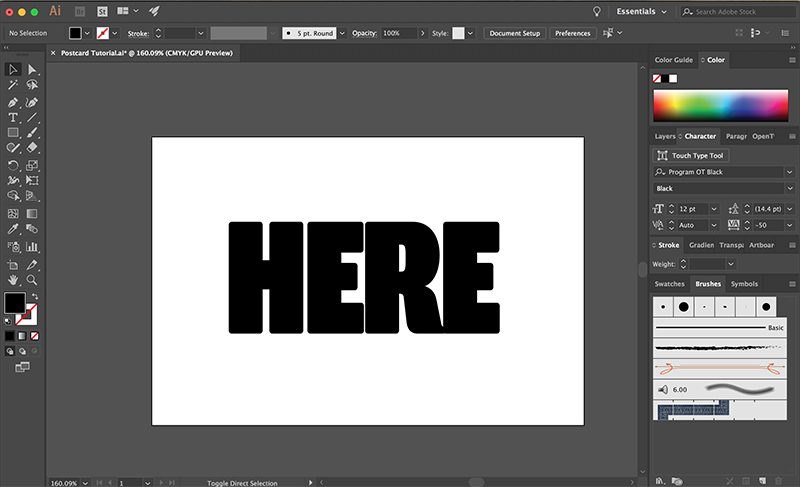
Go to Type > Font and select a simple font that has thick lines. If you don’t see anything that you like, you can explore Adobe’s other fonts online by going to Type > Add Fonts from Typekit.
Once you’ve selected a font, type out the word that you want to be the focus of your postcard. For our postcard, we used the Program OT Black font. If the size of the text is too small, click on the Selection Tool (or hit “V” on your keyboard), select the text, then drag the corners to adjust the width and height.
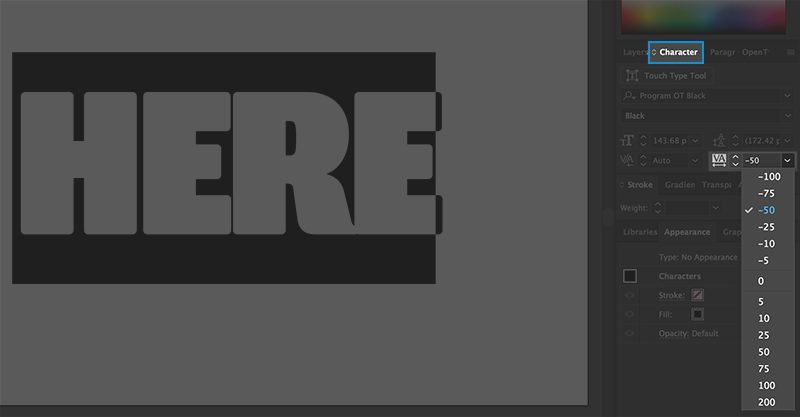
You’ll also want the letters to be close together. To adjust the letter spacing, select the text, go to the Character tab (or Command/Ctrl + T), and adjust the Tracking for the characters (you can see how this is done in the images below).
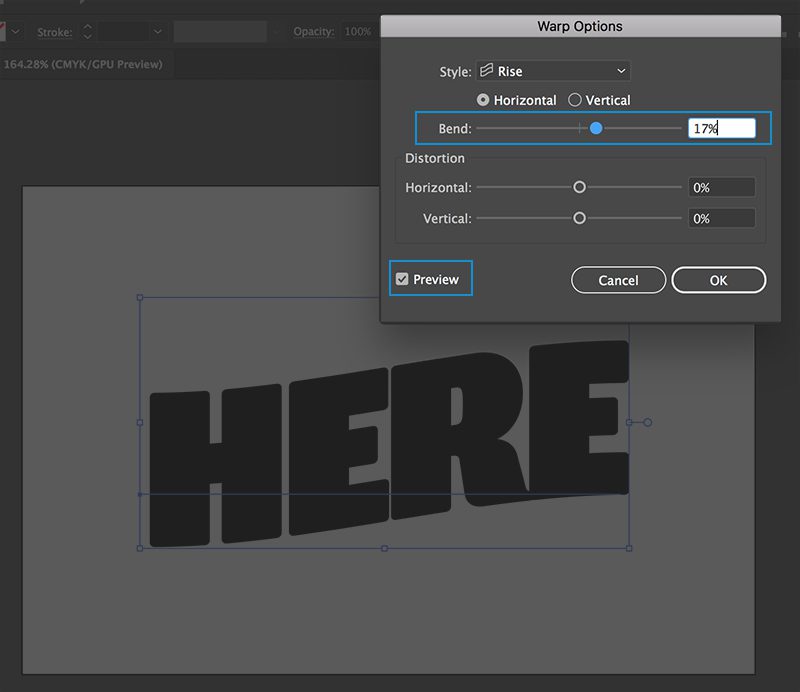
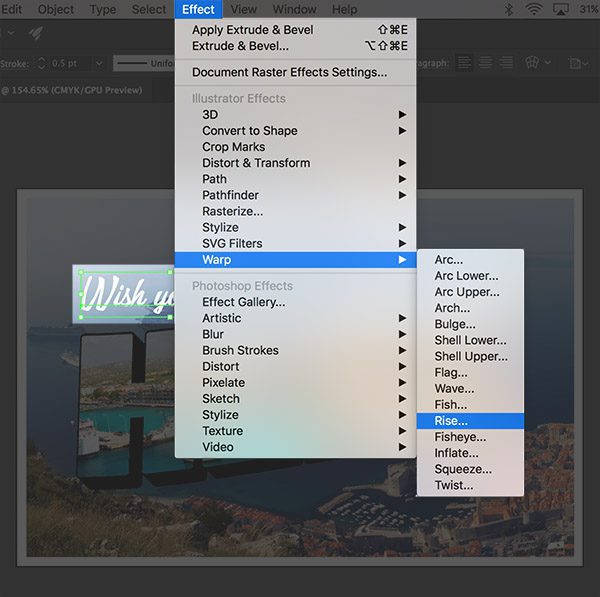
Step 3. Warp the Text.
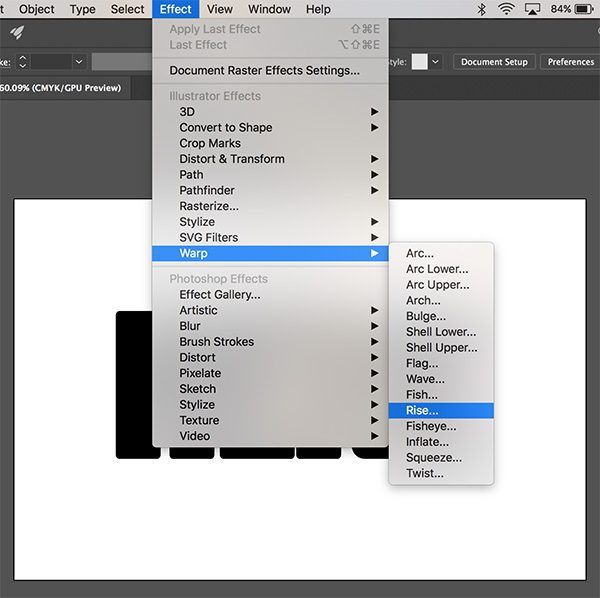
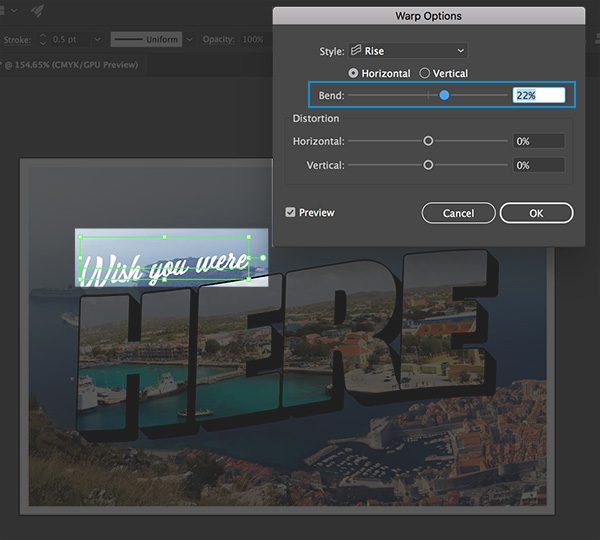
Select the text and go to Effect > Warp > Rise. A window will open that will allow you to adjust the shape of the text. Make sure the Preview box is checked and only adjust the Bend slider. You only want a slight bend so it’s probably best to set it below 25 percent, but this will change depending on how long the word is.
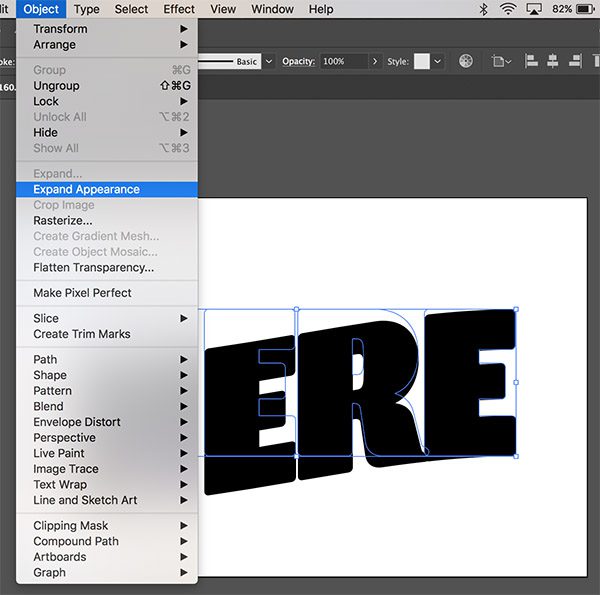
Step 4. Expand Appearance.
When you’re done warping the text, click OK. With the text still selected, go to Object > Expand Appearance.
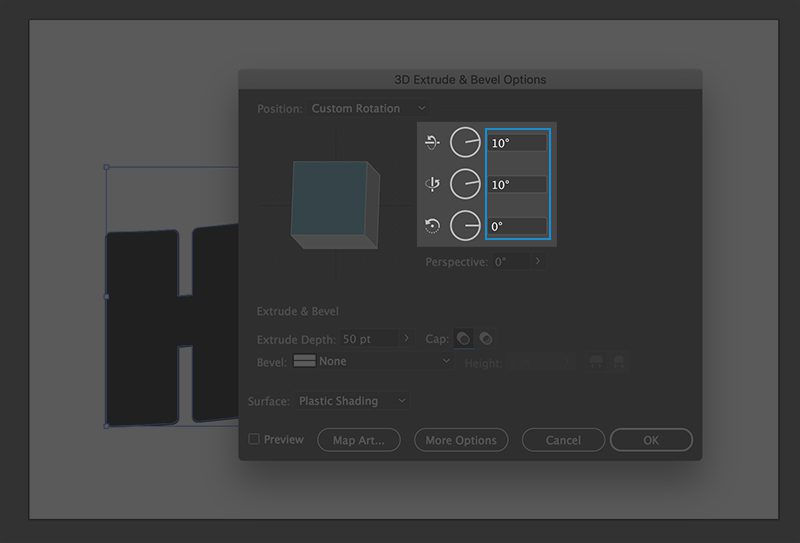
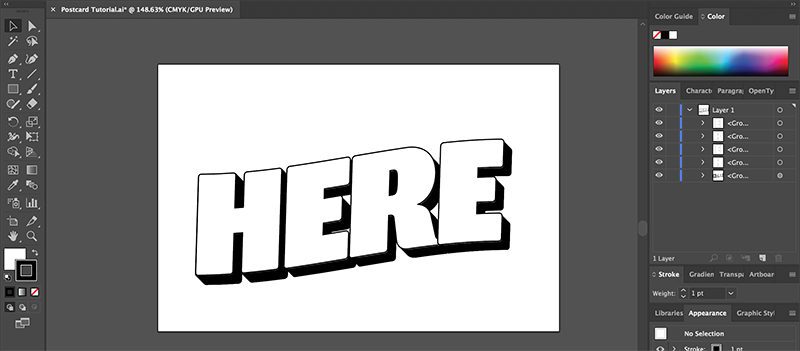
Step 5. Extrude and Bevel.
Make sure that the text is still selected, then go to Effect > 3D > Extrude & Bevel. Set the x and y rotations to anywhere from 10-15 degrees (this changes the length of the shadow under the text) and make sure the last setting is kept at 0 degrees. Click OK.
Click Object > Expand Appearance again.
You can also change the color of the shadow and text to make it easier to see the adjustments that you just made.

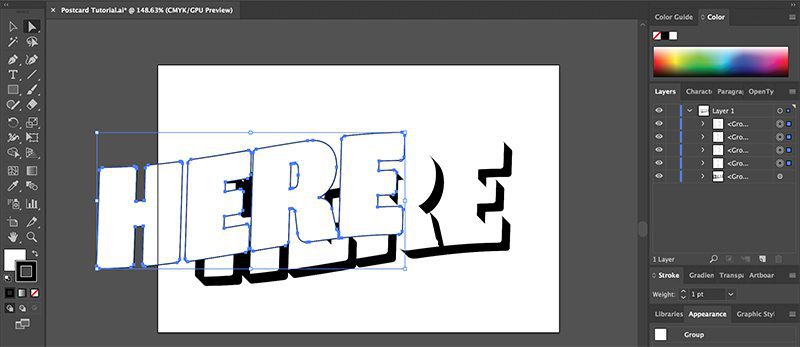
Step 6. Separate the Text from the Shadow.
Select the Direct Selection Tool (or hit “A” on your keyboard). Click on the middle of the first letter of the text, then shift + click on the middle of each of the remaining letters. Do not select the shadow. Once the letters are selected, cut and paste them onto the canvas (Command/Ctrl + X, then Command/Ctrl + V).
Move the letters back into their original position on top of the shadow.

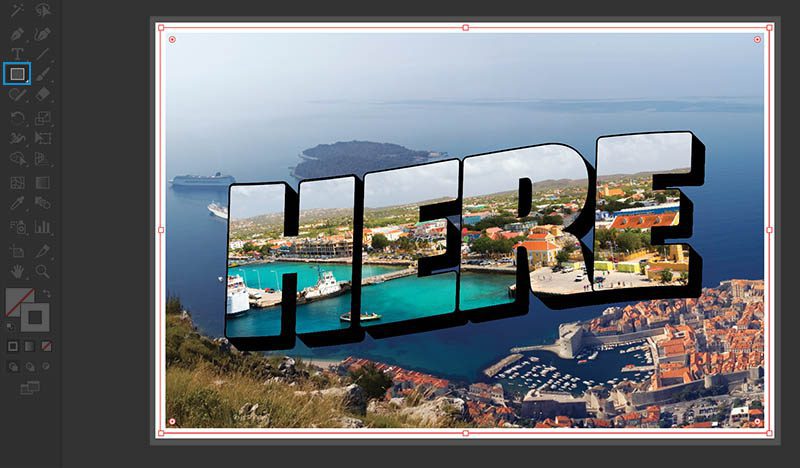
Step 7. Open the Text Photo.
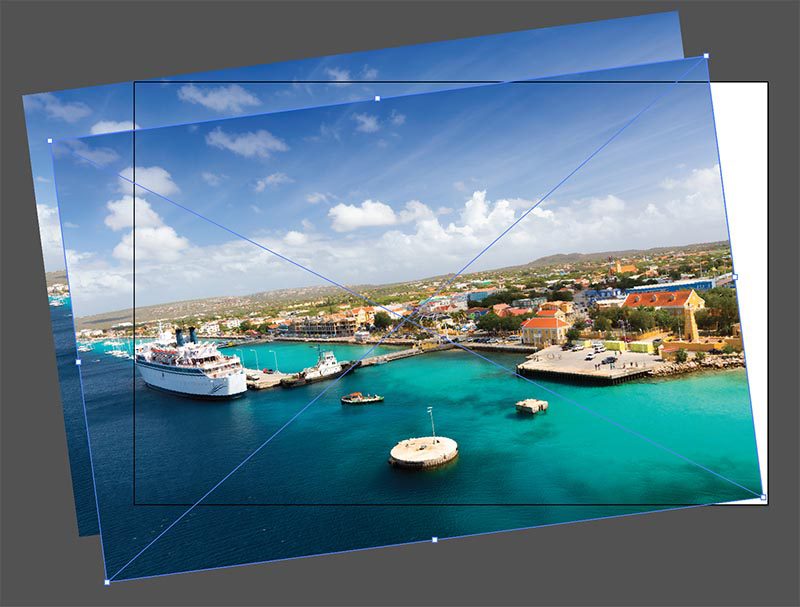
Select a photo that will be the text filler. To open the image, just drag it onto the canvas from a folder on your computer. Right click (Command/Ctrl + click) on the image and go to Arrange > Send to Back. Use the Selection Tool to adjust the size and rotation of the photo so that it lines up well with the text.
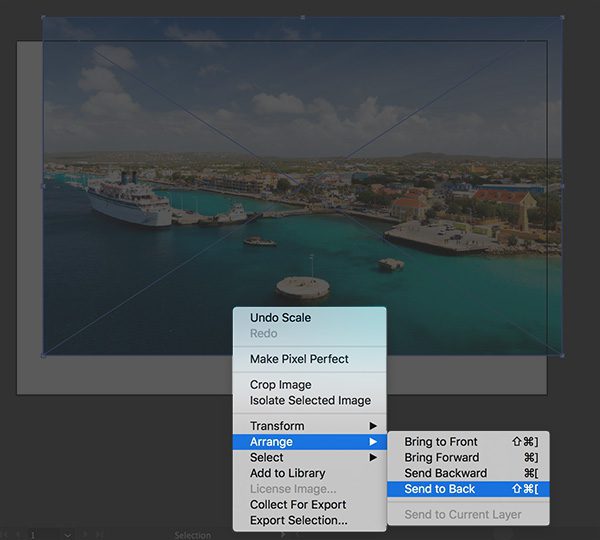
Download the photo of a tropical coastline we used.
Step 8. Copy the Photo.
Make a copy of the photo and put it behind the text (right click + Arrange > Send to Back). Align it with the original photo. In a few steps, we’ll explain why we’re doing this.
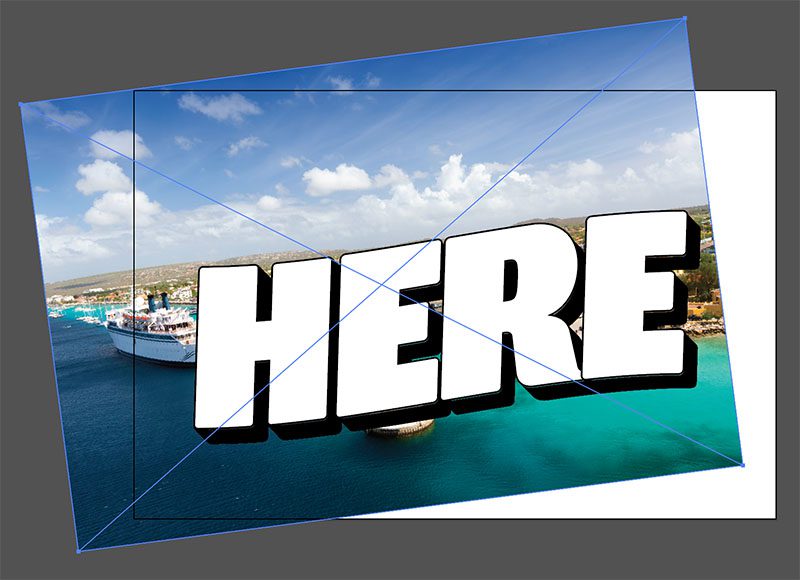
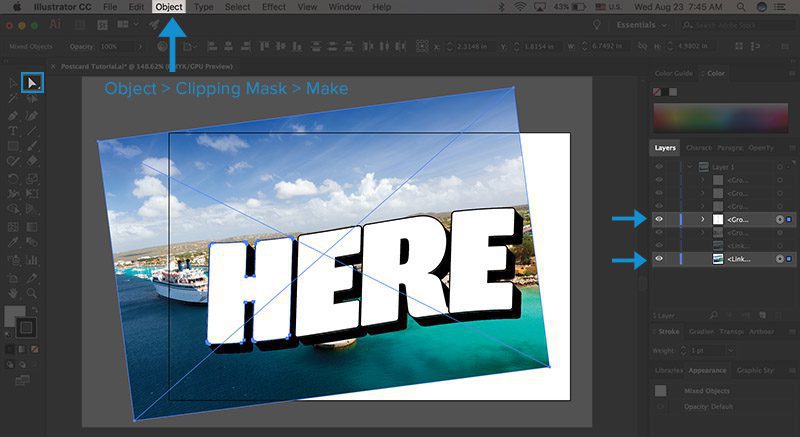
Step 9. Make a Clipping Mask.
Click on the Direct Selection Tool and click on the photo. Hold the shift key down and click on the middle of the first letter. Go to Object > Clipping Mask > Make, or hit Command/Ctrl + 7 on your keyboard.
At this point, you will see one copy of the photo disappear and the letter should be filled in with the photo. Now, only one copy of the photo remains in the background of the canvas.
Copy and paste the photo onto the canvas again. Send the new copy to the back and align it with the existing photo.
We do this because every time you create a clipping mask, you need to paste another copy of the photo onto the canvas so that it can be used for the next letter. If you paste a new copy of the photo while the previous one is still on the canvas, you can make sure that they both line up exactly so that the filler inside each letter looks like a single, continuous photo.
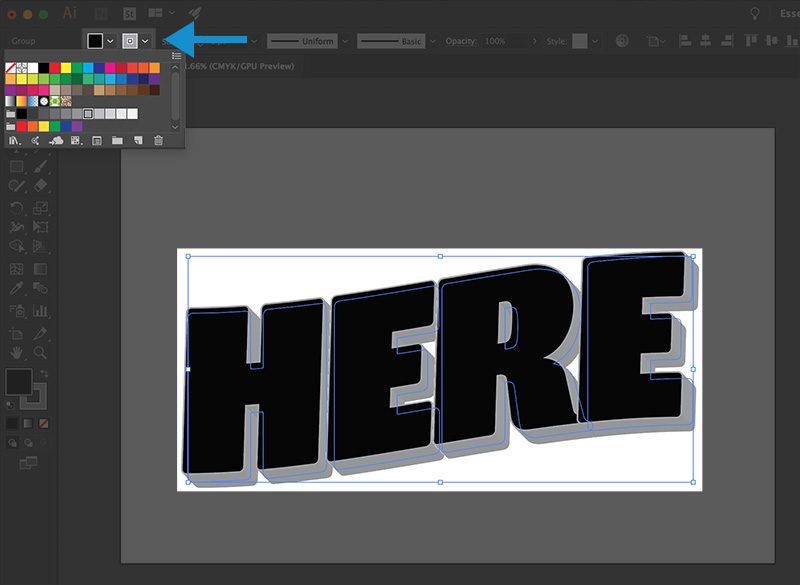
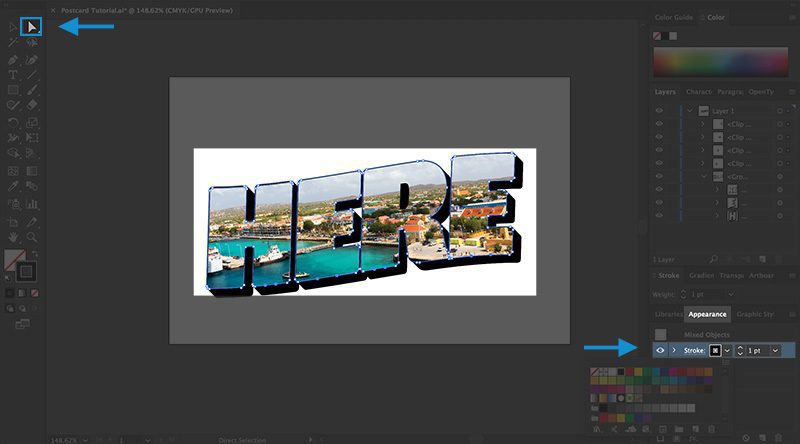
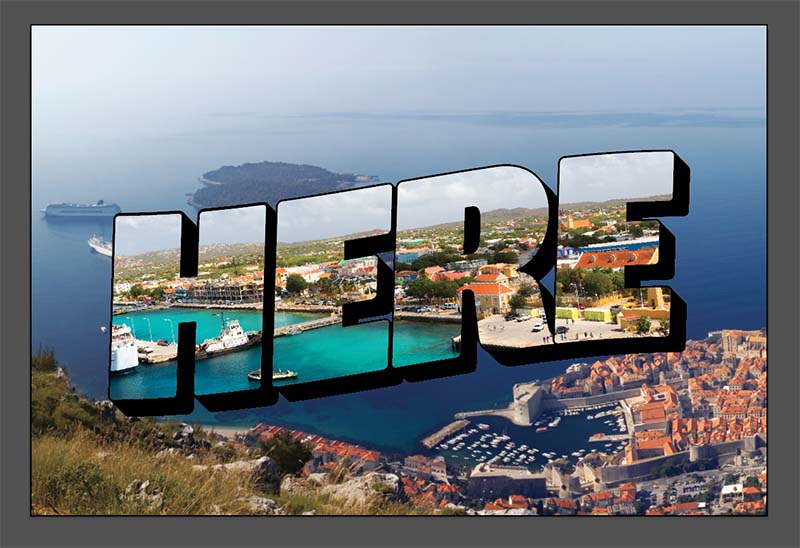
Step 10. Outline the Text.
Once you fill in each letter, you might decide that you want to outline the letters to add definition. To do this, click on the Direct Selection Tool and click on the path outlining each letter (not the shadow). To find the path, hover your mouse over the edges of the letter until a pink line shows up and the word “path” or “anchor” shows up, then click. Shift + click on the paths of each letter, go to the Appearance panel, click on the Stroke button, and select a color.
If the Appearance panel is not already open on the right sidebar, go to Window > Appearance.
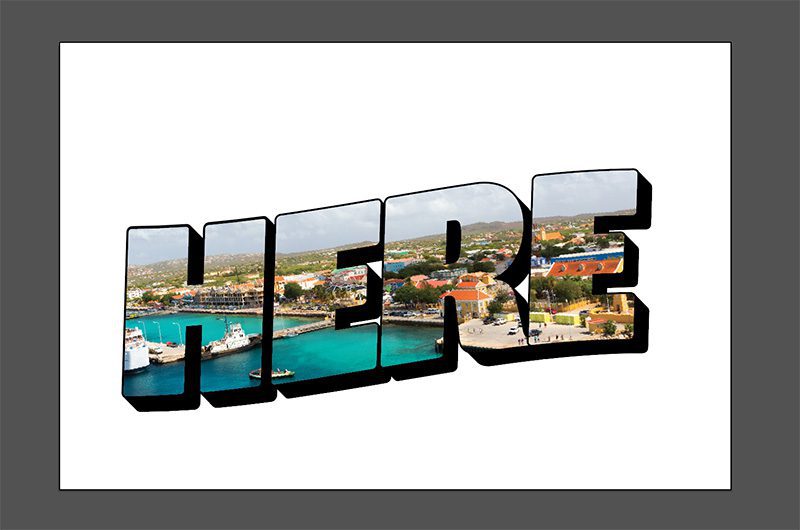
Step 11. Open the Background Photo.
Select an image for your background, then drag it onto your Illustrator canvas. Move it behind the text like the previous photos. Adjust the size as needed.
Download the photo of Dubrovnik, Croatia we used.
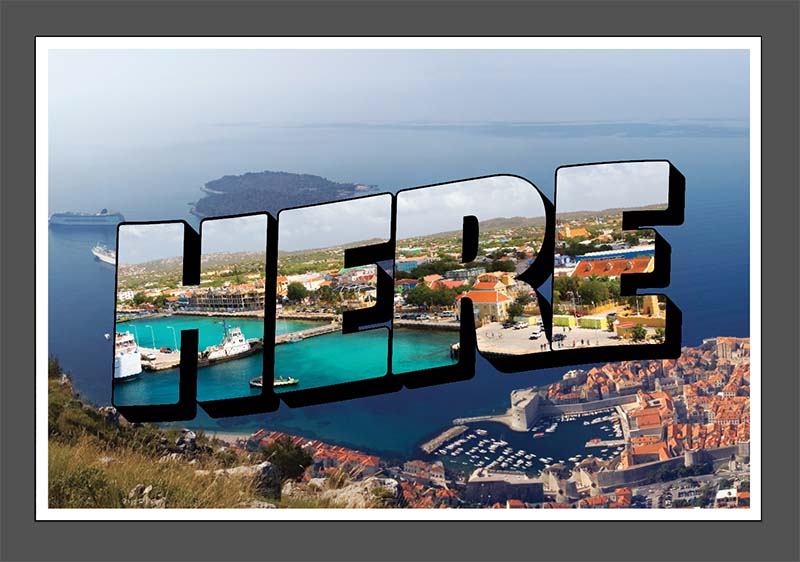
Step 12. (Optional) Add a Border.
Select the Rectangle Tool and draw a rectangle around the border of the image. Change the outline color and the Stroke weight to adjust the appearance of the border. When you make the stroke thicker, the border might extend beyond the edges of your canvas. Just use the Selection Tool to make the rectangle slightly smaller and bring the entire border back onto the canvas.
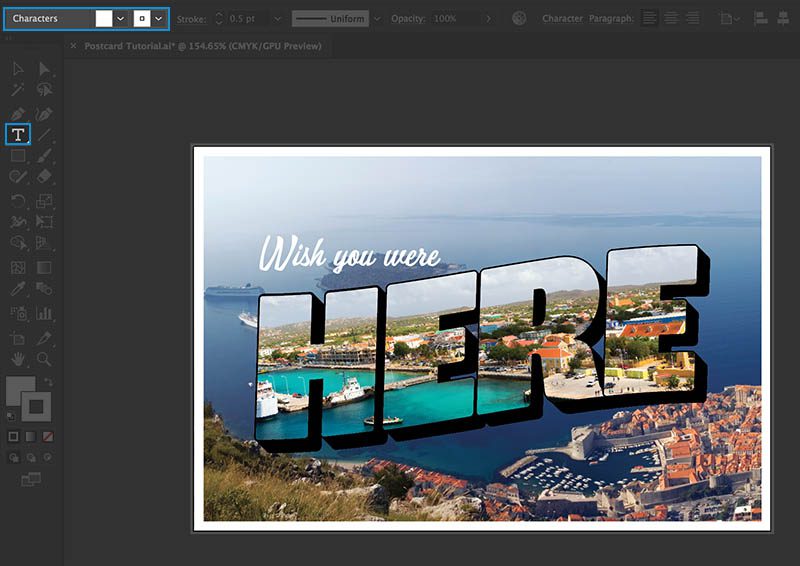
Step 13. Add the Script.
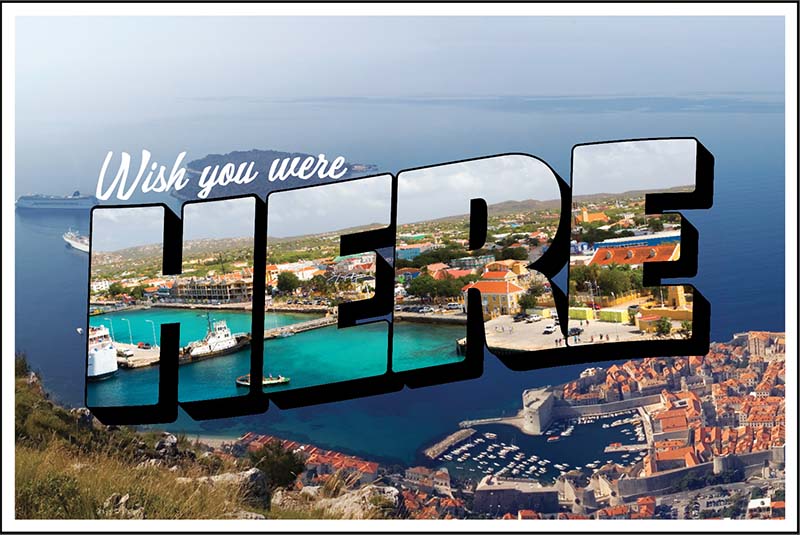
Most vintage postcards in this style also feature script that goes before and/or after the large text. Sometimes the script will say, “Welcome to,” or “Greetings from,” followed by the location written out in the large block letters.
For our postcard, we’re going to have the script say, “Wish you were,” right before the “here” that we’ve already created on the canvas. We used the Kon Tiki Lounge JF Regular font.
Type the script onto your canvas. Adjust the color and size as needed.
Step 14. (Optional) Warp the Script.
Select the script then go to Effect > Warp > Rise. Adjust the Bend until you are satisfied with how the script looks with the block letters. Once you’re done, go to Object > Expand Appearance.
You’re all done! Adobe Illustrator is no easy feat, so give yourself a pat on the back. Now you have a great vintage trick up your sleeve for your next graphic design adventure.
Looking for more inspiration? Embrace your wanderlust with more royalty-free cityscape images from our library.