
VHS has come and gone, but it has left its mark in a surprising way—the Token Creepy Video, or that analog distorted screen effect synonymous with old VHS tapes. Maybe there’s a better name for this, but we’re talking about the glitchy screen on old home movies that show up in movies and TV shows, usually because someone in the home video has gone missing.
Whether it’s for nostalgia or an investigation, this effect often foreshadows something sinister. You’ll see lines across the screen and some glitches in the video—unwanted interruptions that set a dramatic tone. All in all, the Token Creepy Video is meant to cause goosebumps and prepare audiences for more trouble ahead.
But the influence of this effect extends well beyond movies and TV. Nostalgia for the 80s and 90s is at an all-time peak, which means this simulated old school visual effect is potential marketing gold. So if you want to create a mysterious, foreboding still image—or channel some throwback nostalgia—simply imitate the VHS glitch in your Adobe Illustrator design. This tactic extends into the realms of advertising, art, and even logos, making it perfect for pairing with stock images. Plus, this distorted effect instantly adds a vintage feel to whatever artwork you’re creating without overpowering the image.
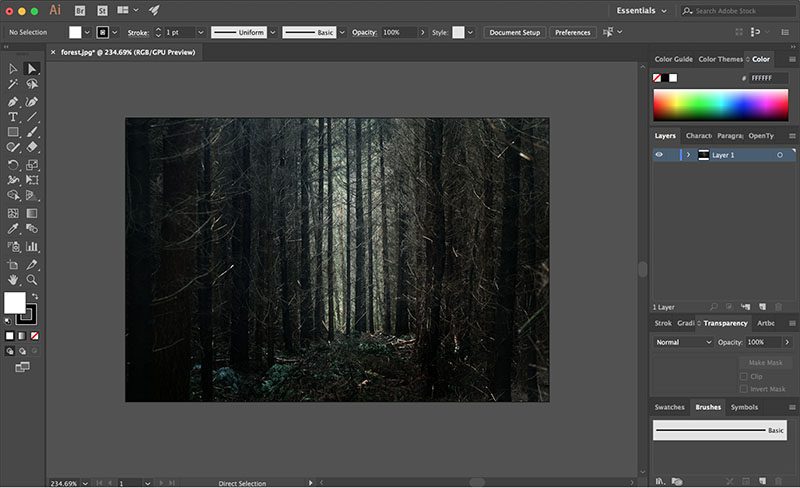
Step 1. Open the Background Image in Illustrator
Select your background photo and open it in Illustrator. We used this stock photo of a forest.
Step 2. Add Text
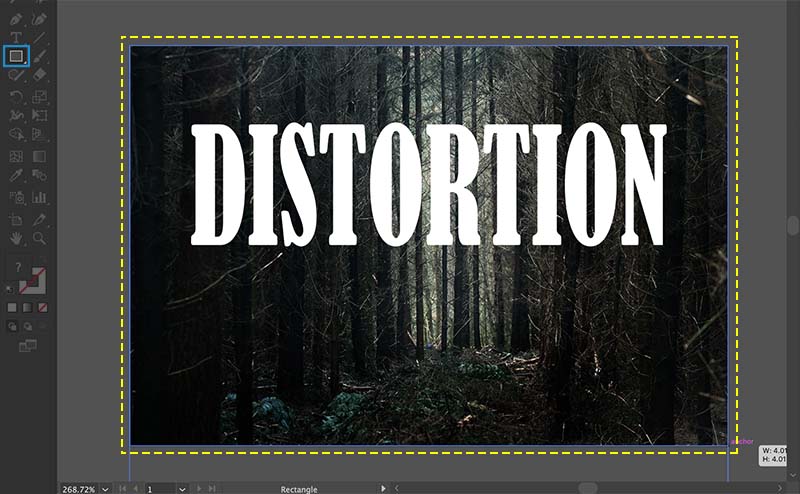
Select the text icon and type anywhere on the artboard. Go to the Type menu to edit the font and size.

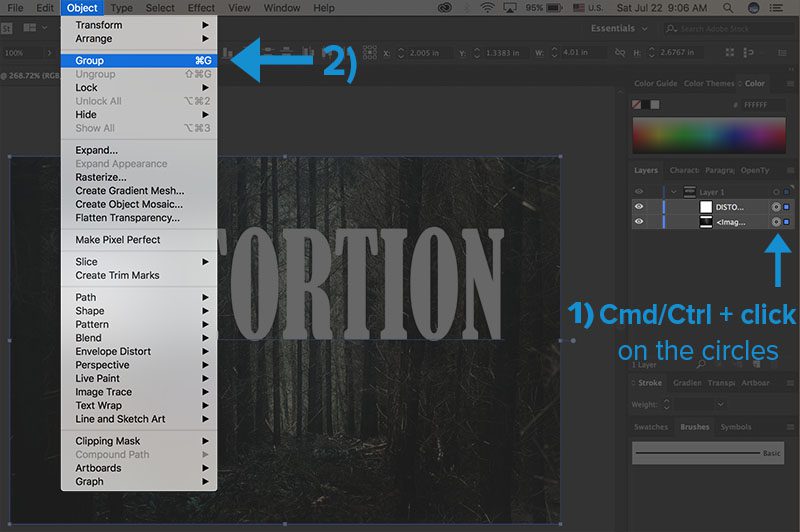
Step 3. Group the Background and Text
Select both the text layer and the background layer (Command/Ctrl + click) then go to Object > Group (or hit Command/Ctrl + G on your keyboard).
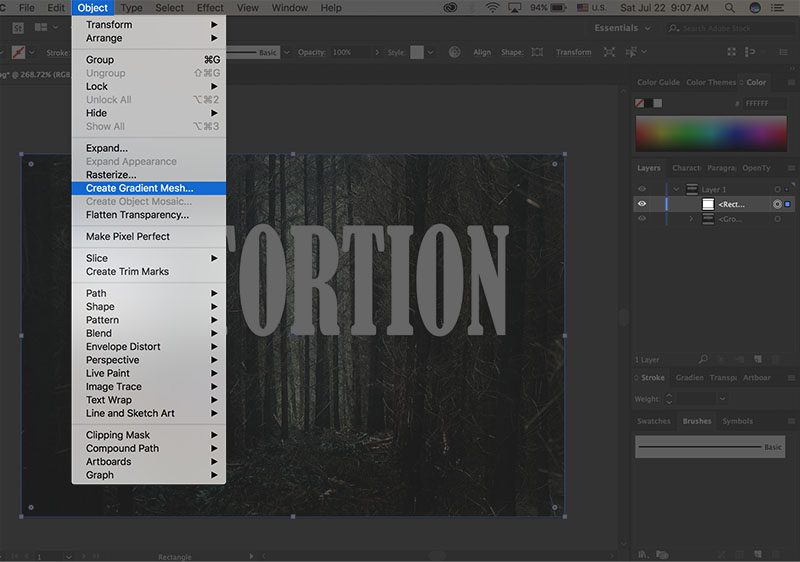
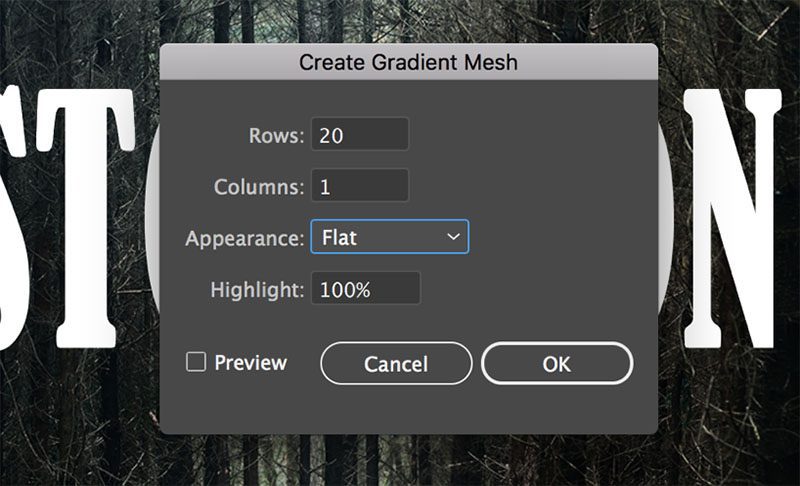
Step 4. Create a Gradient Mesh
Draw a rectangle the size of the background image.
With only the rectangle selected, go to Object > Create Gradient Mesh. A menu will pop up prompting you to enter the number of columns and rows that you want.
For this tutorial, we chose 20 rows and 1 column to allow us to make distortions with smaller portions of the image. We only used 1 column since we needed the distortions to go across the width of the entire image.
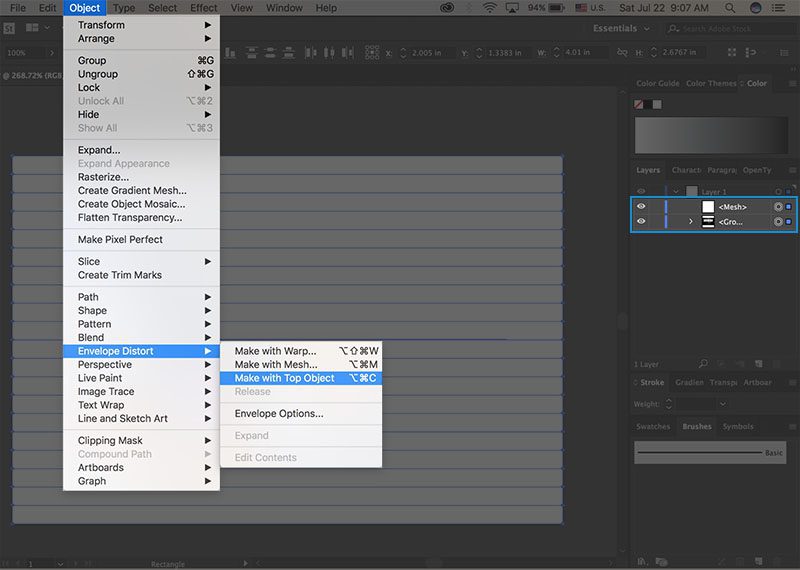
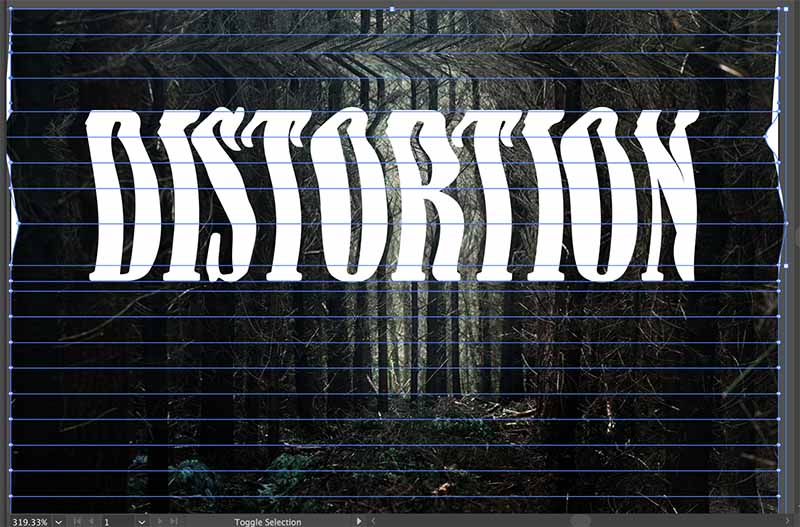
Step 5. Envelope Distort
Select the rectangle layer and the group you made from the background and text. Go to Object > Envelope Distort > Make with Top Object.
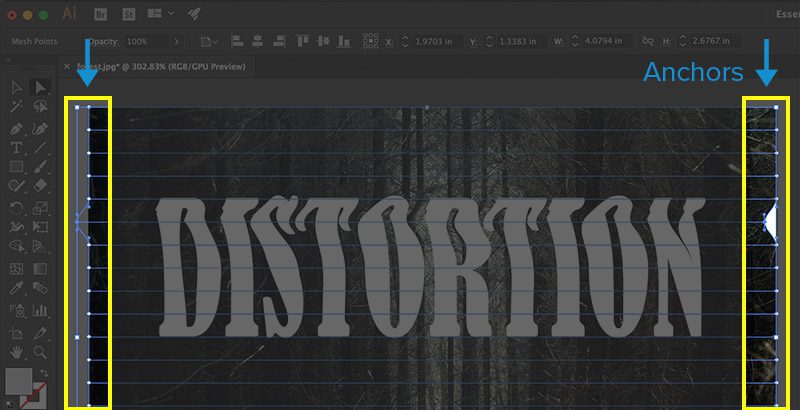
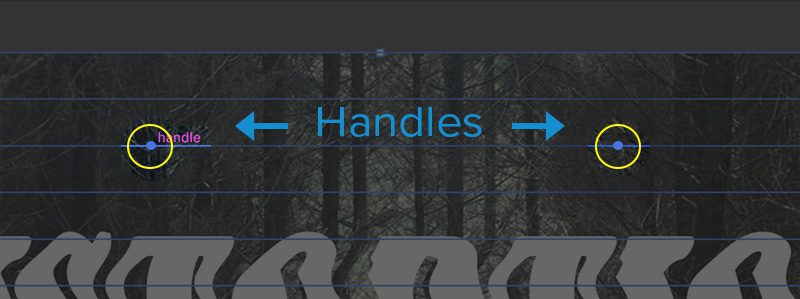
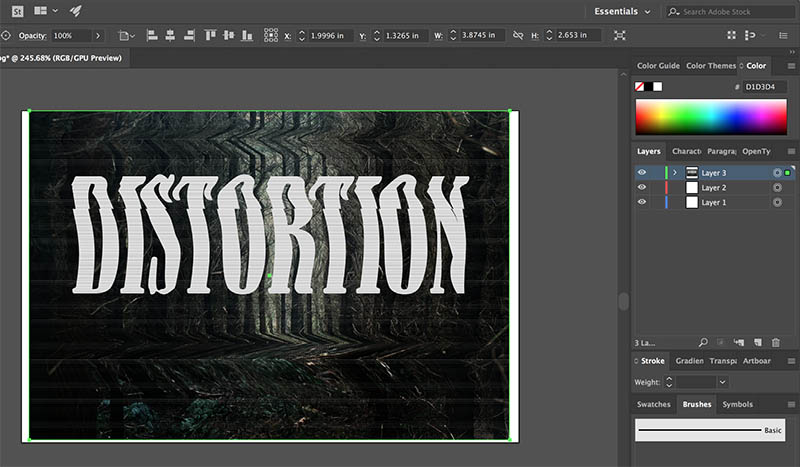
Step 6. Experiment!
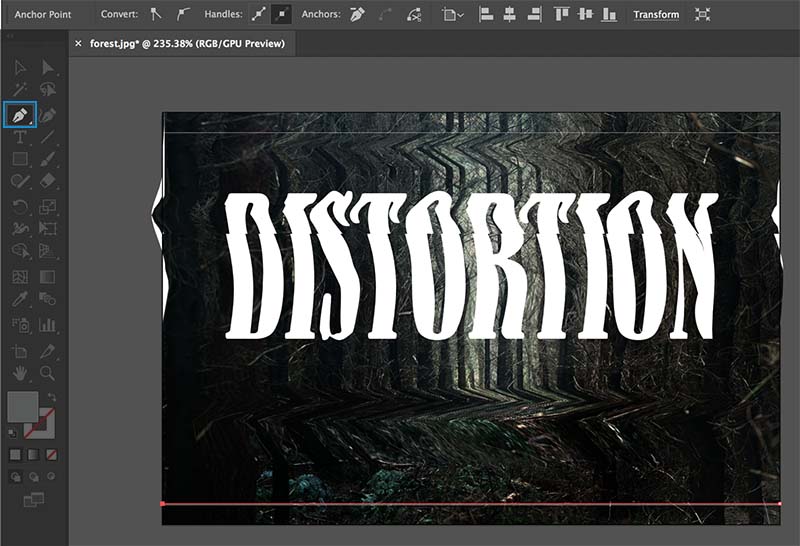
Click and drag the boxes of the mesh to distort the image. To gain more control, click on an anchor on one side of the image then Shift + click on the corresponding anchor on the other side. Use the left and right arrow keys to distort. You can also click and drag the handles to the left and right to create a different type of distortion.
Step 7. Draw a Rectangle and Make a Clipping Mask
Once you are happy with the adjustments that you’ve made, you can make an additional type of distortion using a clipping mask.
Draw a rectangle over part of the image (the color of the rectangle does not matter). The rectangle should be as wide as the background and as short as you like—the bottom of the rectangle is where the distortion will appear.
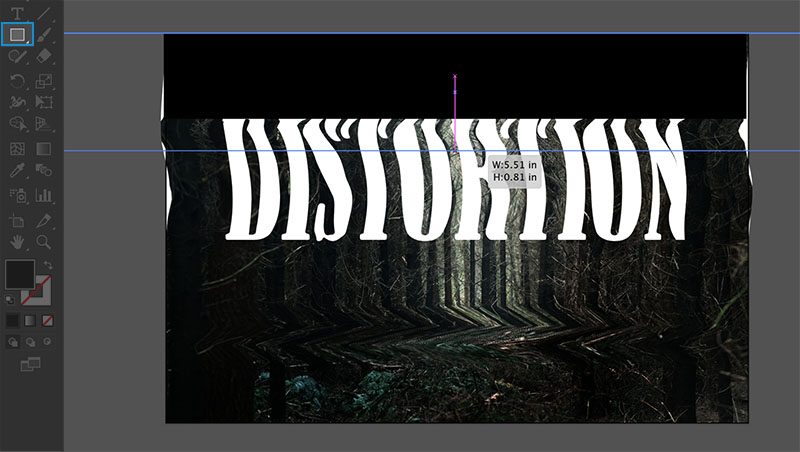
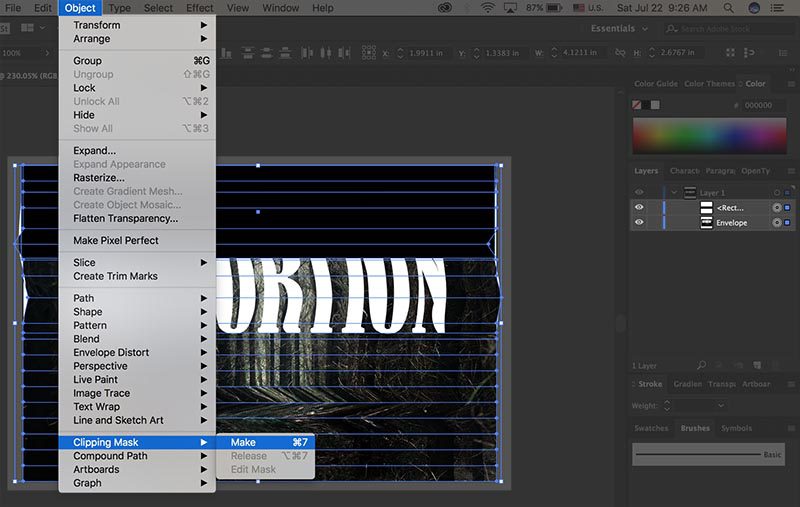
Select all of the layers then go to Object > Clipping Mask > Make.
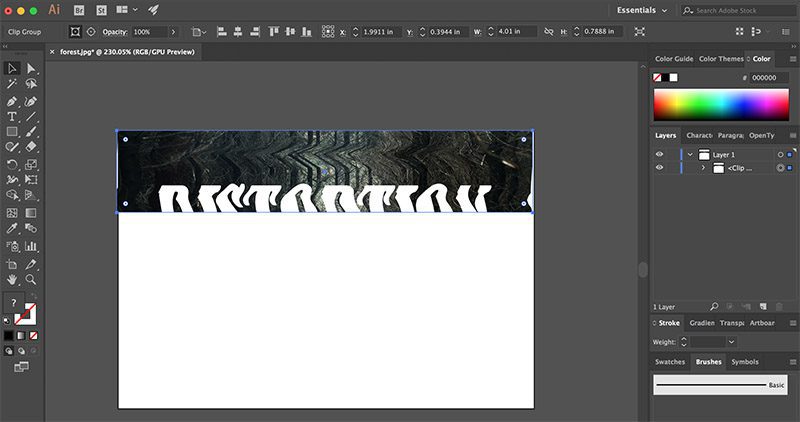
Step 8. Duplicate and Move
Copy the top portion (the non-white part) of the image and paste onto the artboard.

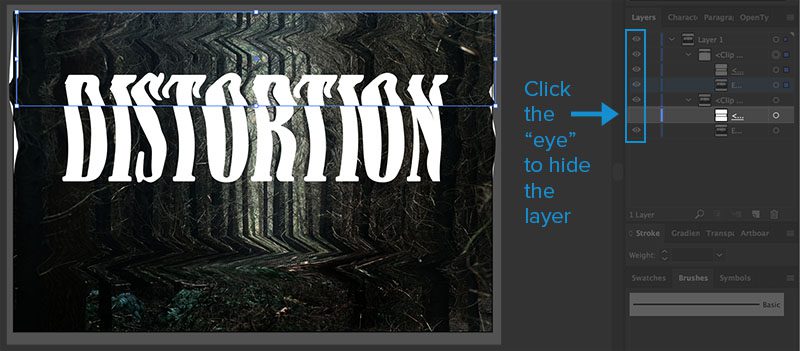
Move the copied portion to the left or right to create a broken glitch effect. While you do this, you can hide the layer that contains the white box so that you can see what your final image will look like.
To hide a layer, click on the eye icon to the left of the layer name.

Step 9. Draw Lines
Use the pen tool to draw a straight line across the top of the image. Make sure that the fill color is white or gray and that the outline color is set to transparent. Copy that line and paste it at the bottom of the image.
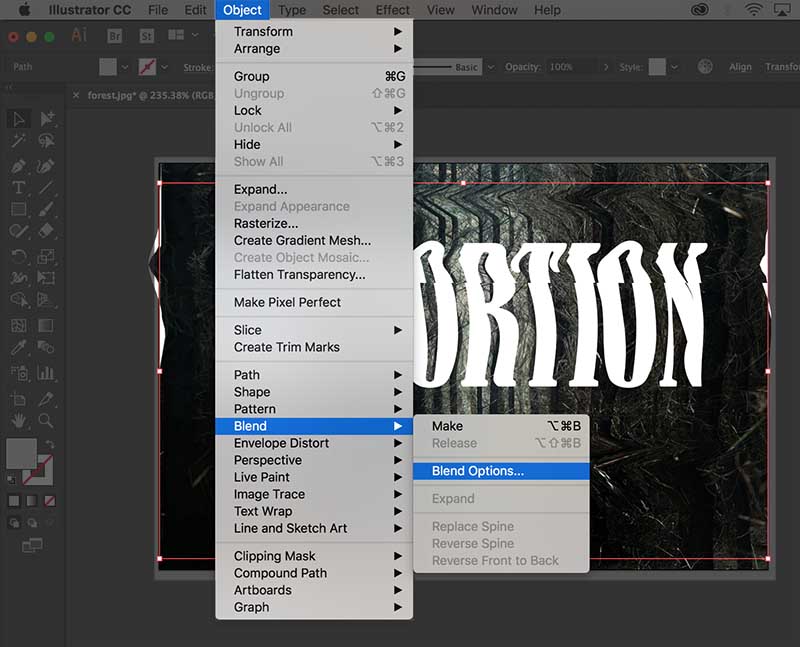
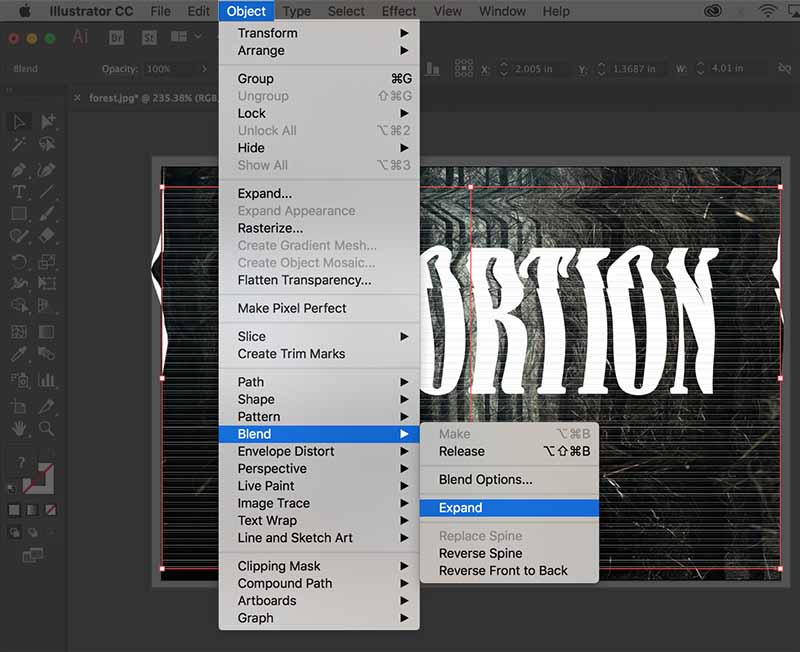
Step 10. Blend
Select both lines (Shift + click on each line) and go to Object > Blend > Blend Options.
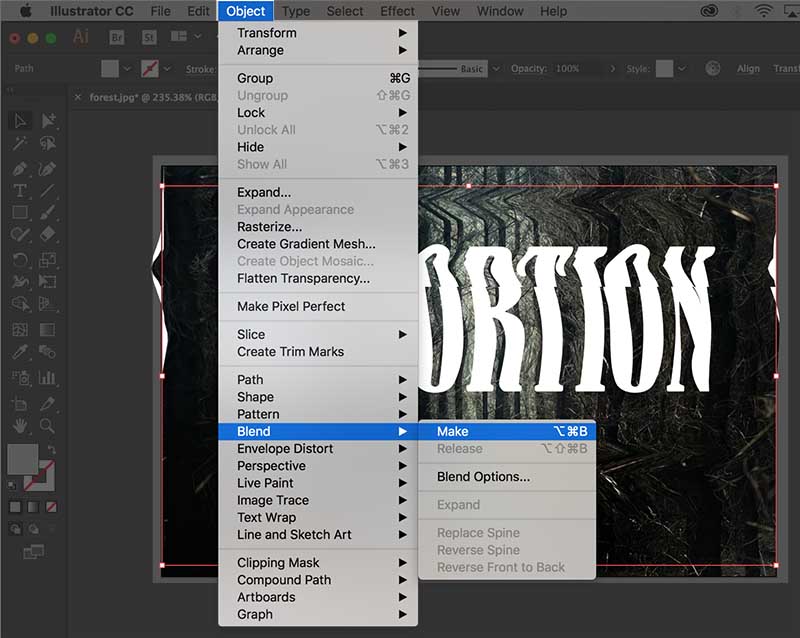
A menu will pop up. Select “Specified Steps” from the drop-down menu then type 200 in the box and click OK.
With the two lines still selected, go to Object > Blend > Make. Finally, go to Object > Blend > Expand. Lower the opacity of the lines if they are too prominent.
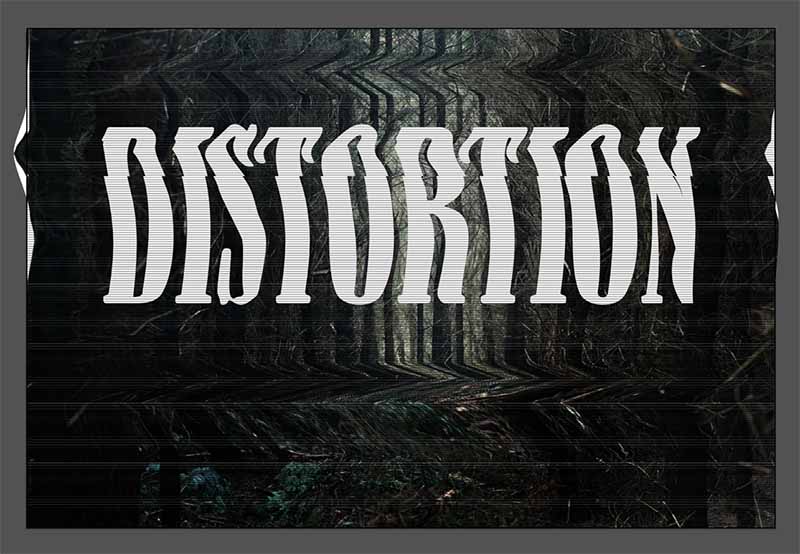
Step 11. “Crop” the Image
The distortion process is done, so pat yourself on the back!
Now we just want to crop the image a bit to get rid of the white parts on the sides. Unfortunately, Illustrator does not have a crop tool but a clipping mask will do the trick.
Draw a rectangle over the area of the image that you want to keep.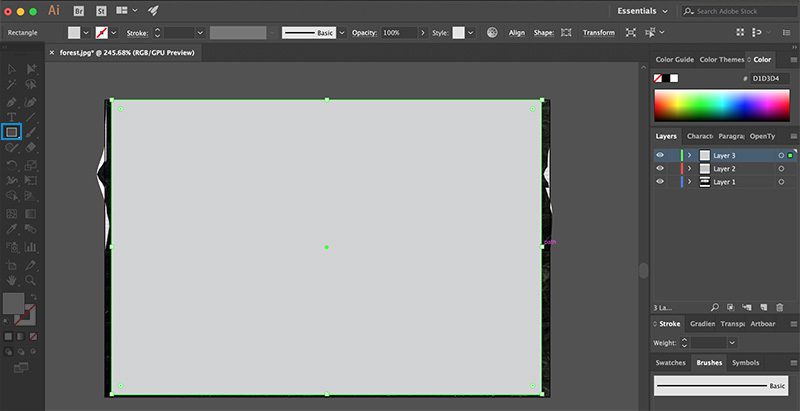
Select all of the layers and go to Object > Clipping Mask > Make.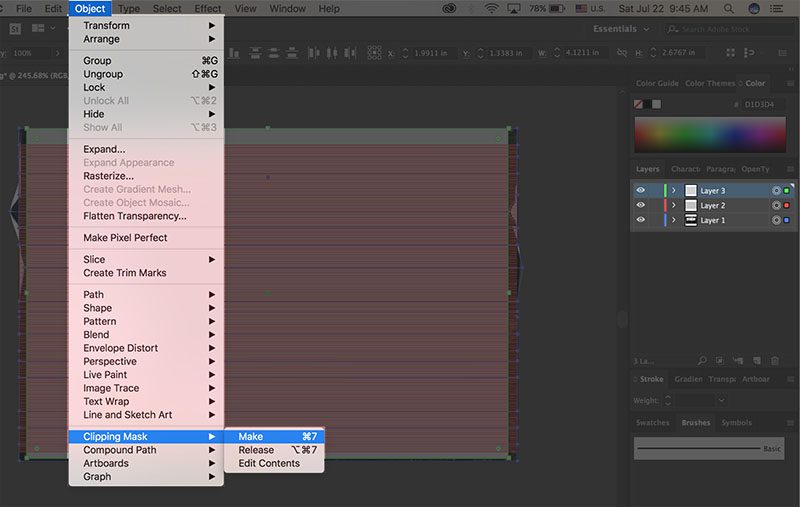
Now your image is “cropped.” You can also adjust the size of the artboard to get rid of the white borders.
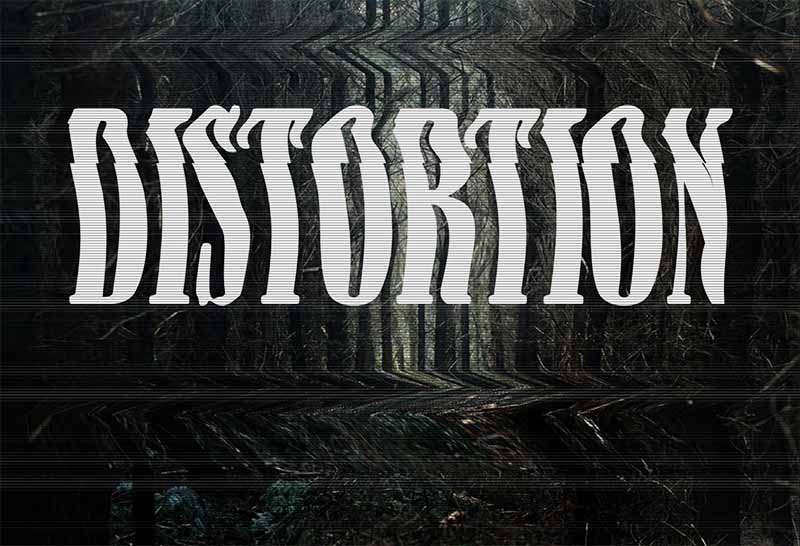
There you have it! You are now the master of the Token Creepy Video effect (we’re not sure if this name will catch on). This glitchy VHS look will serve you well in all of your mysterious, vintage designs. Now go forth and raise some goosebumps!
| Discover More Nostalgic Images |


