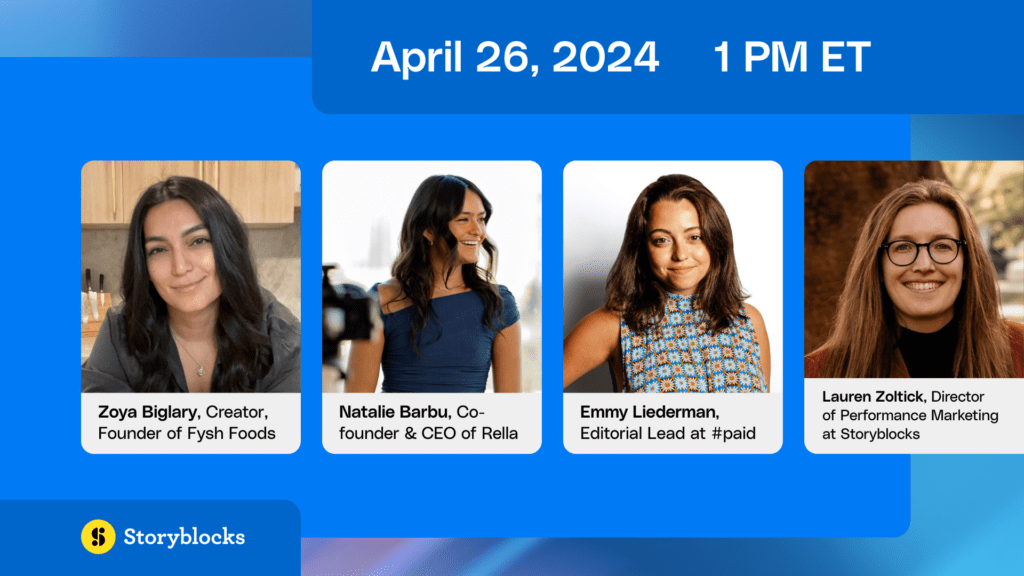
Let’s talk patterns—sometimes it’s good to repeat yourself. From paisley medallions to bricklay to interlocking geometrics, there’s no end to repeating designs to choose from when looking for the right background or texture. And there are certainly plenty of stock seamless patterns out there—but what if you have a specific design in mind? In those cases, it’s helpful to know how to create your own custom seamless patterns.
Adobe Illustrator’s pattern tool makes creating seamless patterns incredibly easy–so easy, in fact, that the hardest part is deciding what to put in your design. Luckily, our library of stock vectors can help with that part of the process.
To get started, pick a shape or design that you want to use in your pattern. It’s also easy to pick and choose elements from existing patterns or preset design elements. For this tutorial, we used these stock owl vectors and stock animal vectors.
Step 1. Open the Files in Illustrator
Open all of the files that you’ll be using to make your custom design.
Step 2. Select Objects
Use the group selection tool to select the first object for your design. If you select more objects than you intended, just Shift+Click on the elements that you don’t want to include in your final design.
Once selected, copy the element and open a new file (of any size) in Illustrator. Paste the element into the new file. Continue to copy all of your desired elements and paste them into the same Illustrator file.
Step 3. Create a Custom Design
Experiment with the placement and colors of the objects until you’re satisfied (this is the difficult part).
Here is the design that we created and the hexadecimal codes for each color:
Join Our Creative Community
Access the best video tips, design hacks, and deals straight to your inbox.
Step 4. Add a Background (optional)
If you’d like to add a background, draw a rectangle that covers the entire canvas. Expand the Layers tab and find the rectangle layer. Double click on the empty space just to the right of the eye icon. A lock icon should now appear in that space. Locking the rectangle layer will ensure that you will be able to select your design elements without the rectangle getting in the way.
Step 5. Use the Pattern Tool
Select your entire design and click Object > Pattern > Make. Click “OK” on the box that pops up.
Step 6. Experiment with Placement and Spacing
The pattern tool has some great functions, so we recommend that you do some experimenting. In the images below, we highlight some quick and easy changes you can make to your pattern to achieve the desired placement and spacing.
Tile Type
This function allows you to change the alignment of each “brick” in your pattern, In this case, we decided that we liked the “Brick by Row” option best for our owl pattern.
Brick Offset
This function is only available for the Brick by Row and Brick by Column tile types. The Brick Offset button determines the location on the canvas where each row of the pattern starts. Click through the different options to get a feel for how this tool works.
Width and Height
This option allows you to change the width and height of the spaces between each brick in your pattern.
Copies
This function allows you to see what your pattern would look like with different dimensions. Each option measures your pattern by bricks, so for our current example, the 7×7 option will show 7 owls x 7 owls.
Dim
The “Dim” option has no effect on your final pattern, but you might find it useful as you experiment with the size and spacing of the bricks. The lower the percentage, the dimmer the rest of the pattern becomes while the highlighted brick retains its original luminosity.
Step 7. Click “Done”
Once you are happy with the spacing and placement of your pattern, click “Done.”
Step 8. Put Your Pattern to Use and Start Creating!
This is where we get to test out our custom pattern. Select the rectangle tool, then select the last swatch under “Swatches.” This swatch is the new pattern that we’ve just made.
Once the swatch is selected, simply draw a rectangle. If you adjust the size of your rectangle, the pattern will automatically fill the entire area.
But how can we tell that this is a seamless pattern? Simply copy and paste the rectangle you just made. Align the rectangles and you’ll see that the pattern lines up seamlessly!
There you have it—your pattern is complete!
Now you can let your creativity run wild and create your own seamless patterns. There’s no need to feel limited by existing designs—just pick and choose what you like to create something completely new. To get you started, you can check out our hand-picked vectors from a handful of vector collections, all royalty-free with unlimited downloads when you’re a Storyblocks member.
Leave a Reply