There’s nothing worse than seeing a piece of footage that sticks out like a sore thumb. When working with video, the goal is always to make it feel like a natural part of the production. But let’s face it —every video production has a budget. When your budget doesn’t quite include an international trip for that perfect establishing shot, how do you balance your creative vision with limited time and resources?
In this tutorial, I’ll give you tips and techniques to help you seamlessly match your stock footage to your video production using Adobe Premiere.
How to Match Your Stock Footage in Premiere
In the post below, I’ll share tips and Adobe Premiere techniques to match your stock footage. Make sure to watch the clip below to learn more about Premiere’s Color Match Feature.
Part 1: Choose Your Footage Carefully
Stock footage can be a powerful storytelling tool, connecting scenes and setting the stage for your production. Above all, it’s a cost-conscious way to bring professionalism to your productions when budgets are limited (and they always are.)
The hard part is making stock footage fit in gracefully. We’ve all seen video productions where the stock footage was clearly not shot by the same production team. The best stock footage never causes the audience to consider that it was stock footage at all.
The most important part of integrating stock footage comes at the selection stage. As much as possible, you should try to find stock clips that match your footage. Check out Storyblocks’ collections to find curated footage that may match your project.
As you choose stock footage, first make sure that the technical details match your existing production. For example, if your finished video is 60 frames per second, using a 24FPS piece of stock footage is going to look mismatched. Also, ensure that the stock resolution is at least as good as the rest of your project so that you don’t have unused pixels or stretch your stock.
Second, beyond the technical details, it’s important to make sure that your stock footage matches the mood and tone of your video. We’ll cover color grading tips below, but it helps to choose something that is similar. Because you’re typically downloading finished clips, the clips have already been graded by the videographer so you’ll have less latitude to adjust it further.
Also, consider leaving yourself creative freedom when writing your video for stock footage to fit in. For example, does your video have to be set in New York City, or is a more general urban cityscape okay as the exposition? If you aren’t overly specific about the production details, you’ll have more options while choosing stock footage.
Stock footage clips typically don’t work well as a standalone scene. Don’t try to use it to replace shooting scenes. Instead, use stock footage to complement your productions by helping set the location, for example. Establishing shots are the perfect example of good stock footage usage.
Part 2: Color Grading To Match the Footage
While choosing the right clip is important, you can also adjust the look and feel of footage to make it fit your production. In Adobe Premiere, the Color Match tool is a powerful way to harmonize the color settings of two scenes.
Start off by applying color grading to your non-stock clip. Using the Lumetri Color panel, you can pull on the tools and features to re-style your footage. Of course, it’s important that every clip in your production fits a common set of color looks and styles, so first, start by aligning your captured to that common look and feel.
Also, check out our blog post on the 15 best premiere pro plugins
Now, start to bring your stock footage into your project. Place it on the timeline in the place you have in mind to use it. Now, it’s time to use the magic of Color Match to start integrating your stock footage.
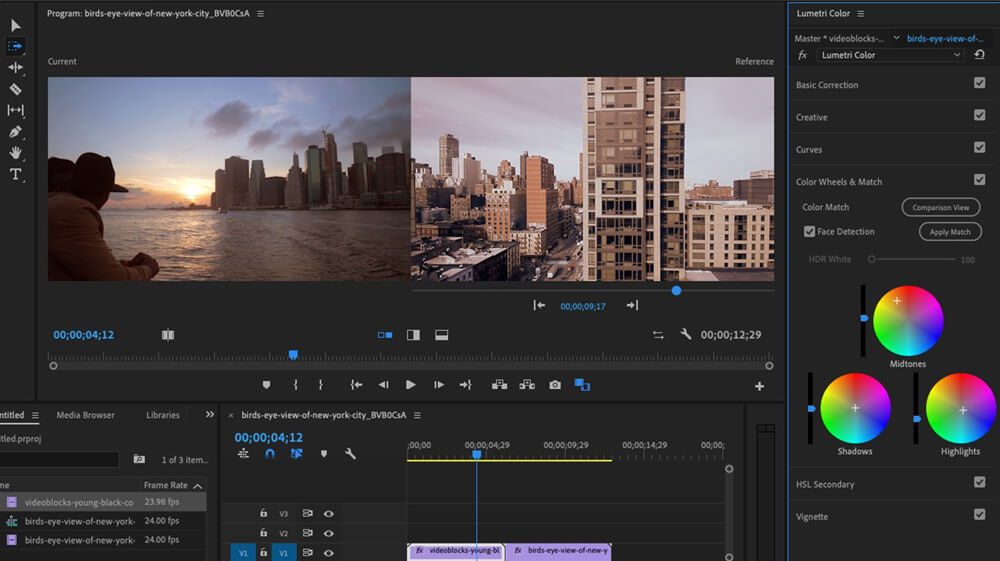
Start by selecting an ungraded clip. In my case, that’s a scene of a couple looking out at New York City. I want to transition into a flyover shot that has some strong, warm color grading added to it. The first clip needs to match the second.
The clip on the right has already taken on a strong, warm color grade that I want to match.
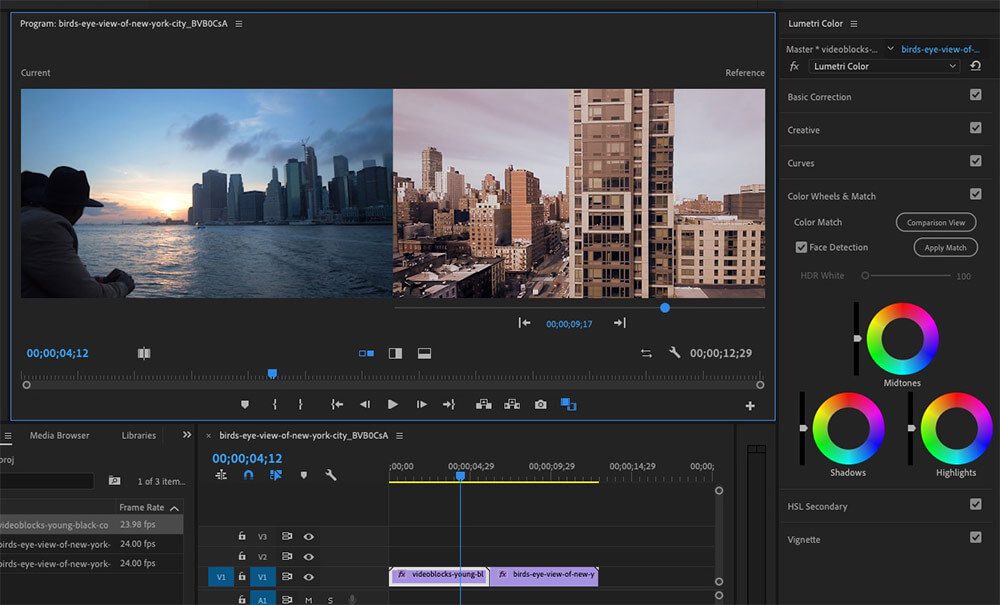
With the first clip selected, I’ll open the Color Wheels & Match option. Now, click on Comparison View on the menu to open up the split view. Use the timeline on the inset window on the right side to choose the scene to most closely match your footage.
Now, click on Apply Match. Premiere will quickly analyze the scene and apply a basic color grade to your selected clip.
Notice that the selected clip quickly takes on the warmer feel of your clip on the right.
In my example, Premiere added quite a bit of warmth to the midtones, but I still want to pull the blue hues down. The source clip has very little blue in the sky and it’s best if we continue to dial that down to match. As you may know, there are many ways to do this in Premiere, and in my example, I pulled the Hue Saturation curves to apply the adjustment.
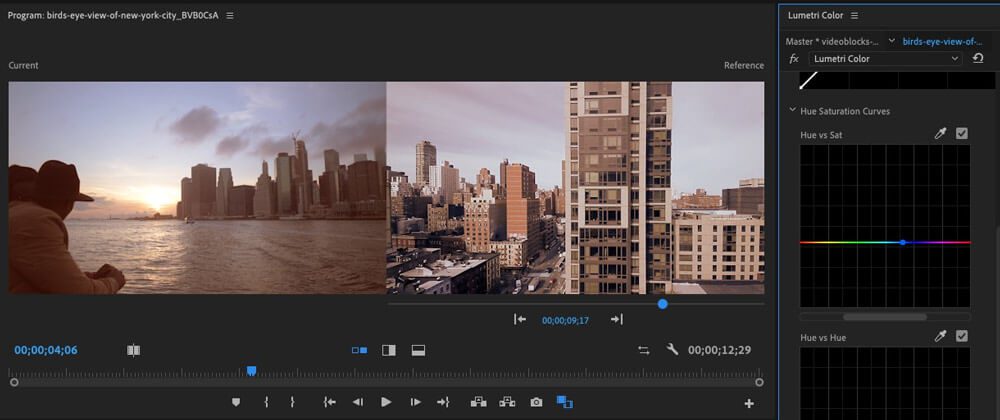
In my example clip, I pulled the blue saturation down to remove most of it from the sky.
This might not be the last tweak that you need to make. Depending on how much time you have, you can keep using the color settings until your clips are even closer.
With this adjustment, my stock footage is certainly close enough to fit in. When time is of the essence, this approach with just a few clicks is enough to match most scenes close enough. Remember that your stock footage will likely only be on screen for a few seconds and that your audience is often far less critical than you are.
Don’t hesitate to use stock footage to fill in those crucial scenes. Choose your footage carefully and adjust it to match the rest of your clips. When you follow the tips in this tutorial, your audience will never know that your footage was from a stock library.