Low poly portraits have become hugely popular for their minimalistic, edgy, and three-dimensional look. And while you may not recognize the term “low poly,” you’ve probably noticed these geometric portraits popping up everywhere—whether it be in advertising campaigns, illustrations, or even decorative art. Considering the popularity of low poly images, this technique is a great design hack to have under your belt, and it’s surprisingly easy to replicate.
Stock images pair perfectly with this design technique because of their versatility and color variation. Your end product will also look completely different from the original, so you save money but won’t risk running into the same image anywhere else. Our stock image library is also easy to search, so you can quickly find images that are perfectly suited to the low poly technique.
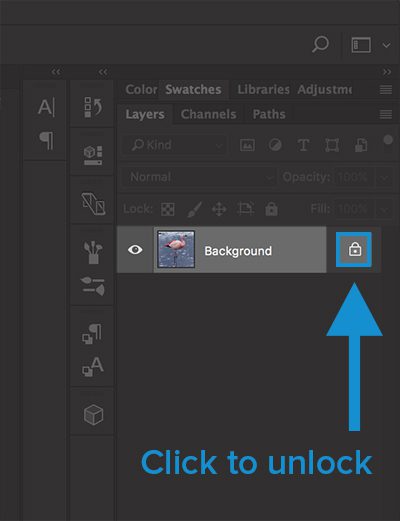
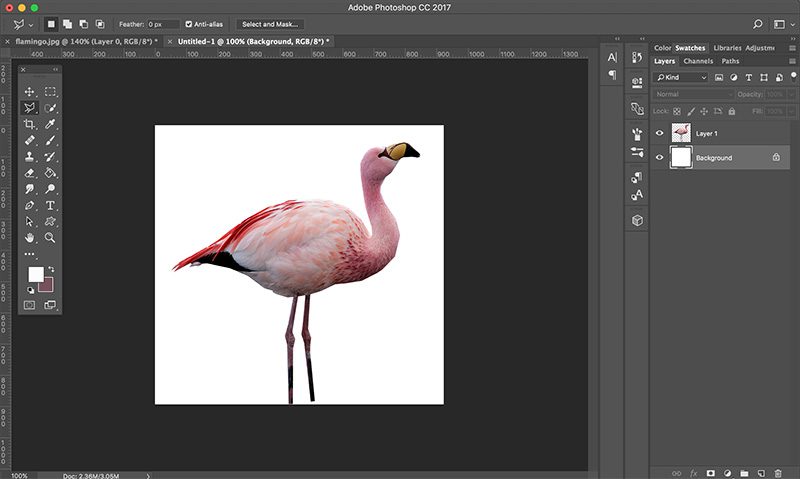
Step 1. Open Stock Image in Photoshop & Unlock the Background
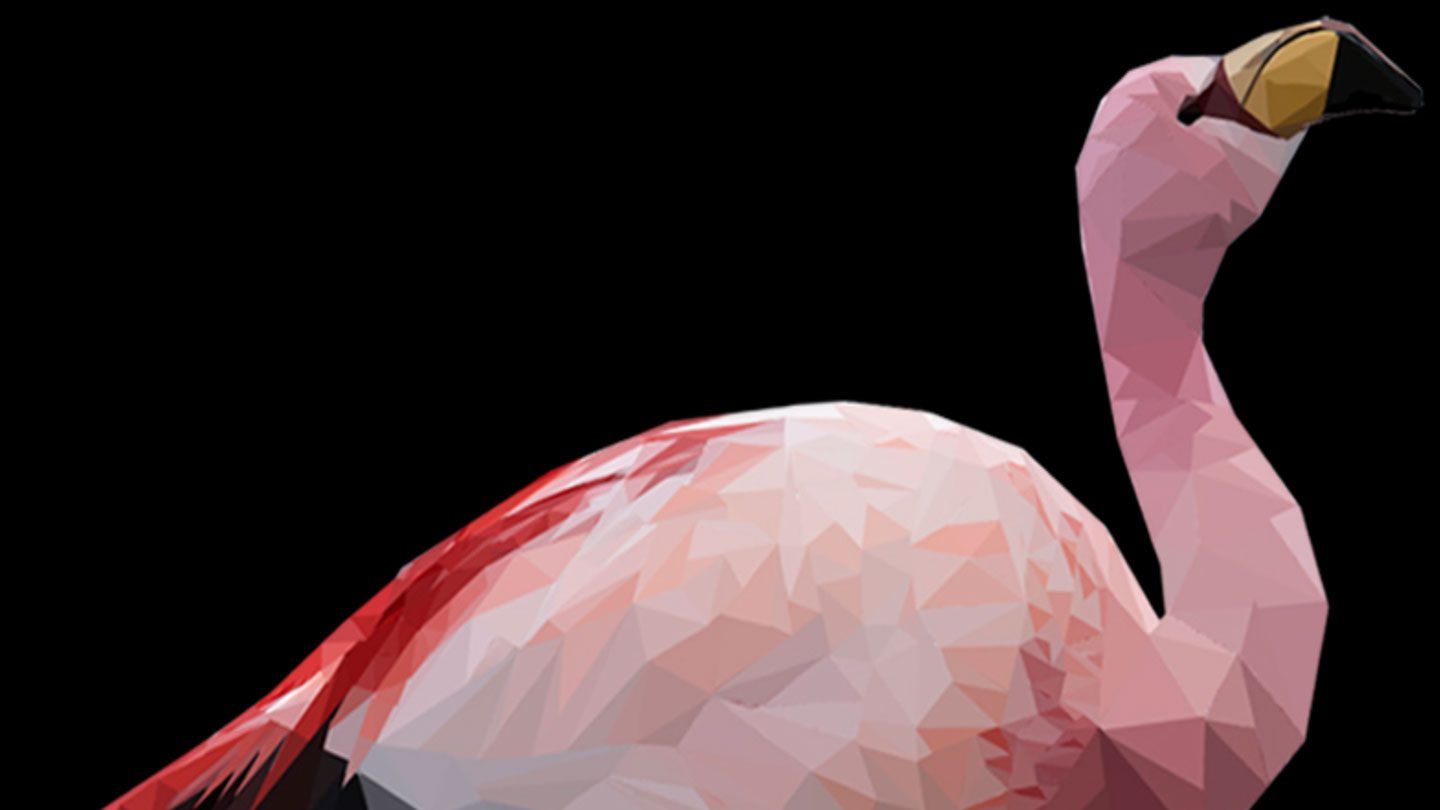
We used a stock photo of a flamingo for this tutorial, but you can find whatever works for you.
Open the image in Photoshop and unlock the background.
Step 2. Select the Entire Figure
Select the Polygonal Lasso Tool and start outlining the subject of your portrait. It’s totally fine if your outline is a little boxy or sharp—this will just add to the geometric effect of the final product.
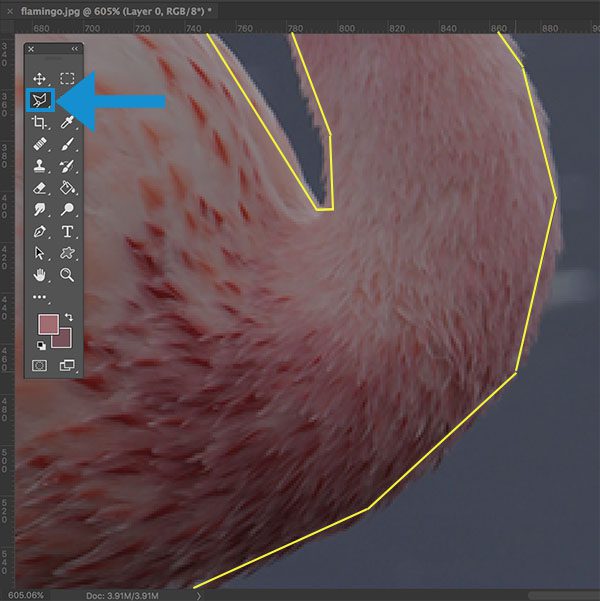
Be careful to include as little of the background as possible. Cutting off the edges of your subject a little bit won’t hurt and might make it easier to avoid including any background colors. You can see in the image below that I outlined the flamingo from the inside to avoid including any of the blue water from the background.
Step 3. Open in a New Photoshop Document
When you finish creating the outline, you will notice a moving dotted line surrounding your subject. This is the selection area. Cut this selection (Command/Ctrl + X) and paste into a new document.*
*If you want to keep the original background, create a new layer and paste your selection onto this new layer. This will prevent any background colors from merging with the subject when you start creating the low poly effect.
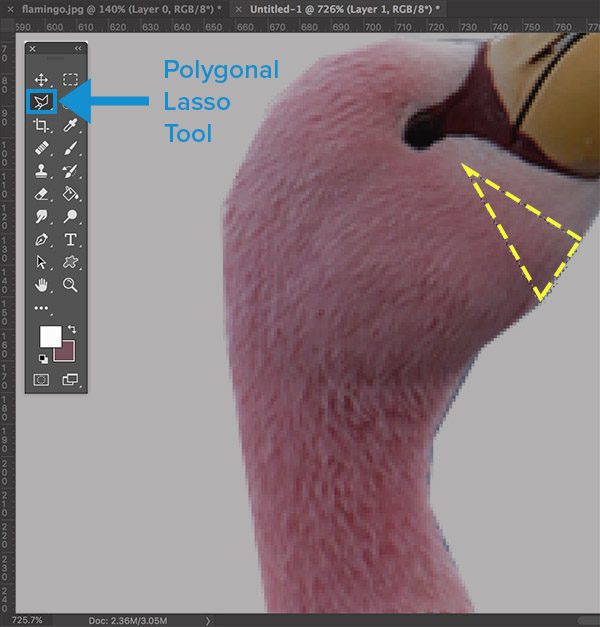
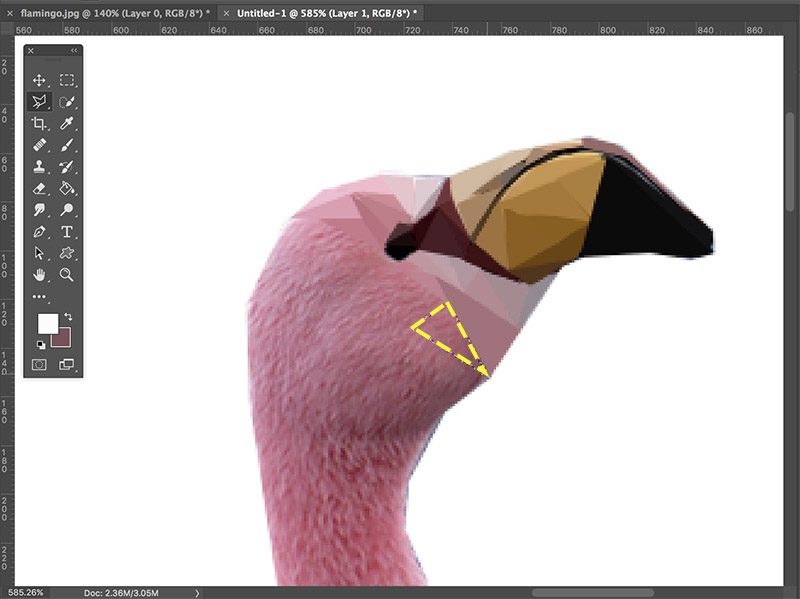
Step 4. Make a Triangular Selection
Select your subject’s layer (in this case, the flamingo layer). Make sure that the Polygonal Lasso Tool is still selected, and pick an area to draw a triangle. For each of your triangles, you want to select areas that have similar coloring.
Now, draw your triangular selection.
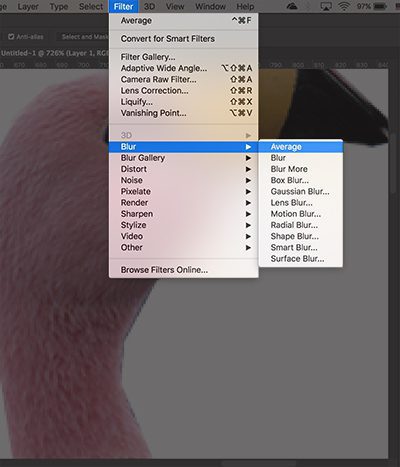
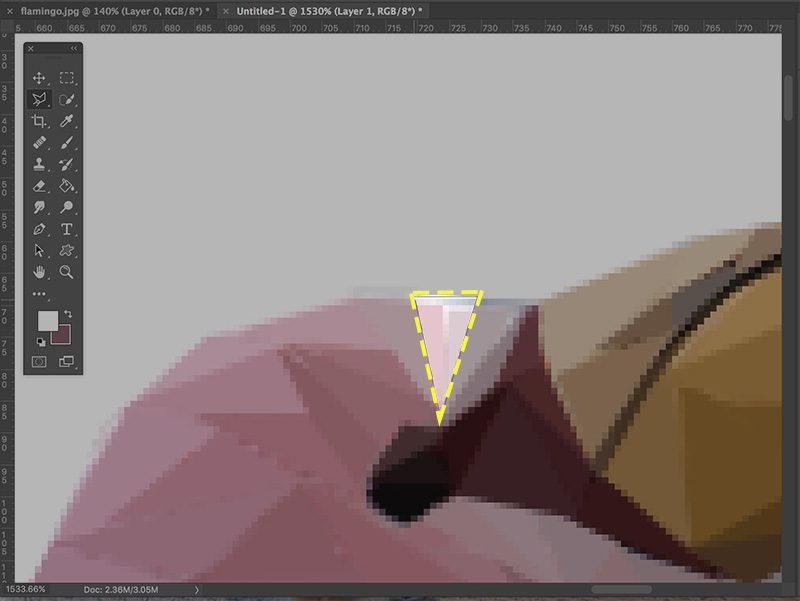
Step 5. Filter the Selection
With the triangular area selected (you should see the moving dotted line), select Filter > Blur > Average. This creates an average of all of the colors within your selection area.
Once the selection area is “averaged,” you can draw your next triangle. Make sure that one side of your triangle lines up with one side from the original. This will prevent any gaps between triangles.
Now that you’ve already used the Average command once, you can simply hit Command + control + F (Ctrl + Alt + F on PCs) on your keyboard. This keyboard shortcut repeats whichever filter was last used.
Step 6. Repeat Forever (Not Really)
This is the time-consuming part of the tutorial. The low poly technique itself isn’t hard at all, but making all of those triangles does take a chunk of time. Settle in with a good podcast or TV show in the background and the time will quickly fly by.
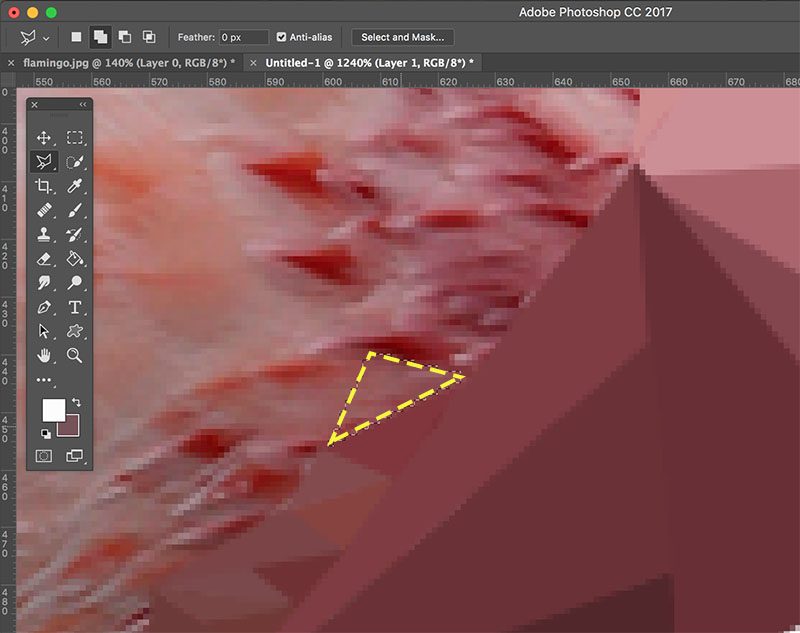
Tip 1: Filling in the Gaps
You might notice gaps between some of your triangles. These are easy to fix—just draw another triangle that covers the gap. (The gaps also might not even be visible once you zoom out to look at the final product.)
Tip 2: Getting the Details
Make smaller triangles to capture the more detailed areas of the image. Luckily, you don’t have to use small triangles for the entire portrait. The low poly effect looks best with a wide range of triangle sizes.
Keep on making those triangles until you’ve covered the entire image.
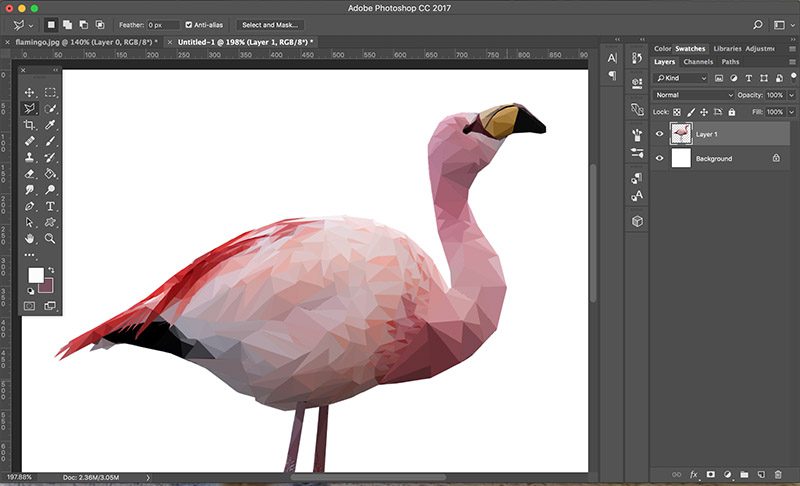
Now give yourself a huge pat on the back (and maybe take a break from the computer screen). You’ve successfully created a low poly portrait! This is an incredibly useful technique to have in your design arsenal, so congratulate yourself on a job well done.
| Get Geometric with More Graphics |