
Cinemagraphs are so hot right now–perennial favorites of digital marketers and designers for their subtle use of movement, cinemagraphs have moved to the mainstream and are making waves online. Reminiscent of Harry Potter’s Daily Prophet and its magically moving pictures, these graphics are eye-catching and mesmerizing. Not-quite movies and not-quite stills, they add a touch of magic and a little something special to your digital content. In this tutorial, we will walk you through the creative process of finding dynamic content—including royalty-free stock footage—and turning it into a spectacular cinemagraph in seven steps or less.
Step One: Finding Content
The first step to create a cinemagraph is finding the right content to transform into a moving image. While adding motion to a static photo is an option, for simplicity’s sake we are going to focus on working with something already in motion—an awesome clip from our stock video library. The video we will be working with can be found below.
Download this clip of a girl chilling in a swimming pool.
When crafting a cinemagraph, it is important to use video content that is stationary; the camera shouldn’t move. Any movement comes from the actor or background scenery. Now that we’ve selected our video it’s time to begin crafting.
Step Two: Choosing the Moving Pieces
The key to a successful cinemagraph is its simplicity. It’s adding as little movement as possible, while still maintaining a touch of motion. Your selection is very important because you do not want to overwhelm the cinemagraph, and you want to loop the content as easily as possible. Once you’ve decided what pieces of the video you would like to freeze and what pieces you’d like to move, go ahead and import the content into Photoshop. You can achieve this by dragging your content over the Photoshop icon and releasing. Photoshop should open the file as is. Make sure your “Timeline” is selected in the Window tab so that your video shows at the bottom of the project. Now that the video has been opened in Photoshop, we can begin step three.
Step Three: Select and Trim
Congratulations, you’ve finished the longest and hardest part of this process. Selecting the video is typically the most difficult part of this tutorial. Now that your video is in Photoshop, resize and trim your content to the portion you’d like to convert to a cinemagraph. Sizing is important because the raw video is fairly large and will require more of your computer’s RAM to render and process. Sizing will also play into the final export of the video if you are attempting to convert your cinemagraph into a .gif file.

To resize, select “Image” and “Image Size” and adjust the the pixel dimensions. For our example I have resized our video to 600px by 338px at a resolution of 72 dpi.

As for trimming the video, you will want to use the timeline window now at the bottom of your screen. If this window is not open, go into your “Window” tab and activate it. Once open, you can trim your clip using the scissor tool. While trimming, you may also consider deselecting the audio track to turn off any sound that will play in the background when you finalize your project. We have decided to work with the portion of the video between the 00:14:00 and 00:17:15.
Step Four: Image Overlay
Now that we have our video segment trimmed and sized correctly, we need to take a still of the content. To do this, find the exact frame you would like to use as your cinemagraph’s main image, then select Command + Option + Shift + E (Mac) or Ctrl + Alt + Shift + E (PC). This will create a still from your video. Make sure that this layer sits above your video content layer and matches the time frame. From here, we want to mask out any portions of the image we want to move. For this project, we want the water behind the woman to be our source of motion.
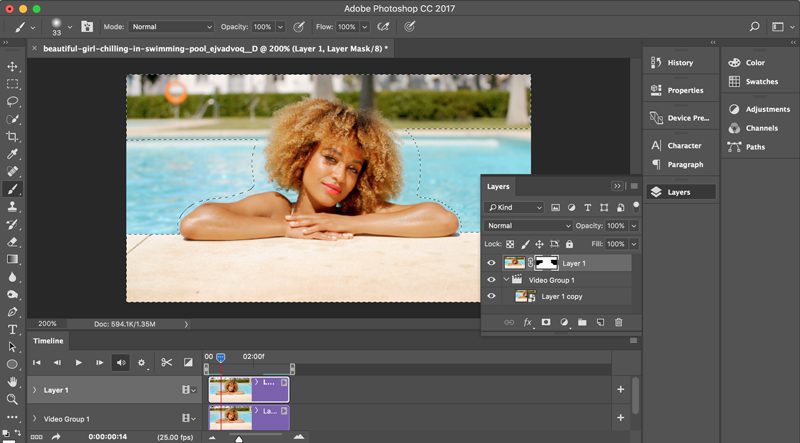
Using the mask tool, mask out the water portion of the image. Once this is complete, watch the rendered video once or twice by pressing the play button beside the scissor icon in the timeline frame. (You can also press the spacebar to activate the play mode.) Make sure your mask only shows the movement you want it to. If any portion of unwanted motion manages to catch your eye, be sure to make adjustments to your main mask layer.
Step Five: Initial Export
If you are content with a single loop of your cinemagraph then your job is done. Export your video in the format of your desire. If you want your content to loop smoothly continue to follow these next few steps.
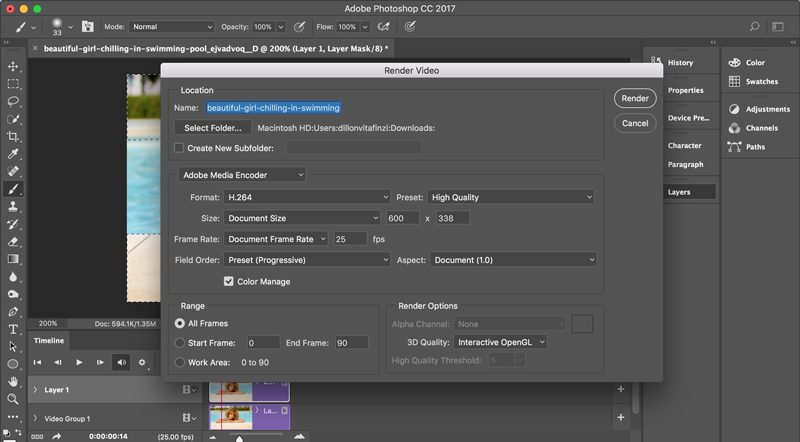
Export your content as a video file, then re-import it back into Photoshop much like we did in Step Two.
Step Six: Looping your Cinemagraph
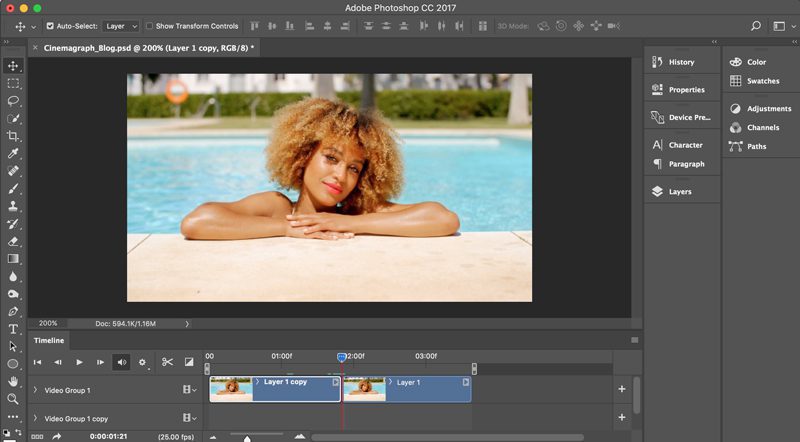
Once you have re-imported your initial exported video, find the midpoint of the video. For us, that would be right around 00:01:20. You will want to split your video at the midpoint and reorder your clips so that the second half is where the video starts and the midpoint is where the video ends.
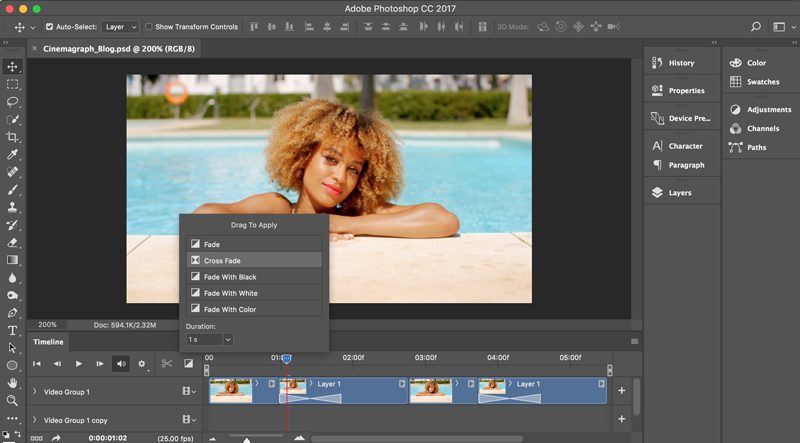
When you have re-ordered your clips, apply the cross-fade transition (found by selecting the Black and White box next to the scissors icon in the timeline window) to the clips and expand as much as your video requires. This will blend the jump cut between clips, making the video loop smoothly. We’ve doubled this process to add some length to our clip.
Step Seven: Export
When you feel confident that your video is where you would like it to be, export your video. Depending on what you would like to use your cinemagraph for, the options for exporting vary. MP4 and Webm are some of the more common web related video exports. Photoshop has no problem exporting an MP4. If you are looking for a WebM version, you will need to consult another resource such as Zamzar.com.
Another way to export cinemagraphs is as a .gif file. If you are exporting your video as a .gif you will need to consider the amount of frames (500) you are using and the overall color count (250), as both of these have hard limits. Once you export, your Cinemagraph is complete. Congratulations!
Ready to add a touch of magic to your site? Start by finding the perfect visuals in our royalty-free video library.


