
Whether you have a small business, blog, or are a budding graphic designer, Adobe Illustrator is a powerful tool that will boost your branding, marketing, and design skills. That’s why we’ve created this primer on some basic Illustrator techniques so you can level up your creativity and customize any of the royalty-free vectors from our library of graphics
But first, you may even be thinking to yourself, “What exactly is a vector?” Don’t worry, the details aren’t common knowledge. Here’s a quick rundown on Vectors 101.
What Is A Vector?
Digital art can be broken down into two main categories: raster images and vectors. Raster images (such as photographs) are made up of individual pixels and are resolution dependent. This means that they cannot be scaled without loss of quality and should generally not be used for designs that rely on scalability—or the ability to change the size of an image—such as web pages.
On the other hand, vectors (such as icons or logos) consist of points, lines, curves and polygons on an algebraic grid. Wait. Hold on. Yes, we mentioned the A-word, but relax. You don’t have to know algebra to work with vectors. Basically all you need to know is that they are completely scalable and resizable without loss of quality.
In short, the pixels in raster images will lose their quality when you size them to be larger, but vectors do not. If that’s all you know about vectors, then you’re golden.
While Adobe Photoshop allows you to use vectors within the program, you can’t edit the vectors with the same freedom that you can in Illustrator; this is because Photoshop only outputs rasterized graphics. Adobe Illustrator allows you to completely customize and manipulate vectors, exporting these designs as scalable graphics.
In case you need a quick reminder for everything you just learned, here’s a ready-to-pin infographic you can always reference again in the future.
Now, let’s see what we can do with these vectors.
1. Downloading Vectors From Storyblocks
It’s important to know which file type distinguishes a vector from a raster image. As indicated in the infographic above, vectors can be an .ai, .eps, .pdf, or .svg file. Raster images can be a .jpg, .png, .tif, or .gif file.
On Storyblocks, there are sometimes a few file types to choose from when you download your chosen vector. Depending on the image, you may have the option to download a .jpg, .eps, or .png. If you would like the vector version, be sure to download the .eps file.

2. Editing Vector Colors
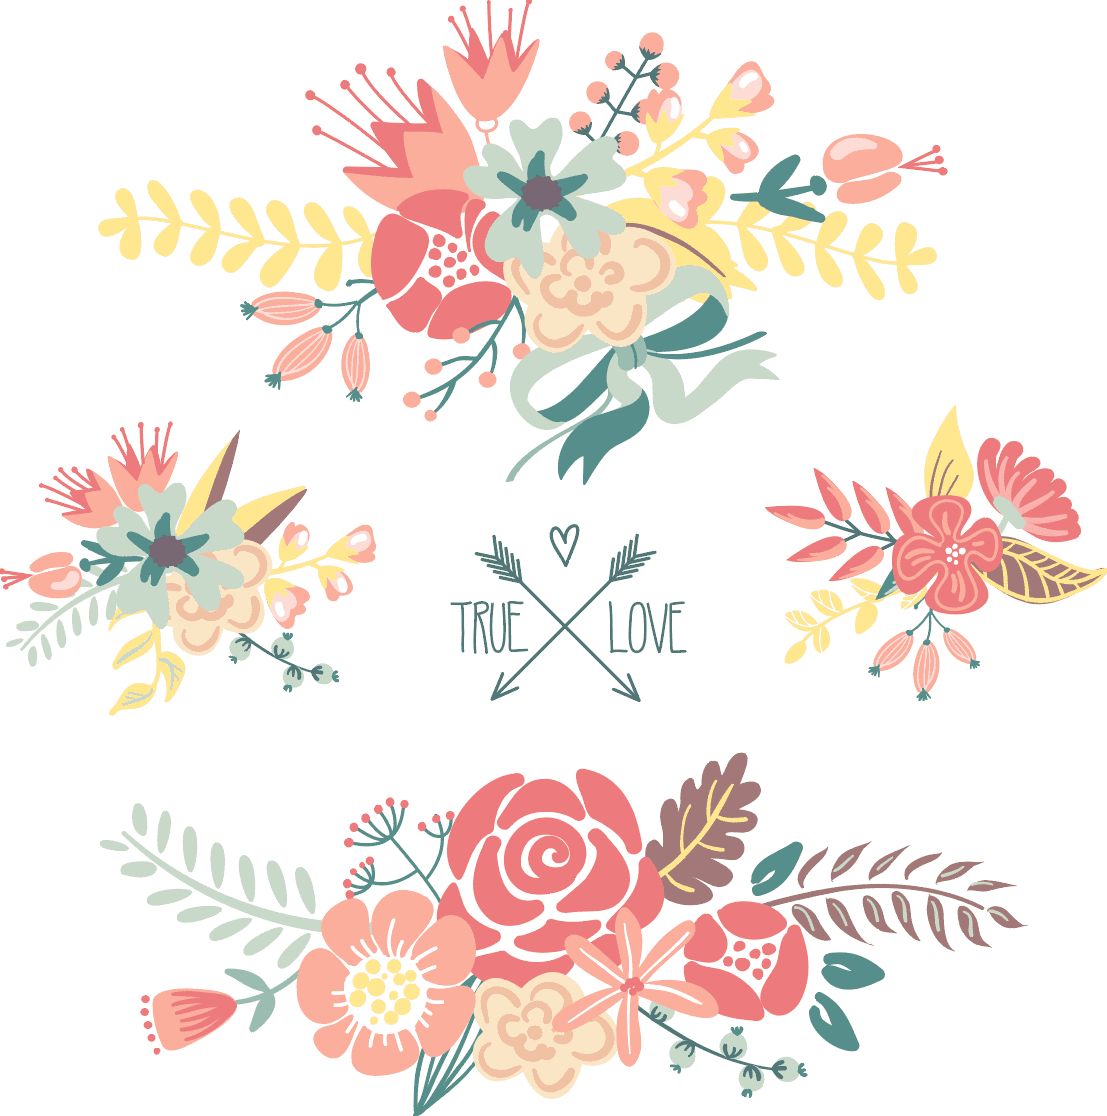
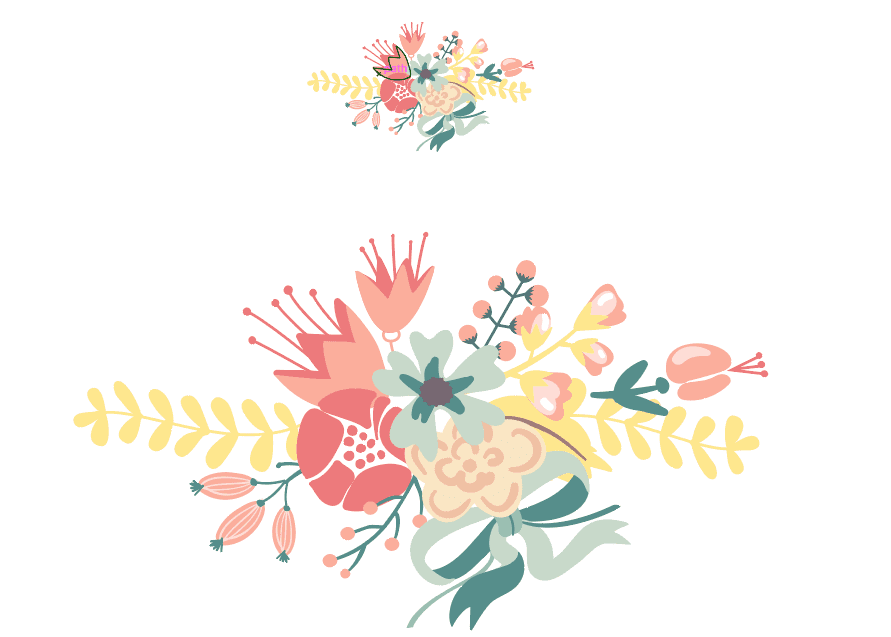
Once you’ve downloaded the proper file type, you can open the vector in Illustrator. We’ve decided to play with this image of floral bouquets, if you would like to join in with our edits.
Take a moment to hover around the image and notice the outlines of each individual shape.
These shapes can easily be made different colors. Let’s say you want to change all of the shapes that are the darker brown color to a golden yellow.
Step 1. Choose the Selection Tool (keyboard shortcut – V).

Then select the shape you wish to change the color of. If you want to select more than one shape, hold down the shift key while you click each element.
Step 2. Double click on the Color Picker.

Step 3. Choose the color you want those shapes to become. If you want to use the exact same color as us, we chose the hex color #FFE888 which can be typed into the text area on the Color Picker. Click OK.

And just like that, you’ve changed the a major part of the design.
3. Editing Vector Colors (Alternate Method)
Confession time. That was the slightly more complicated way to change every element with the same color to another color. That method is useful for when you want to pick and choose individual pieces to alter, but there is a quicker and easier way to adjust them all.
The quicker way is to choose the shape with the color you want to replace. Then go up to your menu bar and choose Select > Same > Fill Color.
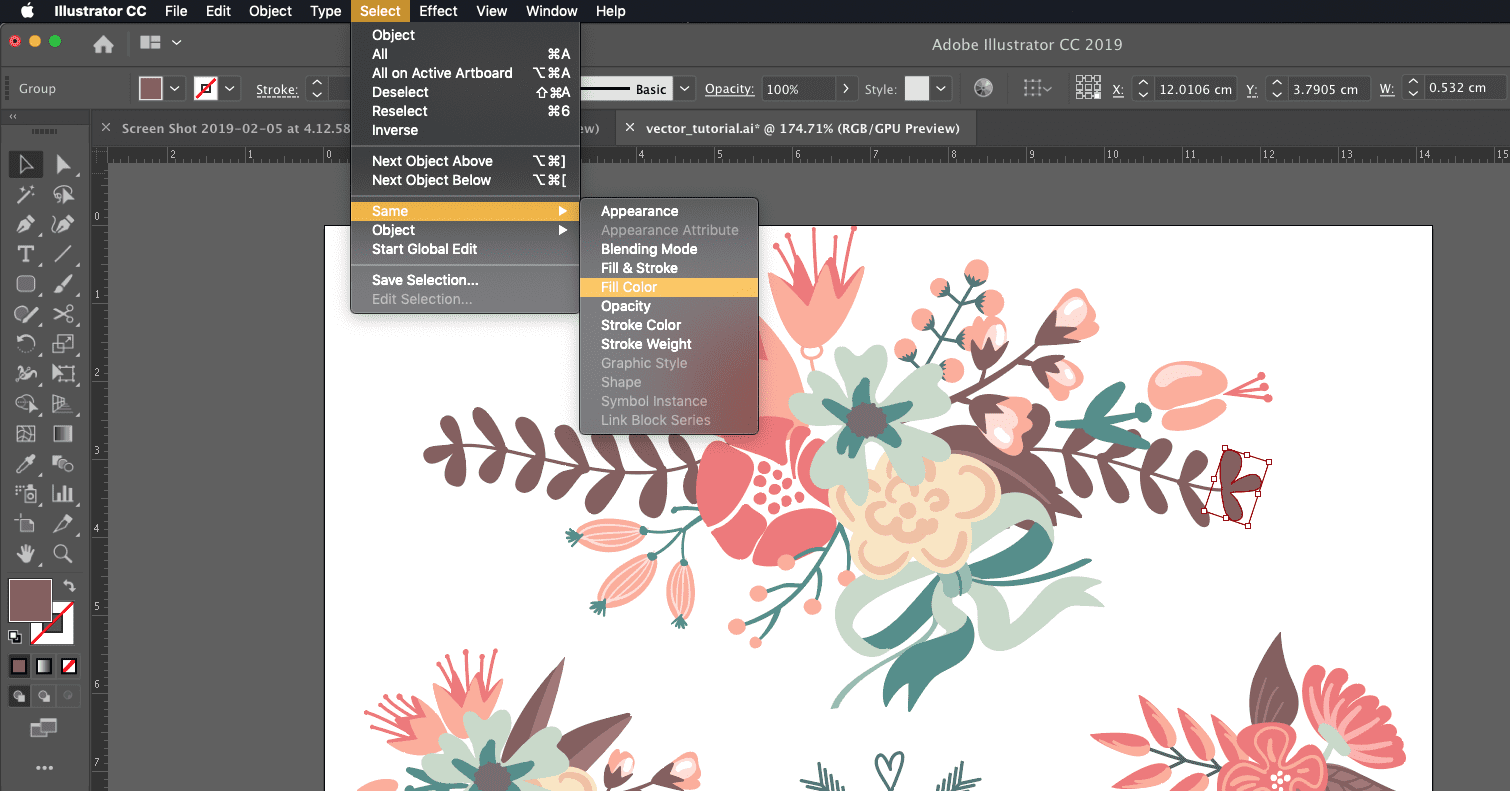
This will automatically select every element that has the same fill color as the one you selected before. Now you can once again double click the Color Picker and choose your new color.
4. Selecting Individual Elements on a Page
Keep in mind while you are searching through our vector library that one of the beauties of working with vectors is you can pick and choose which elements you want to work with, and which elements you’d rather not deal with. So if you see a design that has something you like about it—but maybe not everything will work well for you—you have the option to pick and choose.
For example, we really like the image that we’re editing right now, but not all of those elements are necessary. We would rather work with one cluster of flowers rather than four, and the text can be distracting.
Step 1. Select the elements you don’t like, and simply hit the backspace. You can select multiple shapes by clicking and dragging around each group and using the shift key if you need to do this more than once.
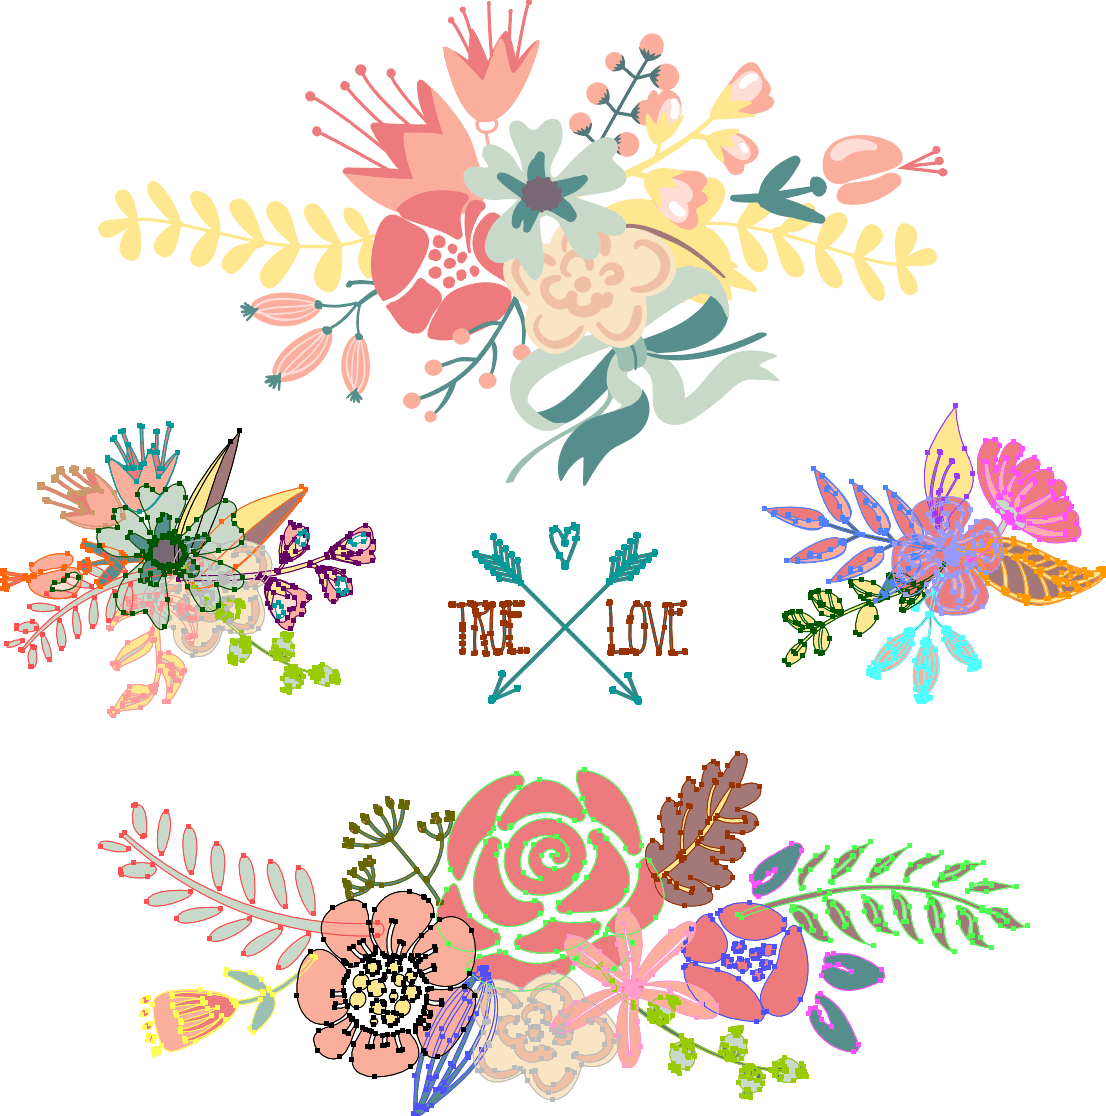
Now we’re left with only the elements we really like or need.
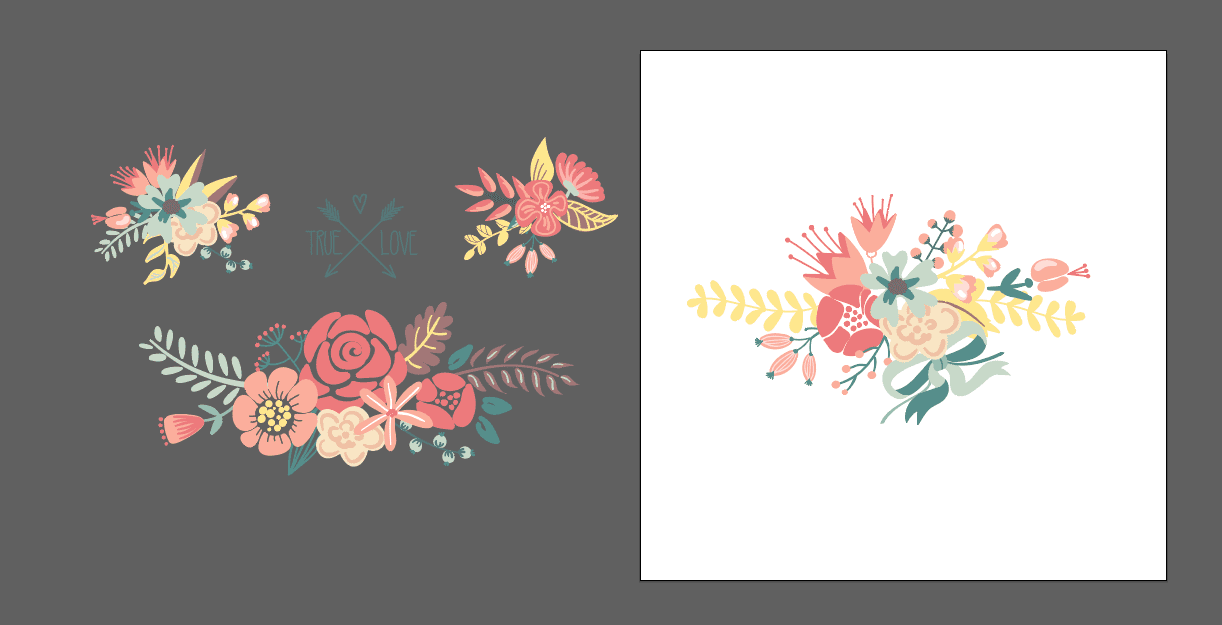
If you think you may want to use those elements later, rather than hitting delete, you can simply move them off your artboard (the white canvas) and keep them around for later.
Step 1. Hit Command + Z (Control + Z for PC users) on your keyboard until all of your deleted shapes come back. This is a keyboard shortcut for Undo.
Step 2. Re-select the items and drag them onto the gray space. Now you have access to those without interrupting your canvas space.
5. Changing The Size of Elements
Adobe Illustrator can be used for more than just color adjustments. Changing the size of the vectors is also incredibly useful. Remember how we said vectors are completely scalable earlier? Let’s explore that a little further.
Step 1. Select your remaining elements on your artboard and notice the rectangle that forms around the cluster. You can select any of the corners, then click and drag to resize the selection.
Pro Tip: You can “group” your elements together by selecting all of them and typing Command + G. This links the elements together so you can move and resize them without re-selecting every piece each time.
If you want to edit each individual element later, simply double click the group to edit within it, or right click the group and select Ungroup.
Step 2. Hold down shift while you’re dragging the corner, and the proportions of the selection will remain intact.
Notice how when you go from large too small and then back to large, the quality of the graphic is not lost. If you had done this same action in Photoshop, then the image would have lost some quality and appear pixelated.
You can also rotate the selection by hovering just outside the corner of the selection box until a rotation symbol appears and click and drag to rotate the selection any way you want.
If you hold shift while rotating, it will snap to 45 and 90 degree angles.

All of these functions can also be performed on each individual piece of the illustration.
Putting It All Together
While these tips may seem basic, they are very important in order to know your way around Adobe Illustrator and can be very useful for when you start working with the program a bit more.
You can transform an already beautifully designed vector and make it your own; and since all of our content is royalty-free, this is a great way to create easy and polished designs for your business, blog, or portfolio.
Now it’s your turn. Are you feeling inspired? What will you create? Check out the vectors below to find some vectors that could be in your next design project.
 |  |
 |  |
| Explore More Vectors |


