The Invert effect is a simple way to make changes in your footage. This is particularly useful if you want to change the colors of a shot or if you need to isolate and remove some elements from the scene. There are many options available when using this effect, so let’s look at how we can use it in Adobe Premiere Pro.
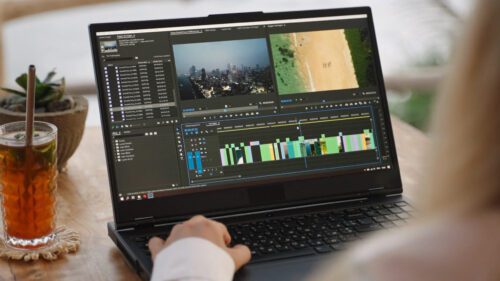
Adobe’s Premiere Pro is the industry standard video editor for professionals, which means that it can be intimidating and confusing for beginners. However, you can also master this robust program with time and patience! One great way to do that is by following our invert effect tutorial.
Steps to Create the Invert Effect in Adobe Premiere Pro
The invert effect flips all the colors in a clip, so white becomes black and black becomes white. You can use it as an interesting stylistic choice or make something more legible on a primarily dark background.
While the exact result of the invert effect may vary depending on what the clip looks like, it’s good to know that you can always customize it by adjusting the opacity and other options.
Let’s take a look at how we can use this effect so you can better understand how it works!
Step 1: Open a clip in Adobe Premiere Pro – The first step is to open your clip in Adobe Premiere Pro. You can do this by selecting file> Import and selecting the file you want.
Step 2: Look at the effect options – After opening the clip, look at the Effect Options drop-down menu (Effects > Video Effects > Channel > Invert). Several options are available for us, including Channel and Blend With Original.
Step 3: Adjust the blend – You can decide what level of blending with the original works best for you, but a setting in the 30 – 40% range is usually most effective.
Step 4: Change the Channel – Channel determines which values within your image are inverted. You can play around with different settings to get the best result.
Step 5: Play with the shape – Now’s a good time to play around with the shape of the invert effect. You can create a mask with the elipse, rectangle, or pen tools located inside the Invert effect in your Effects Controls.
Editing Advice
If you have trouble getting the invert effect to work correctly on your clip, don’t worry. It’s not a complex effect to use, and if you run into problems doing so, don’t be afraid to open up another clip in Adobe Premiere Pro and try it. That way, you can quickly find out what the problem could be. Also, there are a lot of available plugins for Premiere Pro.
It’s important to understand that the invert effect is spatial, meaning you can use the entire clip as a source with this effect.
If you want to customize your video further, try using the mask option instead. Then, focus your editing on the specific area where you need to change the colors and make edits in seconds!
How Do I Invert the Colors of a Video?
When you want to invert the colors of a video, there are a few ways you can do so. The easiest way is to use the invert effect. This will flip the colors of your video, making black white and vice versa. This common technique makes the text easier to read on a dark background.
You can use the color balance effect if you need to remove the blue hue from your video. This is not permanent and should only be used in cases where the blue color cast negatively impacts the content of your video (for example, if it makes skin tones look off).
You can use masks to customize the invert effect even more. To do this, you’ll need to apply masks to your clip – such as black-and-white masks that make a section of your footage appear as if it were a negative image – and then use the inverted effect over those custom masks.
This can be useful if you need to invert only certain areas of your video, such as a logo or text. You can also use the “Levels” effect to switch colors. This is a more advanced technique that allows you to adjust the intensity of each color.
How Do You Make a Video Negative?
The easiest way to make a video negative is to use the invert effect in Adobe Premiere Pro. Select the clip you want to invert and click on Effects in the top toolbar. Next, navigate to Video Effects > Invert and drag it onto your video.
Once you’ve applied the invert effect, your video will be negative. However, it won’t look good because it will be too dark and grainy. You can fix this by increasing the brightness of your clip using the Levels effect.
Negative contrast can be used as part of a film noir-style look and can be an interesting stylistic choice when used correctly. The main thing to remember when adding a negative effect is that it often needs to be paired with another stylistic choice, such as black and white or sepia tones. If you use negative contrast on its own, your video will look washed out and bland.
You can also use the color balance effect in Adobe Premiere Pro to make a video negative.
With so many options available regarding color, you may want to consider using more than just one option. Whether you use the invert effect alone, combine it with the color balance effect, or even transform the hue of your clip, it’s essential to understand how these effects will affect your final product before applying them.

Utilize Storyblocks Templates for Easy Video Content Creation
Don’t get daunted by the invert effect because it’s a direct effect to use. The more you understand how it works and plays with different options, the easier it will become to use this effect.
Adobe Premiere Pro is one of the most capable digital video editors on the market, and with some practice and patience, you’ll find it a breeze to master! Storyblocks can help you through the process by offering a variety of premade templates, including video intros, graphics, and more.
Need some inspiration? Check out our wide range of video templates and incorporate them into your content creation process. You’ll be able to create surreal and eye-catching videos in no time!