
Are you looking to spruce up the text in your next video? In this tutorial, you’ll learn to create a wow-worthy video title by placing footage within text using Adobe Premiere Pro. I’ll be showing you two different methods you can use to create this effect.
If you’re looking for footage to use, Storyblocks has you covered with countless options from our royalty-free library. Let’s get started!
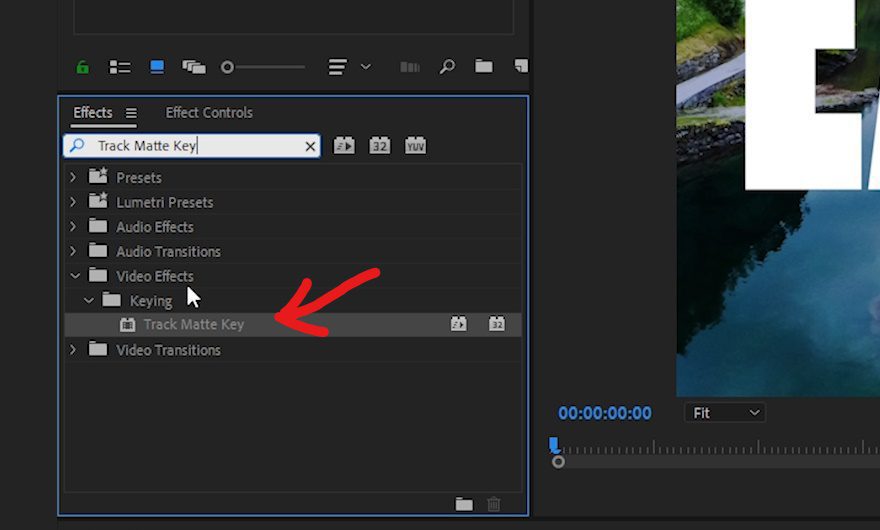
Use the Track Matte Key
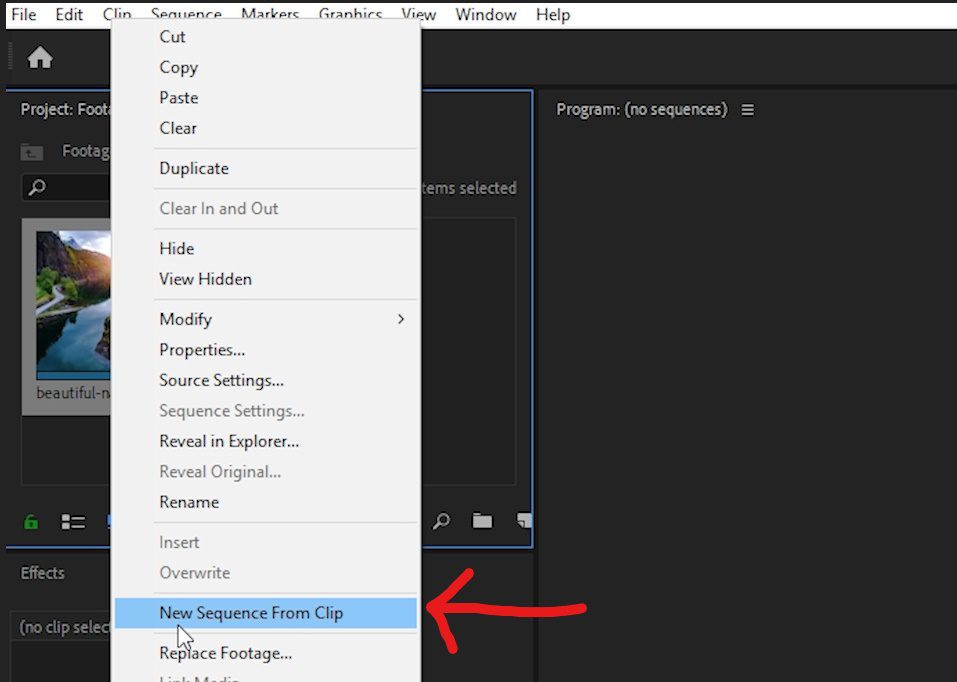
1. Start by importing your footage into Premiere Pro. With your clip in the Project window, right-click on it and select New Sequence From Clip.
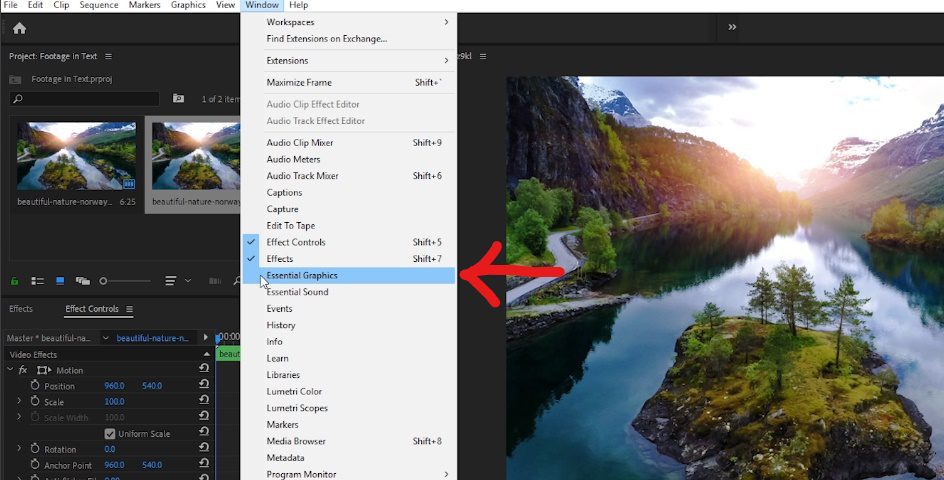
2. If your Essential Graphics panel isn’t visible, you can go up to Window and click on Essential Graphics.
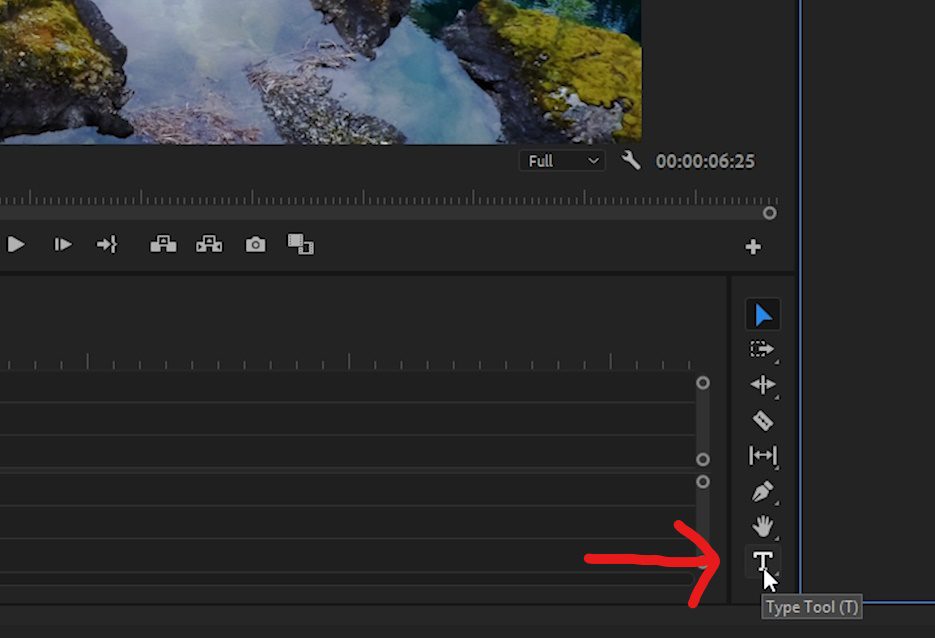
3. In the toolbar, select the Type Tool.
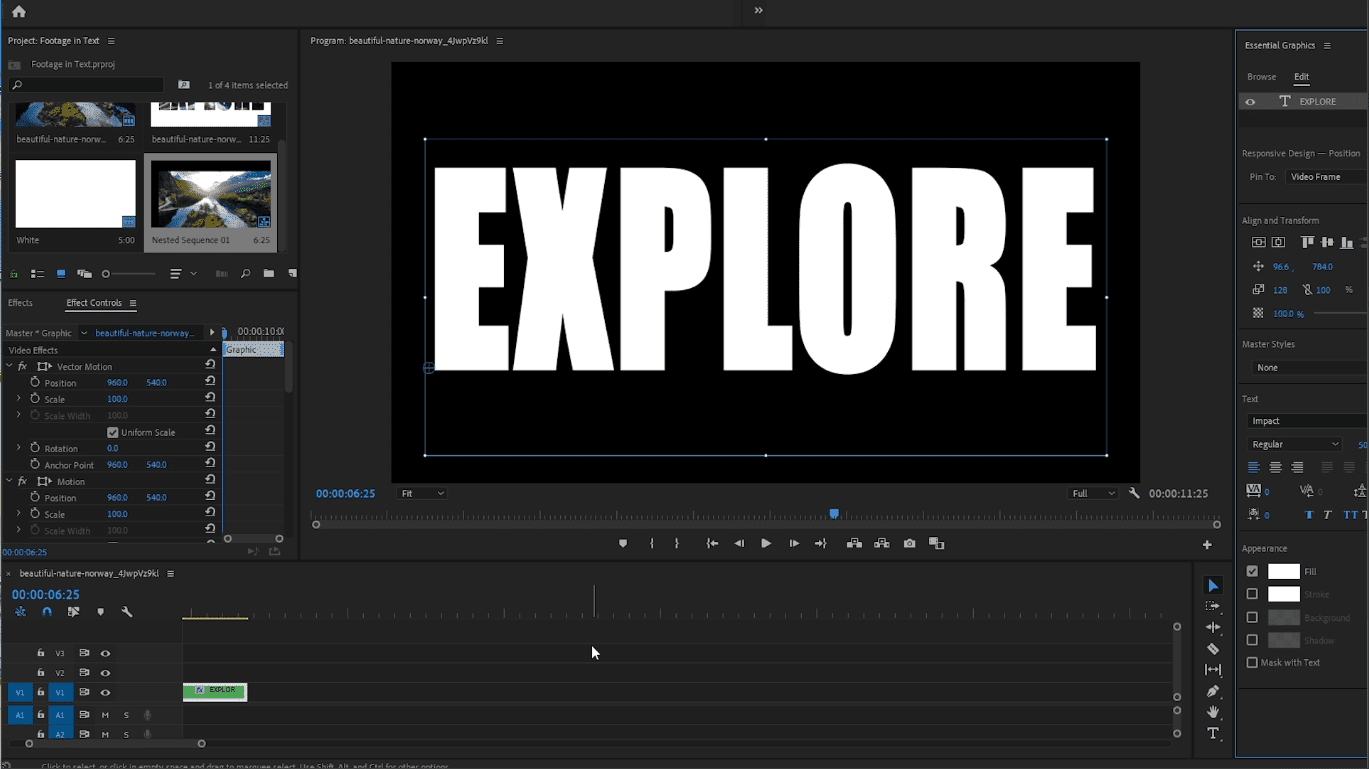
4. Click on the Program window, and in capital letters, type the word you’d like to have on-screen for this effect.
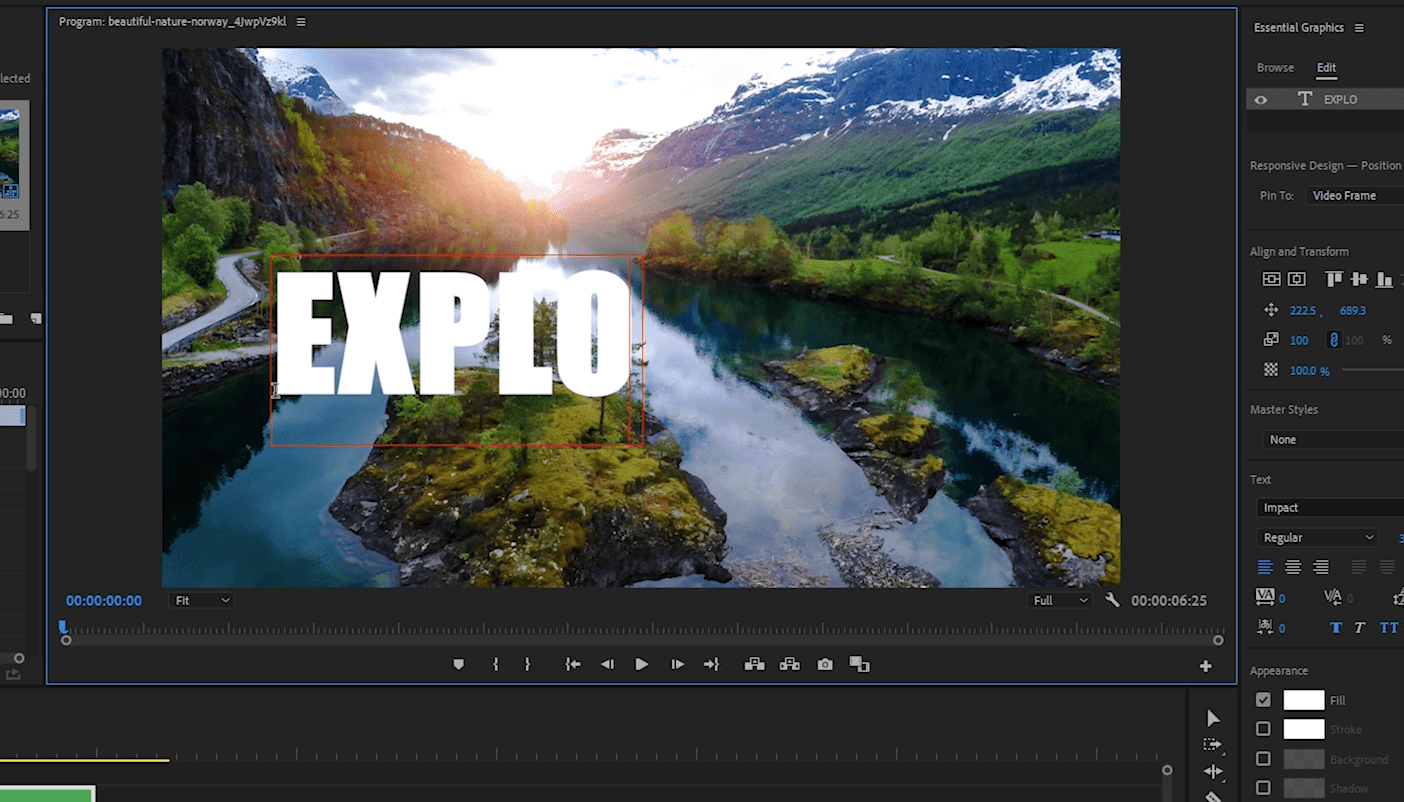
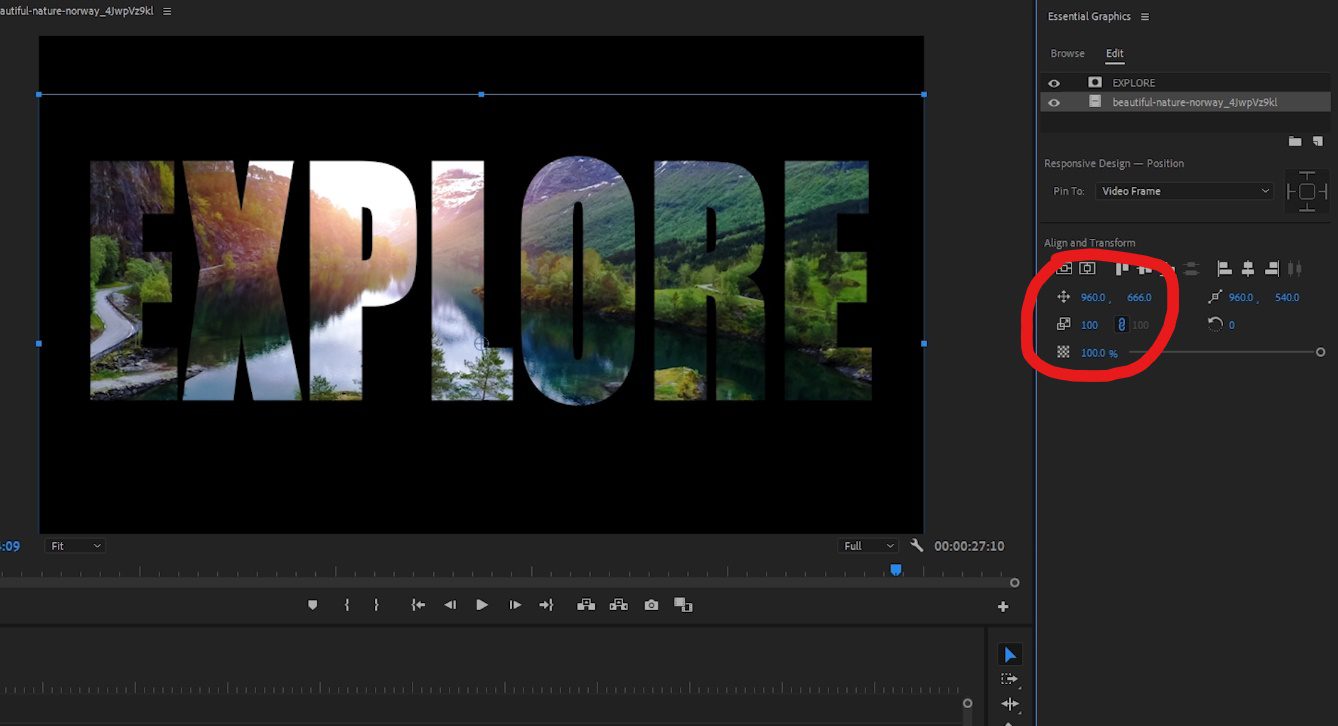
5. Select your text and in the Essential Graphics panel, under the Text heading, adjust the size of the text to your liking. In our example, we will adjust it to fill the majority of the frame.
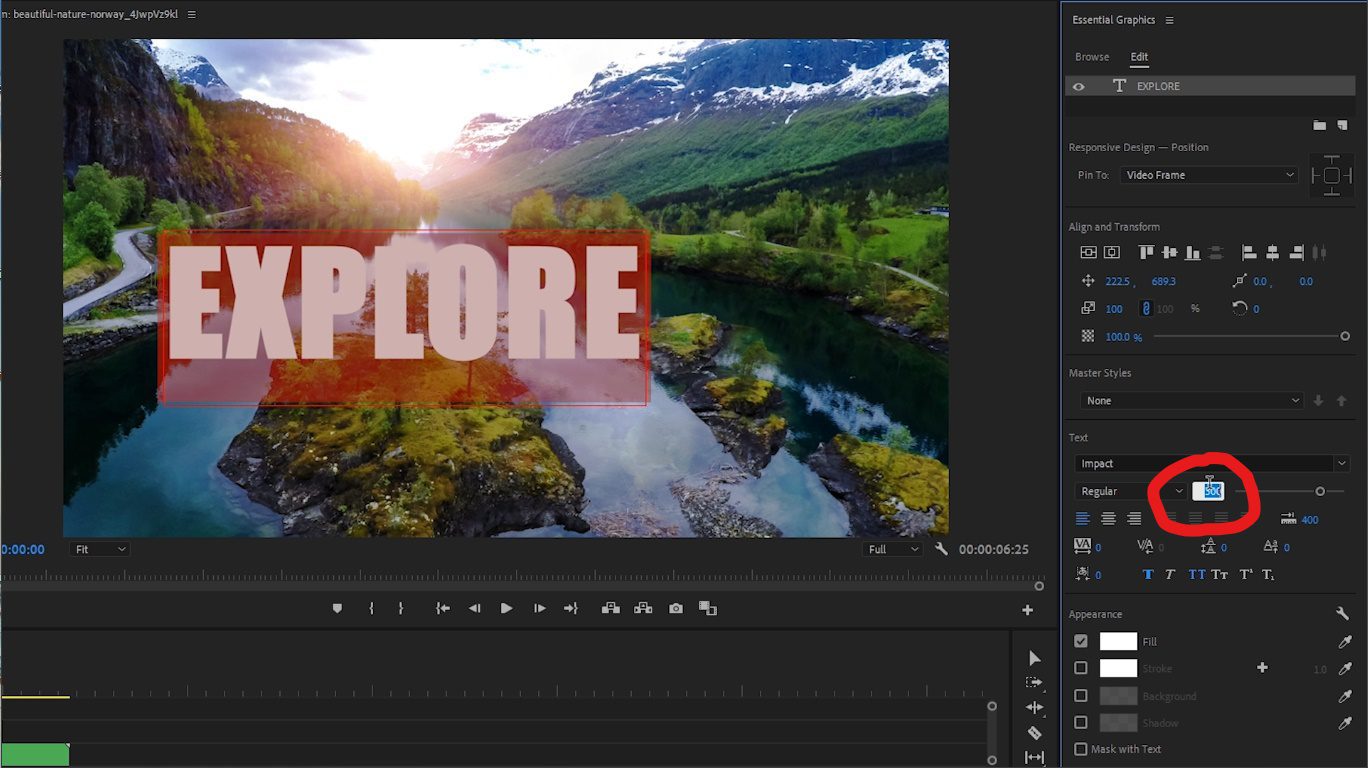
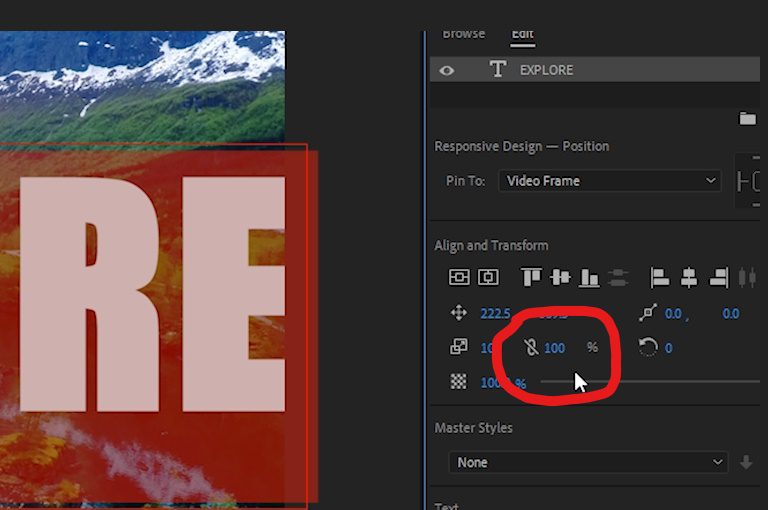
6. To extend the height of your text independently, under the Align and Transform tab, click on the Set Scale lock to disable the constraints and adjust the height of your text to your preference.
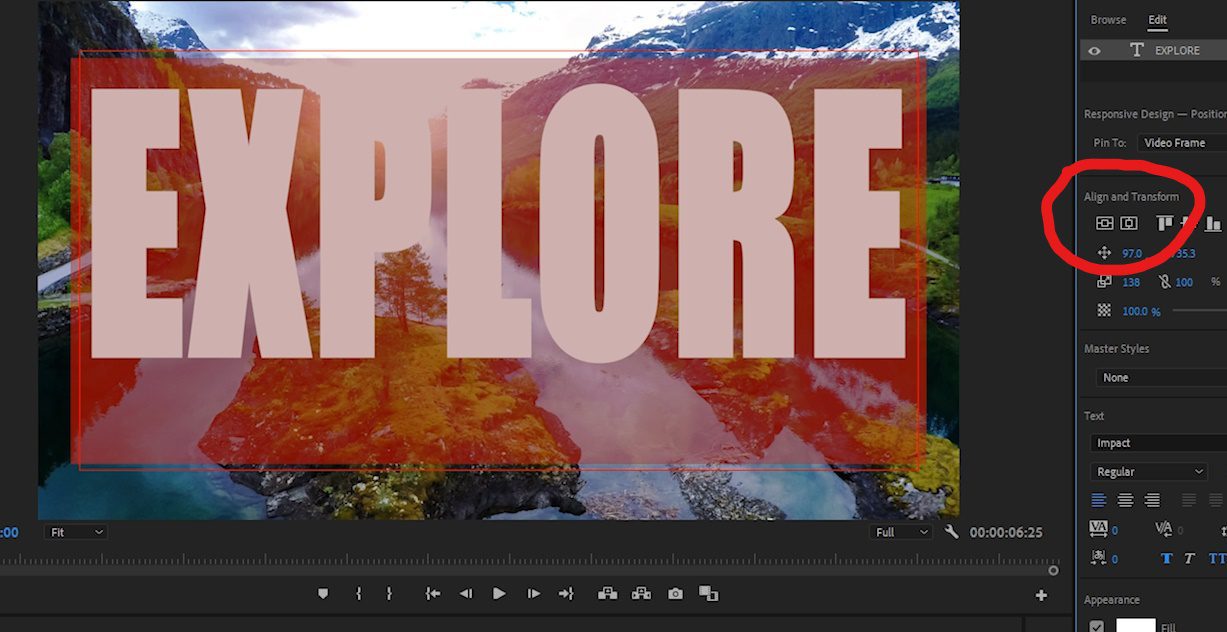
7. Click on the Horizontal and Vertical Centering icons to center your text on-screen. Depending on your font, you might have to reposition the text.
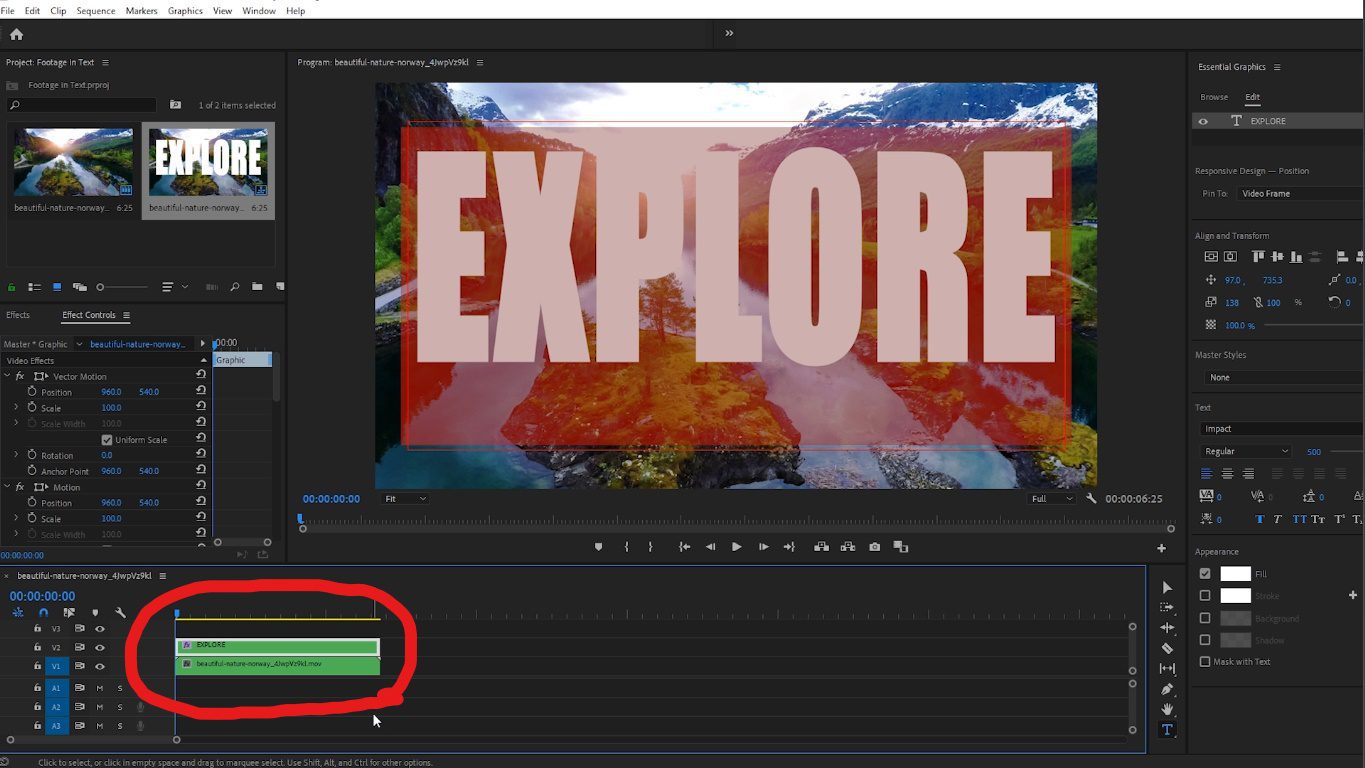
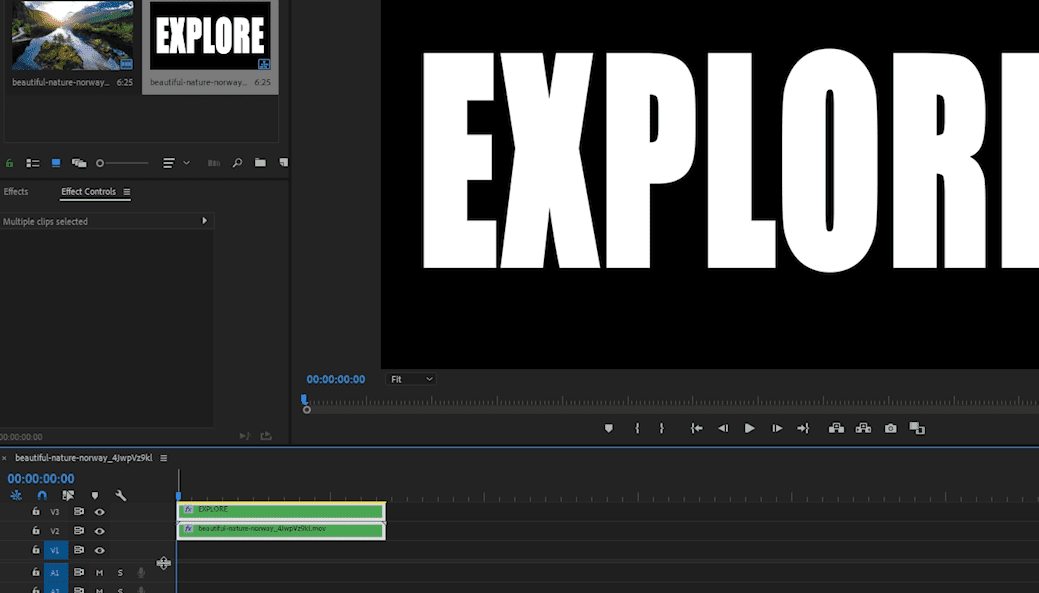
8. On your timeline, adjust the duration of the text layer to match the duration of the video clip.
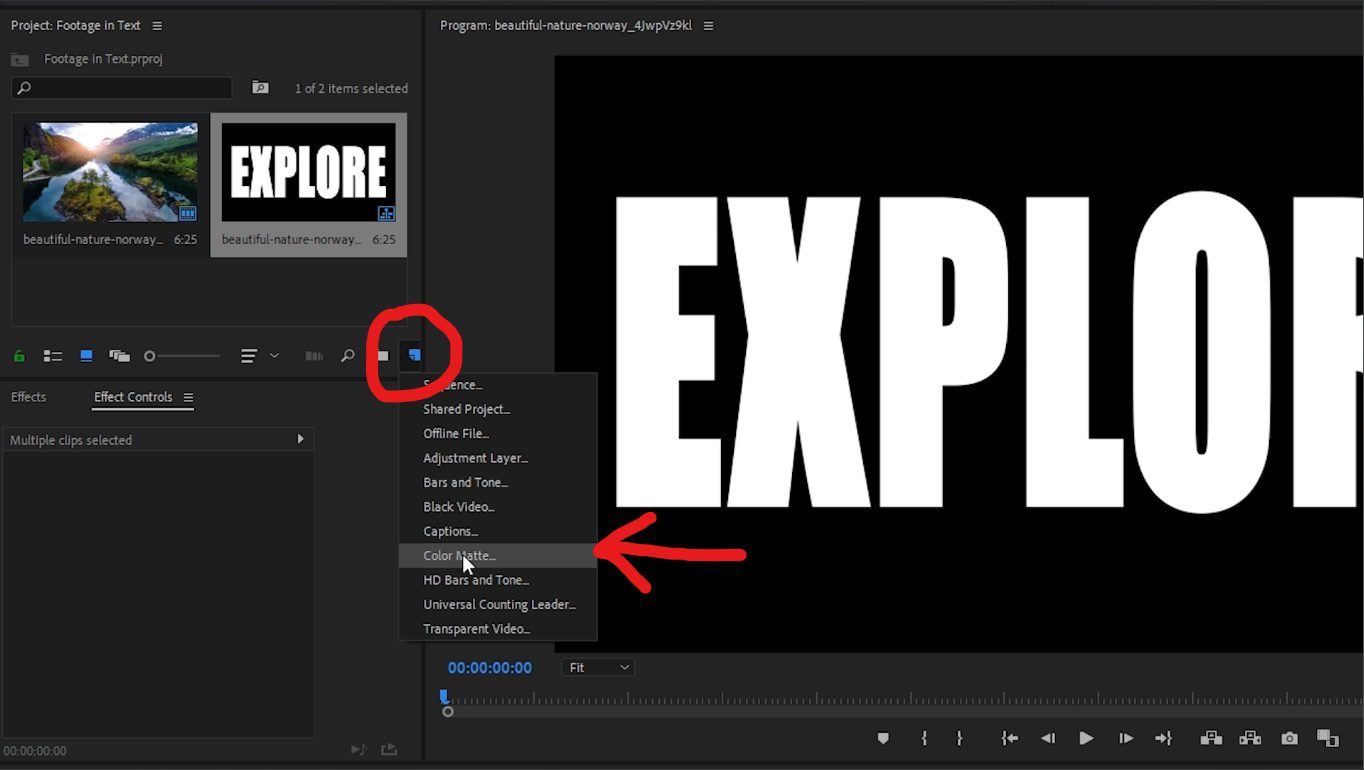
9. In the Effects window search bar, type in Track Matte Key (under Video Effects > Keying folder) and drag this effect onto the video clip on your timeline (not the text layer.)
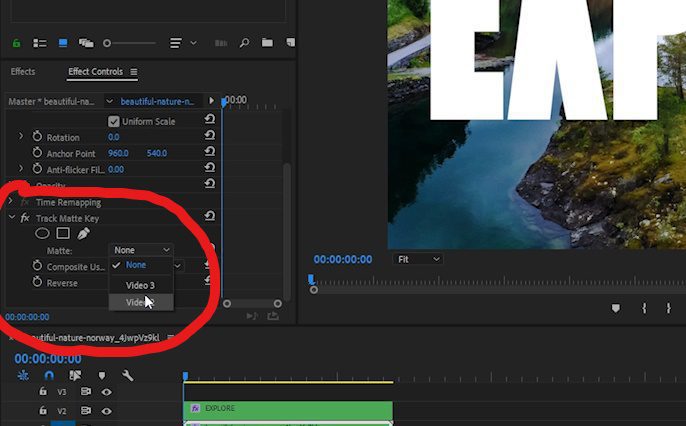
10. With your video clip selected in the sequence, go to the Effect Controls window and under the Track Matte Key effect, select Video 2 in the Matte dropdown menu. This is the track that our text layer is on.
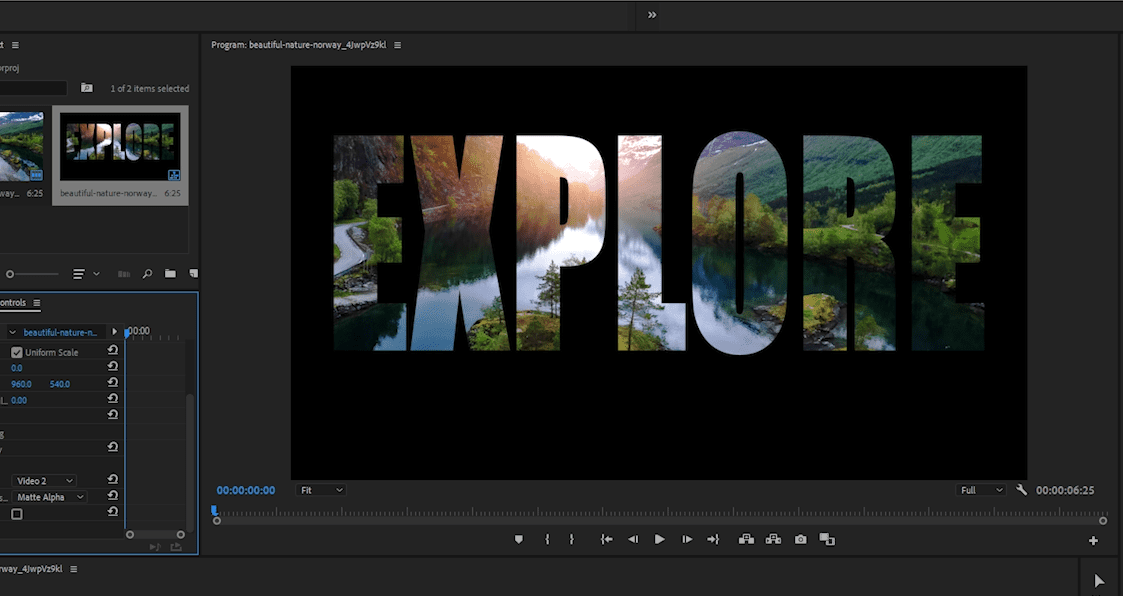
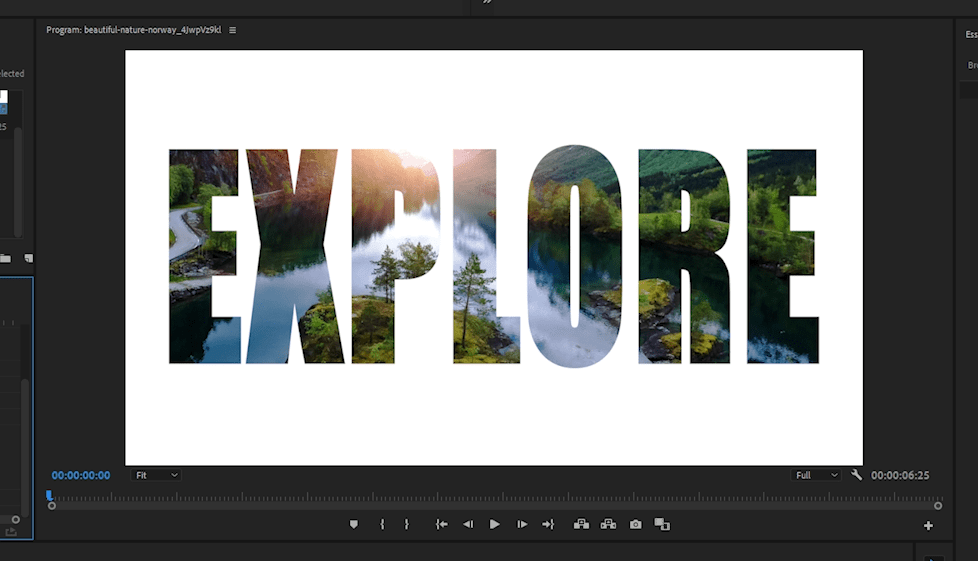
11. You now have the video displaying inside your text!
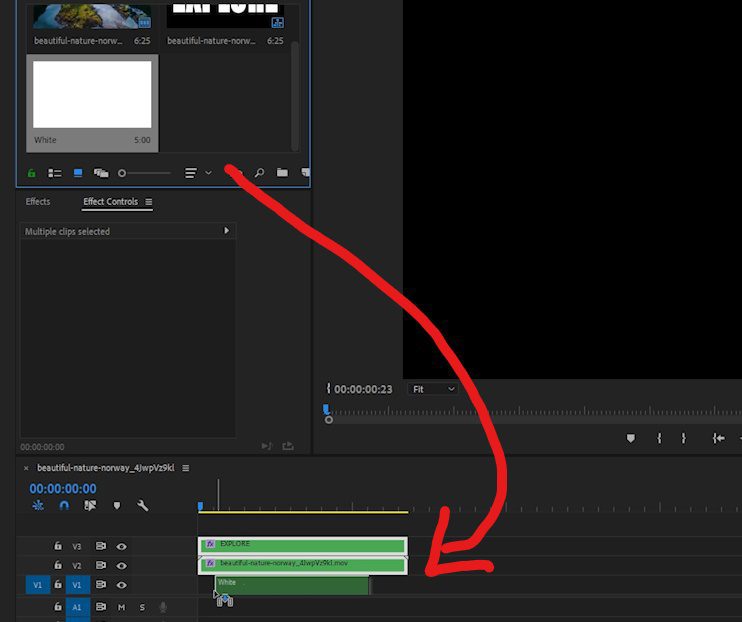
12. To switch up the background color in this effect, select both layers on your timeline and drag them up to Video track 2 and track 3.
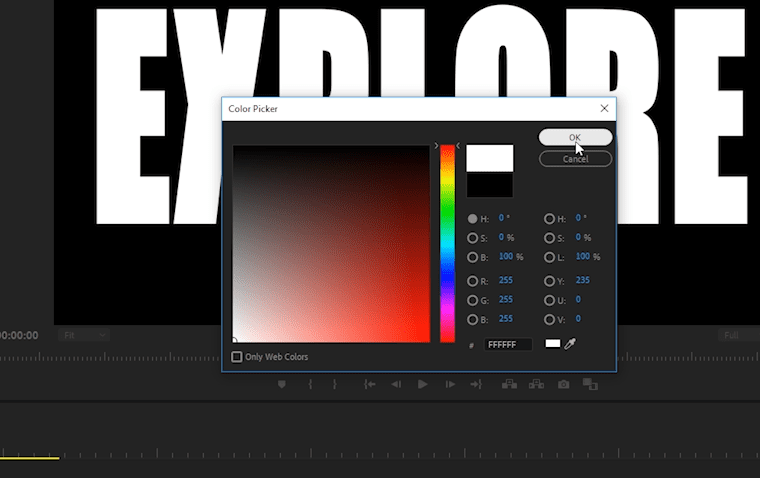
13. In the Project window, at the bottom right, click on the New Item icon and select Color Matte.
14. In the Color Picker window, click on a white area of the color window and press OK.
15. Drag the white color matte from the Project window, onto the V1 track on your sequence.
16. Select the video clip on the V2 track, go to Effect Controls and under Track Matte Key > Matte, select Video 3 in the dropdown menu.
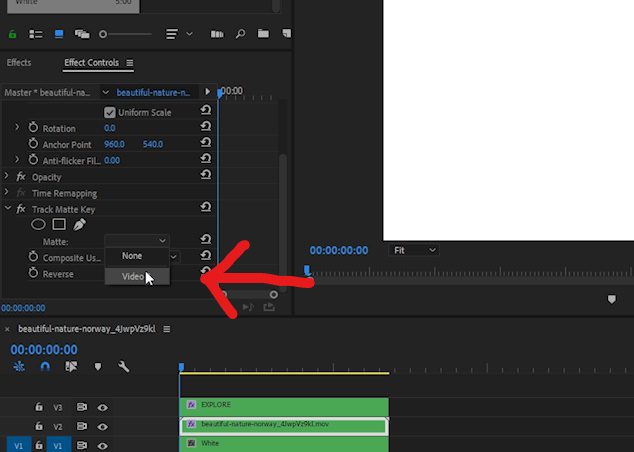
17. You now have your video in text with a white background!
Use Mask with Text
As video editors, it’s valuable to understand all the available options when creating certain effects–you can also use the Essential Graphics window in Premiere Pro to place your video in text.
1. With your cursor over an empty area in your timeline, use the Text Tool and type a word you’d like to have in the frame.
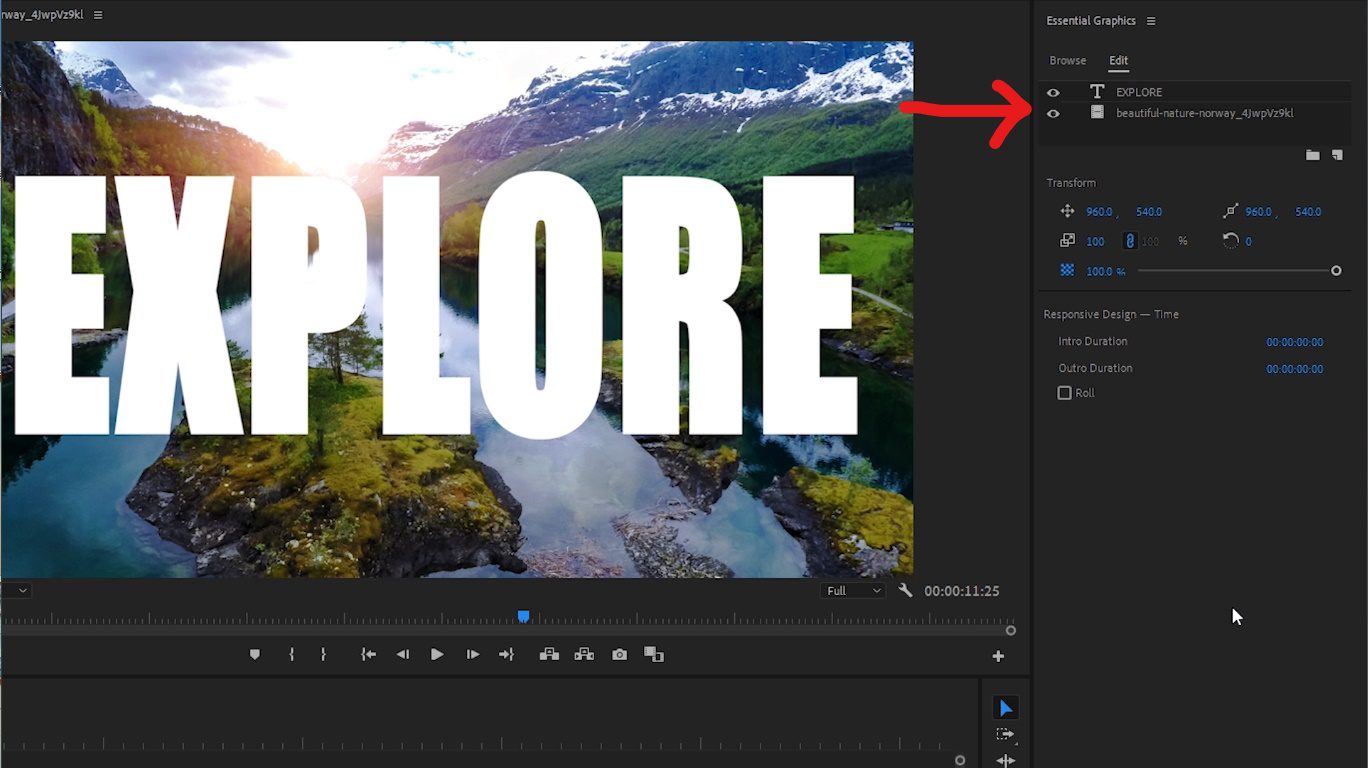
2. Making sure the text layer is selected in your timeline so that you can see it in the Essential Graphics window Edit tab, go to your Project window and drag your video right underneath that text layer inside the Essential Graphics panel window.
3. Select the text layer in the Essential Graphics window and under the Appearance tab, select the Mask with Text box. You now have footage inside your text!
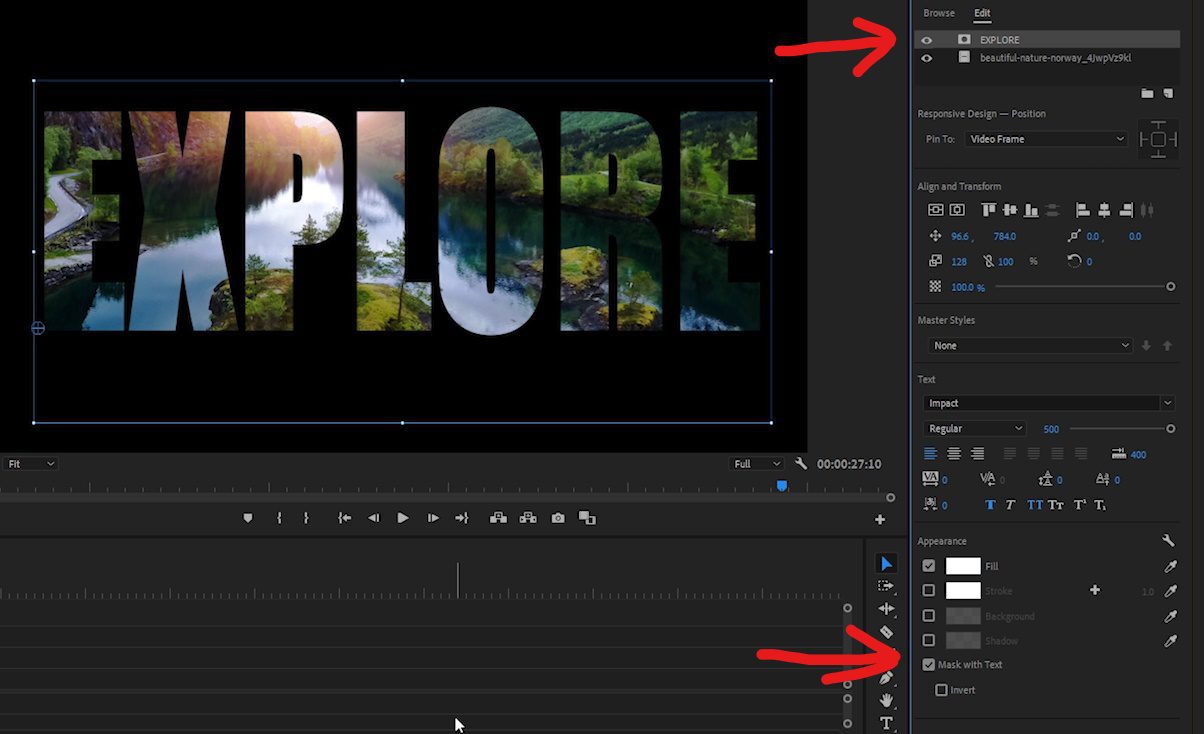
4. If you would like to reposition the footage within the text, with the footage layer selected, change the size and position settings inside Essential Graphics to show the desired areas of the footage within the text.
There you go. You now know how to create a video in text effect! You can use this new skill with text, graphic elements, or a logo to add a creative touch to your video titles.
Check out more of our Premiere Pro tutorials to learn skills like how to stabilize shaky footage or how to add a slow-mo effect.
Want to see more from Alli Saunders? Look for new tutorials to come on the Storyblocks blog or follow Alli and Will on YouTube and Instagram.


