Working on a music video or something for your YouTube channel, and looking for ways to make your video stand out?
We’ve got you covered in this tutorial on how to create a glow effect animation with Adobe After Effects CC. The technique, popularized by Blotter Media, can bring your video to life by adding strong visual elements that will keep your viewers watching. This is where footage meets motion graphics!
New in After Effects? Check out the Beginner’s Guide to Advanced Tools and Techniques for a primer. And if you’re looking for stock footage to use, head over to Storyblocks Video for endless, high-action options.
Follow along with the video to get started:
Organize Your Footage
1. Start by importing your footage into Adobe After Effects. You can either go to File > Import or simply drag and drop it from a folder, into the After Effects Project panel window.
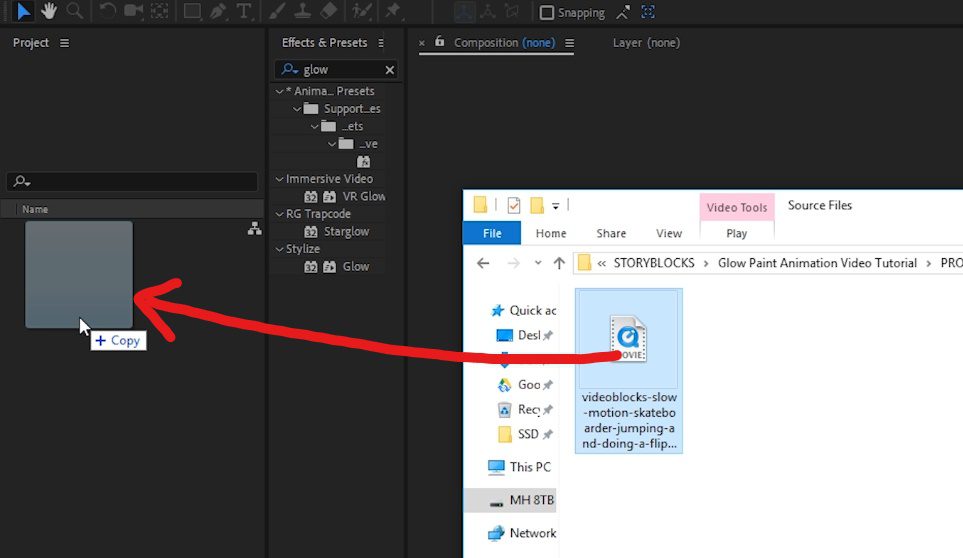
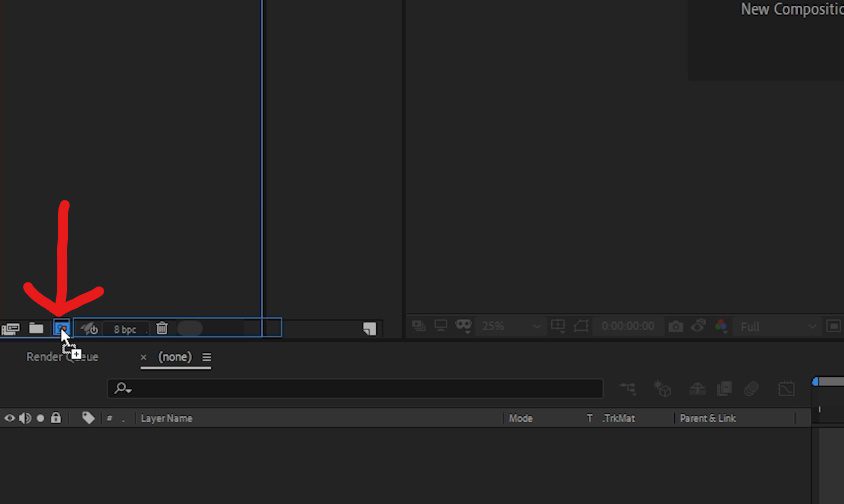
2. Drag the footage onto the New Composition button at the bottom of the Project panel window. This will create a new composition inside After Effects that has the exact same resolution, frame rate, and duration as your source footage.
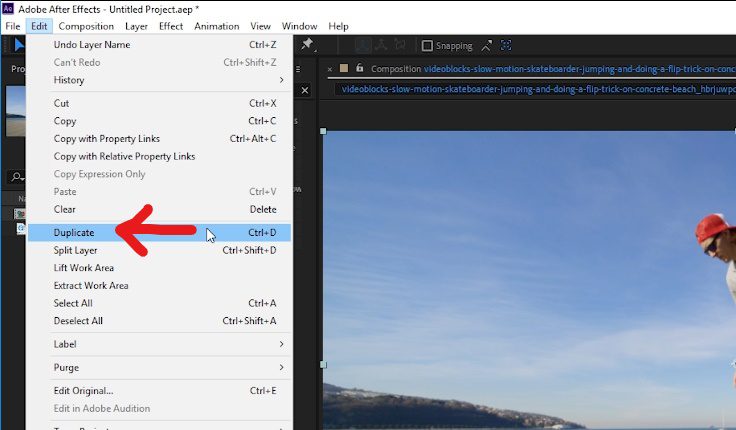
3. Select the footage layer in your composition by clicking on it and then duplicate it by going to Edit > Duplicate. You can also duplicate a layer by selecting it, then press ‘Ctrl + d’ on Windows, or ‘CMD + d’ on Mac.
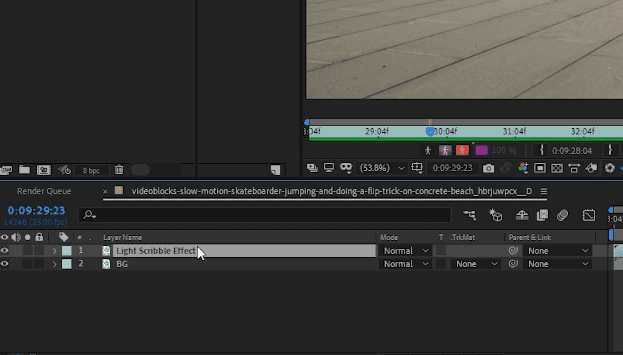
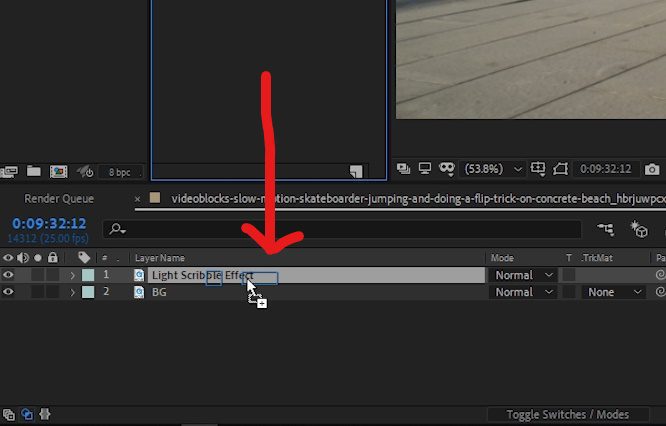
4. Organize the footage in your composition by naming each layer — select a layer, press the ‘Enter’ key on Windows, or the ‘return’ key on Mac, and then type ‘BG’ (stands for background) on the bottom layer, and ‘Light Scribble Effect’ on the top layer.
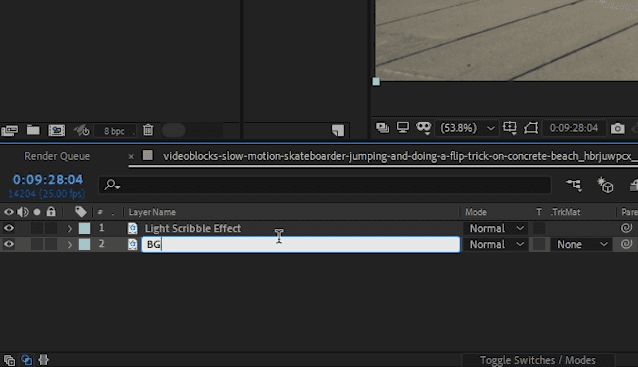
Organizing your footage in this way will help you quickly identify which layer is which when working in your After Effects project.
Start to Paint
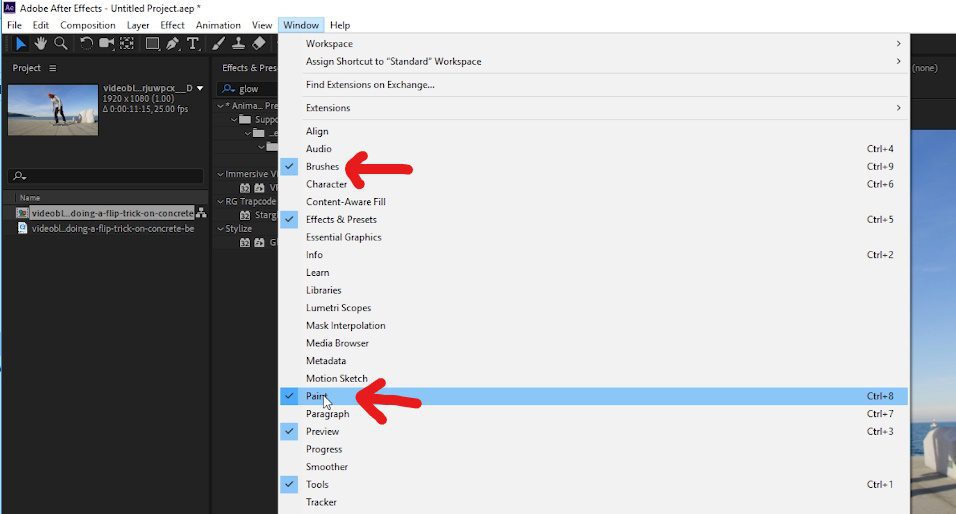
5. Next, let’s open up the Paint and Brushes panel windows by going to Window > ‘Brushes’ and Window > ‘Paint.’
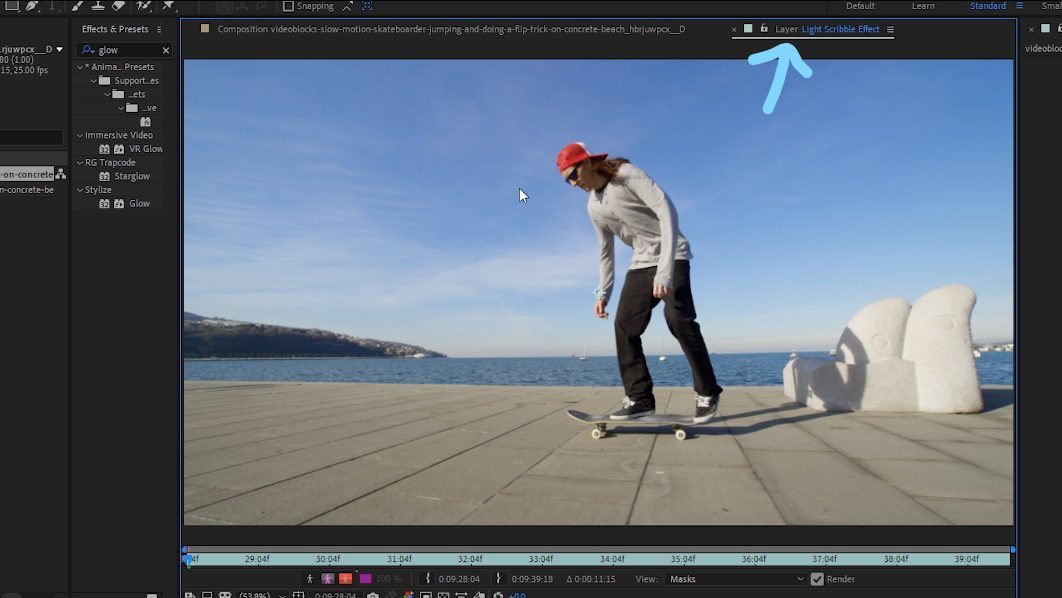
6. Select the ‘Light Scribble Effect’ layer in your composition, then double click on it. This will open up the footage in the Layer panel window. This is where After Effects allows you to use the Brush Tool to draw on the footage.
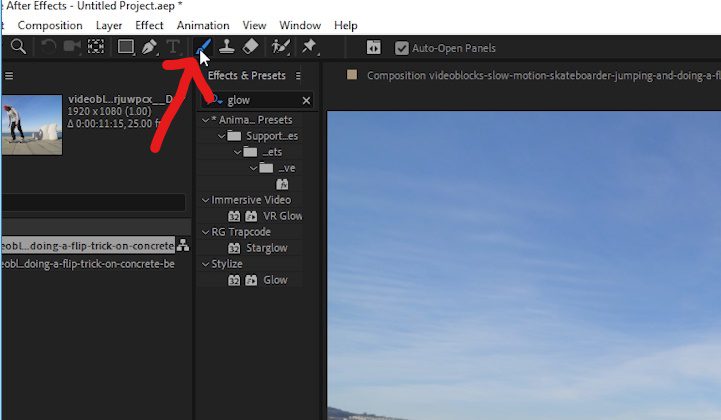
7. Next, select the Brush Tool from the tool options at the top of your program. This is the tool that we will be using to create the paint effect.
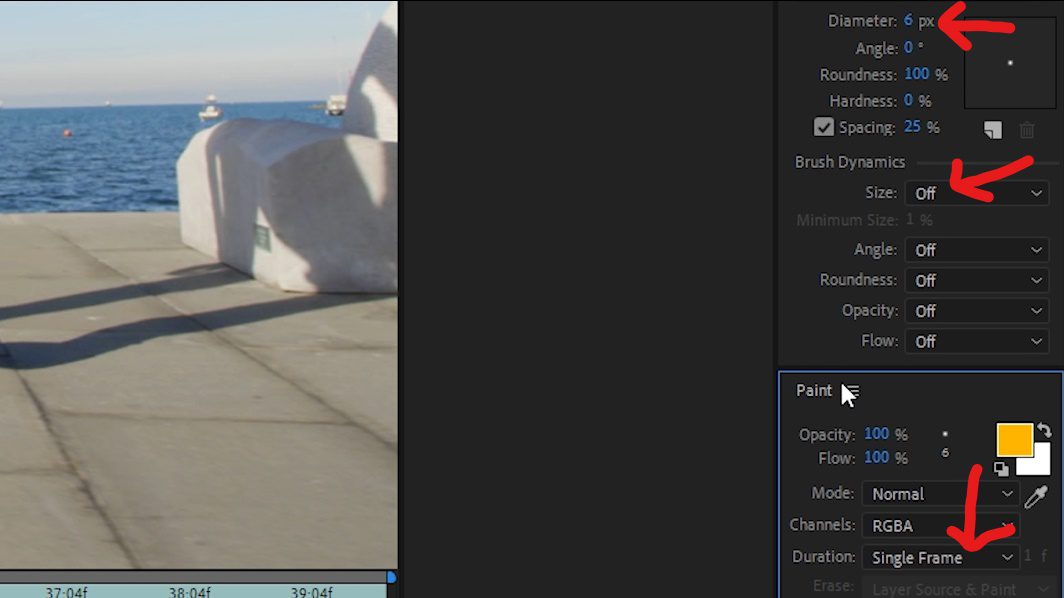
8. Within the Brushes panel window, change the diameter to 6 px, and under Brush Dynamics, change the Size to ‘Off.’ Depending on the footage you’re working with, a thinner or thicker diameter might work better.
Then, on the Paint panel window, change the Duration to ‘Single Frame.’ Since we will be painting frame by frame, we need the paint we draw to only appear on the frame we draw it on. If we used the constant setting, for example, the paint we draw would appear on every frame, which is not what we want for this type of effect.
9. Navigate in the composition to the first frame that you’d like to paint. While on that frame, start to draw what will be on this frame. In our example, we will be outlining the skateboard. If you make a mistake, you can go to Edit > Undo.
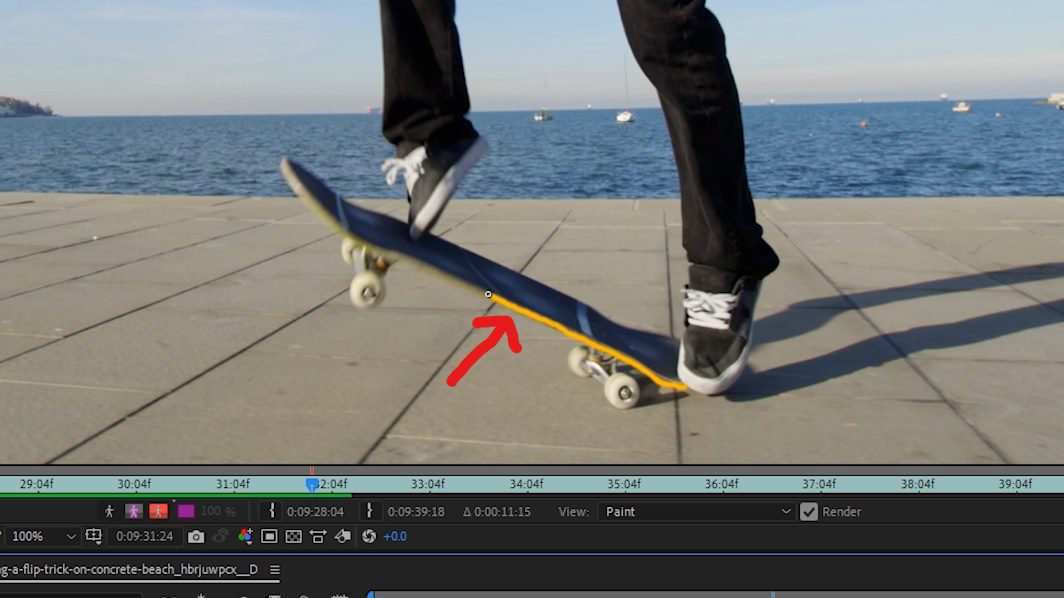
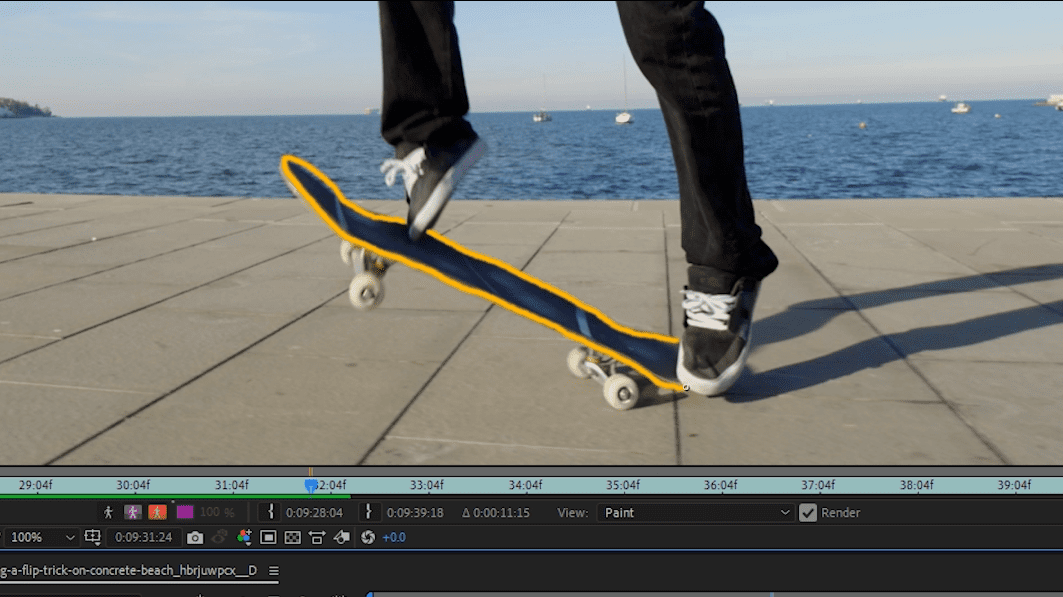
Continue drawing on this frame until it is complete.
Paint and Repeat
10. From here on out, you will repeat this frame by frame to complete the effect. Navigate to the next frame in your composition by pressing ‘Page Down’ on your keyboard, or by moving the composition timeline cursor one frame to the right.
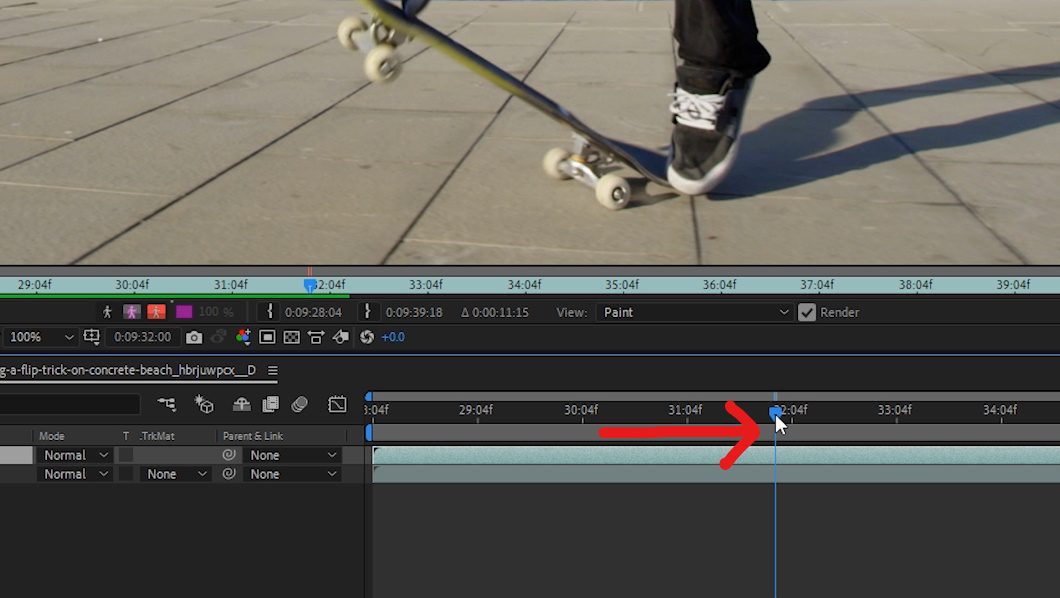
11. Start painting the next frame in your animation. For our example, since the skateboard is moving, we will be following the edge of the board for each frame. If your footage is different, you might need to make slight changes in each frame to create movement in your paint animations.
Continue this process by drawing on a frame, then moving to the next frame, drawing, then moving to the next frame, and drawing again, etc. It’s a time-consuming process, but it’s a fun effect, so it’s worthwhile!
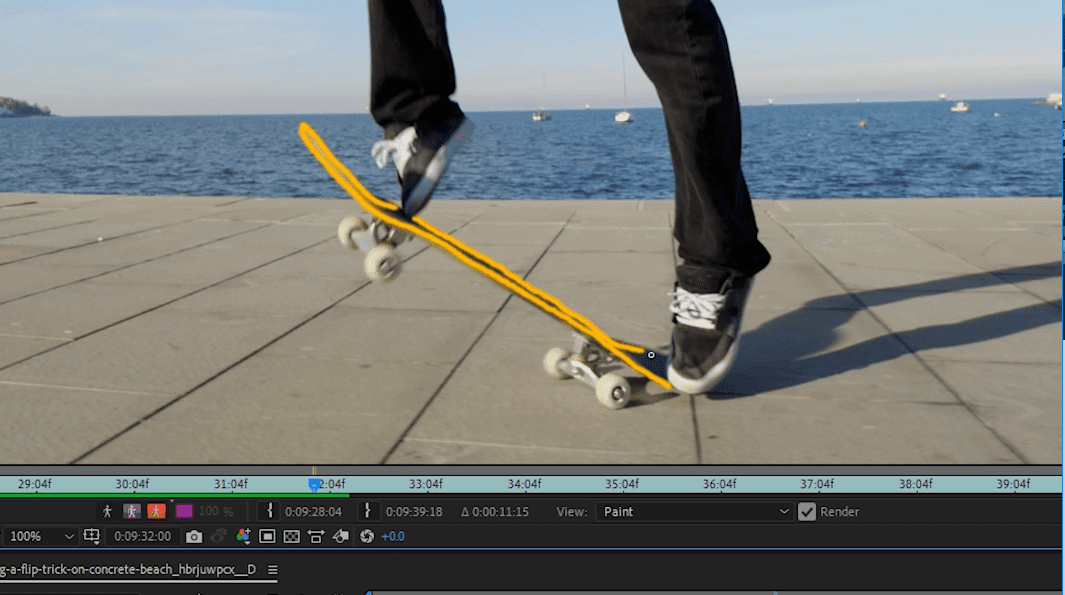
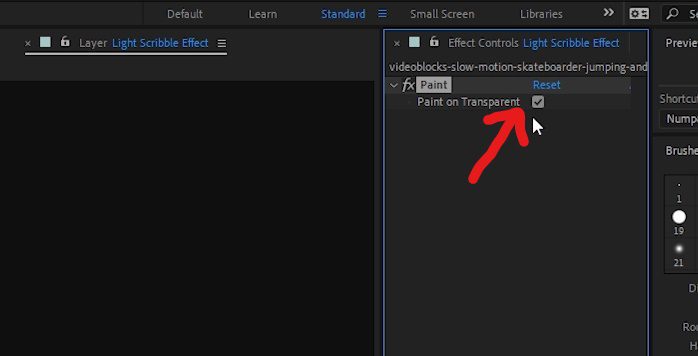
12. Once you are satisfied with your entire painting animation, select the ‘Light Scribble Effect’ layer that the paint effect was applied to, and within the Effect Controls panel window, check the box to turn on the Paint on Transparent option. This will remove the footage from this layer so that only your paint effect shows up. This was why we duplicated the footage in Step 3; so that we would eventually have the bottom layer as the footage, and the top layer with only the paint effect.
Make it Glow
13. We are now finished in the Layer window. Navigate to the Composition window.
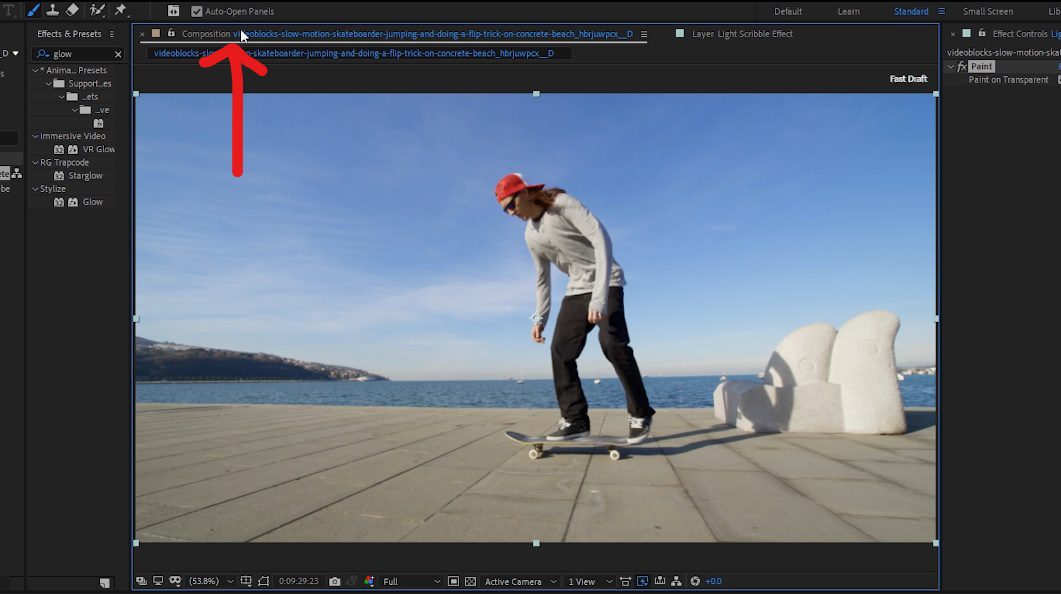
With the ‘Light Scribble Effect’ layer selected in the composition, go to the Effects & Presets panel window (found under Window > ‘Effects & Presets’.)
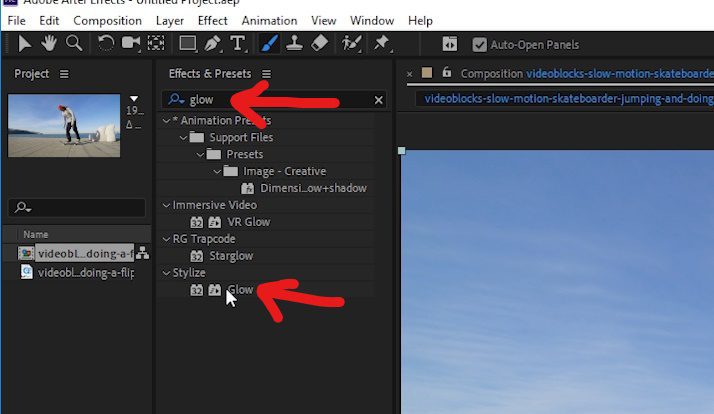
Type “glow” into the Effects & Presets window, select the Glow effect, then drag and drop it onto the ‘Light Scribble Effect’ layer within your composition. It’s time to enhance the look of the paint effect by adding a glow.
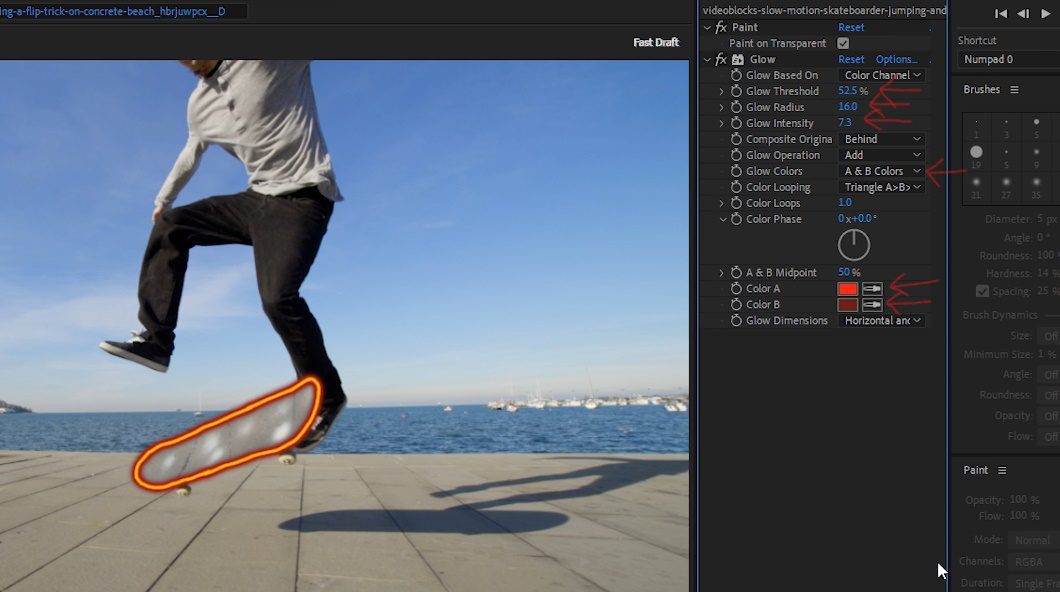
14. Navigate to the Effect Controls panel window, and you will now see the Glow effect that has been applied to the ‘Light Scribble Effect’ layer.
Change the following settings on the Glow effect to create a good looking glow on the paint layer. You can experiment with these settings to your liking:
- Glow Threshold: 52.5%
- Glow Radius: 16.0
- Glow Intensity: 7.3
- Glow Colors: A & B Colors
- Color A: Red (We used a bright red color)
- Color B: Darker Red (We used a dark red color)
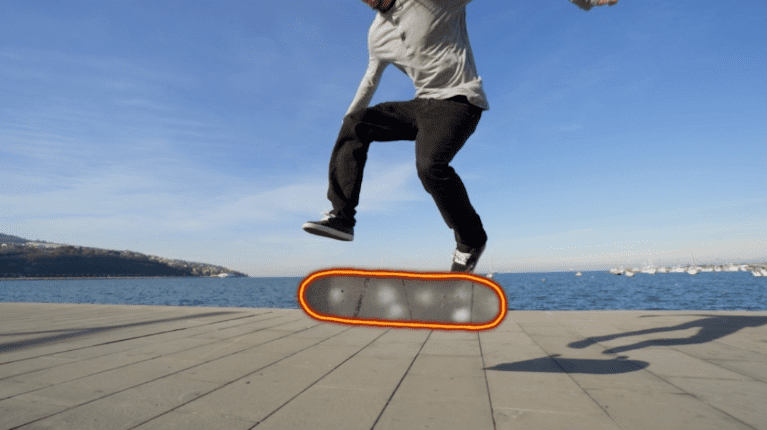
15. You have now completed the glow animation effect in After Effects. Congratulations!
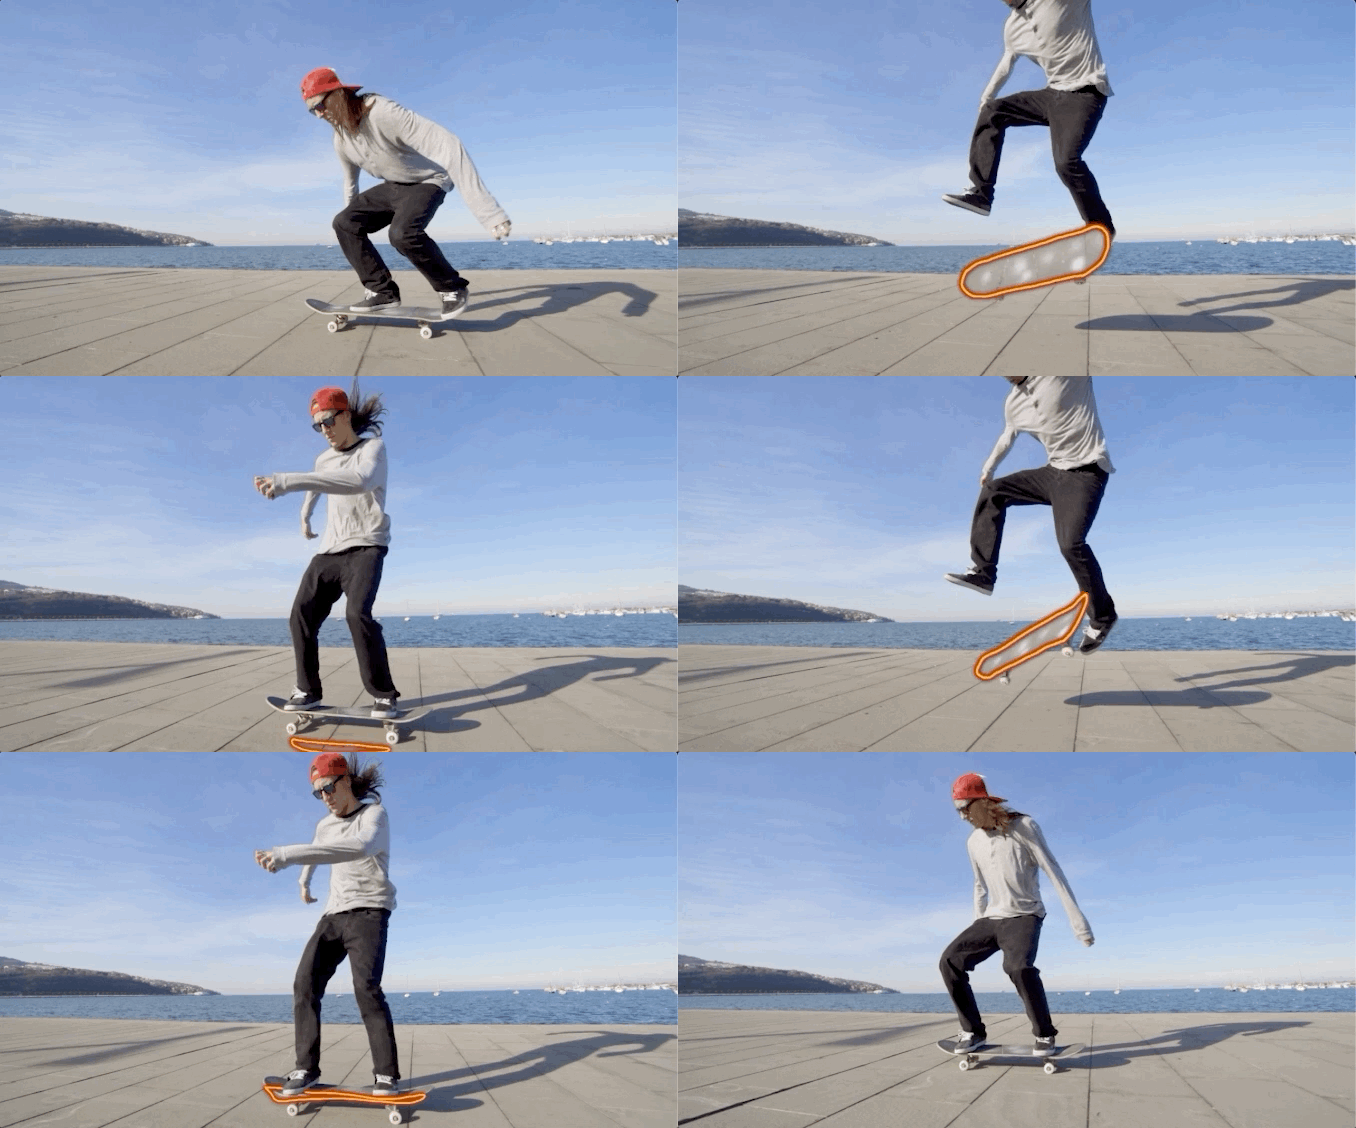
This is only one example of what you can create with this effect; there truly are unlimited results you can achieve by utilizing the Paint technique. From animated characters to glowing highlights, this effect is sure to make your videos pop. Need a clip to get started? Check out Storyblock’s library of royalty-free stock footage so you can experiment to your heart’s content!
Want to learn more from Will Bartlett? Look for new tutorials to come on the Storyblocks blog or follow Alli and Will on YouTube and Instagram.


