
Adobe After Effects is an industry standard for motion graphics and is responsible for the some coolest animations you see online. Mastering this powerful tool, however, can be… time-consuming. Luckily, you don’t need to be an AE pro to create professional-level motion graphics for your business, brand, or personal projects. All you need is a beautiful, professionally-designed template. In this post, we’ll use a corporate presentation template to create a promo video for a music school. Here’s the final product:
If you want to follow along, we’ll also use a violinist, a bass player, a woman practicing guitar, a musical motion background, a guitar player, a rock band, piano keys, a flute player, and a rock song.
Before You Begin
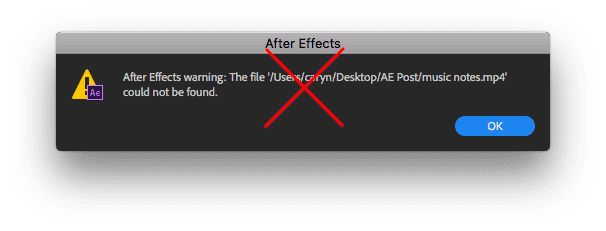
Before diving into AE, create a folder on your computer to house the assets that you plan to use, like images, video, and music. Here’s why: When you import files to AE, AE will continue to look for the files in the location from which you imported them. So, let’s say you’ve got your assets spread out all over your desktop and then mid-project you decide to pop them into a folder. AE will not know where you’ve moved the files. It will prompt you to relink them—not the end of the world, but you can avoid the extra work if you start on the right (organized!) foot.
Opening the File
Upon opening the document, you may get an alert that the program needs to convert the file to your version of After Effects. Go ahead and convert the file; this typically means that the creator made the template on a PC and you’re using a Mac, or vice-versa. The second alert that you may get is that the template uses fonts that are not installed on your computer. If you want to use those exact fonts, just note the names and you can download and install them separately. Alternatively, you may choose to use similar fonts or others that fit your brand guidelines.
Meet the Project Panel
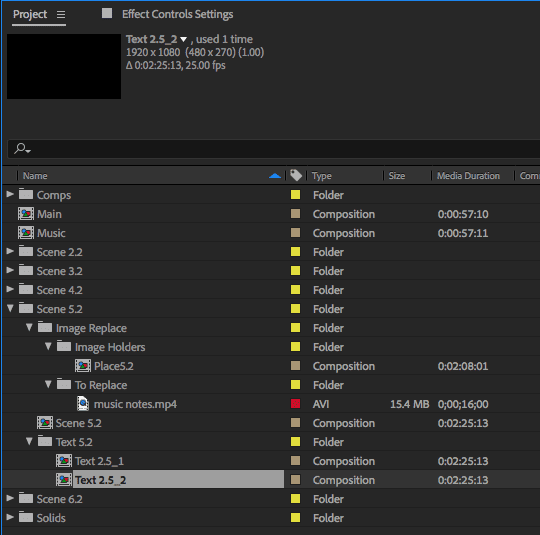
Once the document is open, take a look around. On the left side of your Project panel, you’ll see three types of items: Folders, Compositions, and Assets. Compositions—or “comps”—are containers that hold layers of video, audio, images, text, shapes, and more. Comps each have their own timeline and can be nested within one another. In the Project panel, you will see comps represented as icons with multi-colored shapes. Assets are represented as icons like you would see on your desktop; they vary depending on the file type. Folders, represented by a folder icon (easy!), are there to organize the whole thing as the Project panel can get a little crowded.
Replacing Files
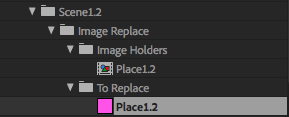
You’ll need to open up some folders and look around the Project panel to locate the parts that you want to edit. Typically, there are placeholders that you will need to replace with photos or videos. To replace an asset, simply right-click on it and choose “replace footage.” In the example below, notice there are two items listed in the Project panel with the same name, “Place1.2.” The file we want to replace is simply a solid, represented by the color of the solid. The other item with the same name is a comp. A comp cannot be replaced with a file. In this example, the comp under the “Image Holders” folder is used for resizing and adjusting the image itself.
The Main Comp
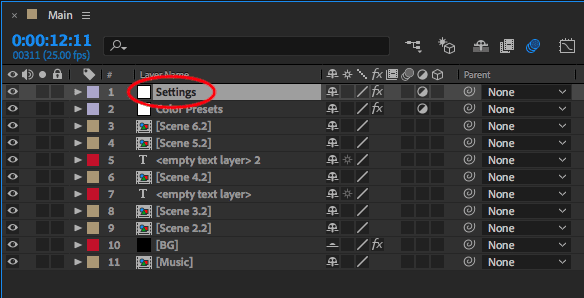
There will be one comp—called something like “Main”—that will hold the other comps, as well as master settings (such as colors) for the whole piece. Keep this comp open to watch your progress and edit the universal settings. To edit the colors of other design elements, use the Main Comp to locate the settings layer.
Delete What You Don’t Need
Once you’ve scoped out your document, delete any sections that you don’t plan to use. Keep in mind that you might only want one scene in a multi-scene file! Deleting excess elements will make it easier to see what you’re working with. In this example, we cut out about half of the project.
Editing Text
You may need to change the text fonts and colors to fit your brand, or even to make the text readable against the background. You can find the text comps in the Project panel and use the text tool to type. Use the text controls to adjust the color, size, and font.
Make it Your Own with Music
When we updated the imagery in the template, the included music didn’t really fit anymore. To make the project more cohesive, we grabbed a rock song from our audio library. The rock song fit the video much better than the original song, so don’t be afraid to experiment with audio!
Optimize Performances
If you don’t regularly use graphics-intensive applications, you may not have a computer with the recommended computing power for AE. One easy trick to improve performance is to lower the playback resolution. While you work, you’ll watch the project playback in a lower quality, but it will still export at full quality. Find more tips for optimizing performance here.

Export It
When you’re ready to export, navigate to File > Export > Add to Render Queue. This will open a tab in the timeline area where you can adjust your settings. If you need a smaller file, go to “Render Settings” to adjust the file quality. Under “Output Module” you can choose your format (Quicktime works well) and codec (H.264 will provide high-quality video at a lower file size). Where it says, “Output to,” click the default filename to rename your project and choose where you want to save the file.
There you have it! After Effects takes some getting used to, but working with a template is a great way to get to know the interface and tools while achieving great results. Customizing an existing template is also a great way to speed up your post workflow. Just remember that not all templates are created with the same structure. Each template will take a little bit of exploring, but as you become more familiar with After Effects, you’ll feel more and more comfortable diving in.


