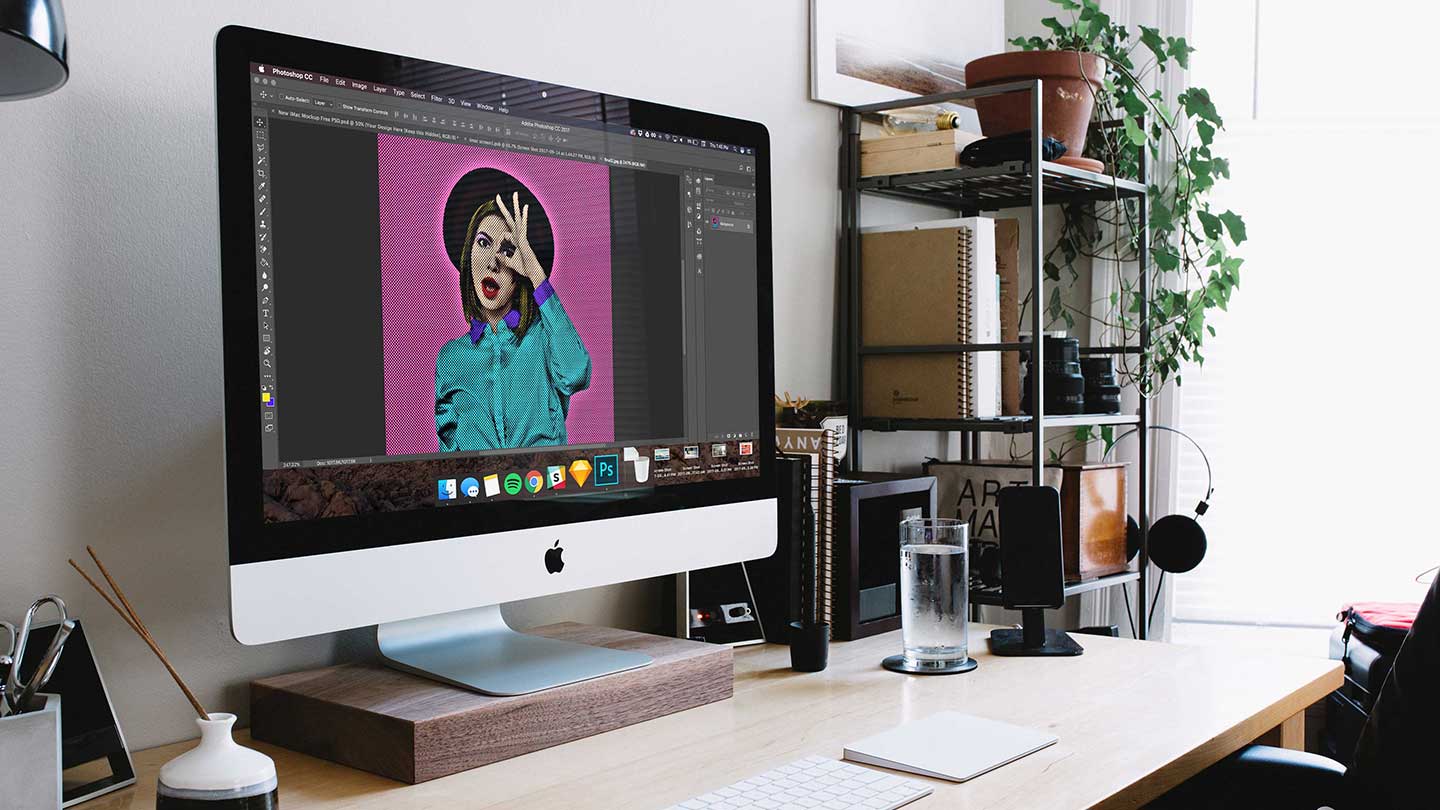
If you want to give your photos some extra “POW”—or channel your inner Andy Warhol—then pop art is the way to go. Pop art’s characteristic bold colors will make any photo stand out, which makes this technique especially great for stock images.
After mastering this tutorial, your next creative project is guaranteed to attract attention. Earn a reputation for dynamic, modern artwork, all while easily staying within budget. Sound as realistic as a unicorn? We promise that this tutorial will make a believer out of you.
Step 1. Open the File in Photoshop
To get started, try working with a fun portrait photo. Select an image and open it in Photoshop.
Step 2. Select and Mask.
Click on the Quick Selection Tool, then click the Select and Mask button.
A new window will open. Set the transparency to 50% so that you can still see the image underneath. Make sure that the View Mode is set to Onion Skin.
Now we are going to create a selection around the woman in the image. Click and drag over the woman to create a selection.
When selecting the woman’s hair, you’ll probably end up selecting small parts of the background, too. Don’t worry if you do—this isn’t a big deal for this tutorial.
Once you’ve finished selecting the woman, make sure that the Output is set to Layer Mask. Click OK.

Step 3. Add a New Layer and Set the Background Color.
Add a new layer below the original and set your foreground and background colors to black and white. With the new layer selected, hit Command/Ctrl + delete on your keyboard. This will set the background color to white.
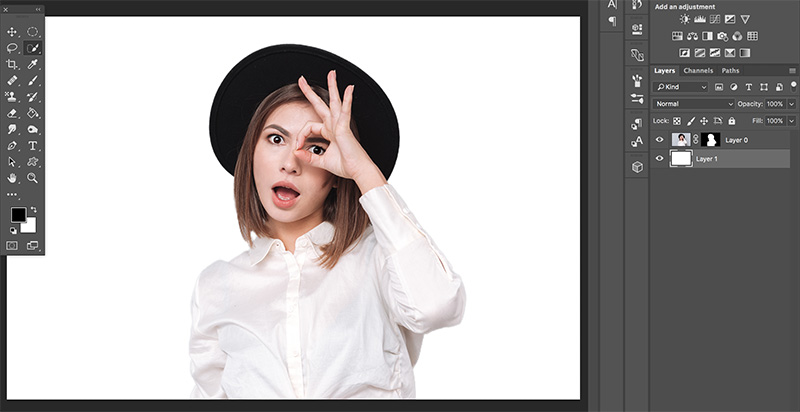
Step 4. Add a Black & White Adjustment Layer.
Select the original layer (Layer 0) and add a Black and White Adjustment Layer.
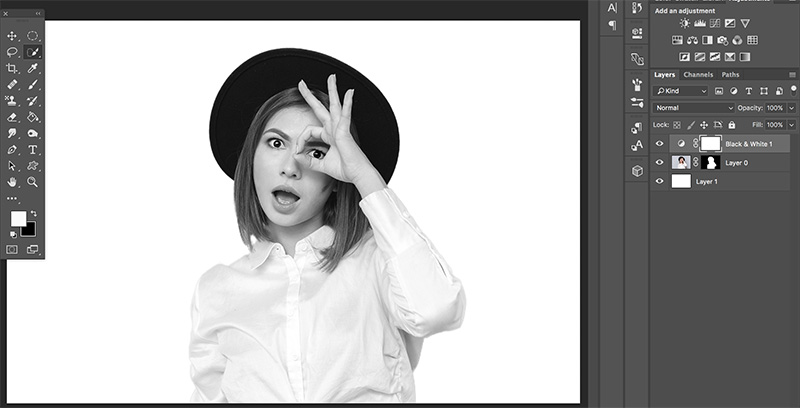
Step 5. Convert to a Smart Object.
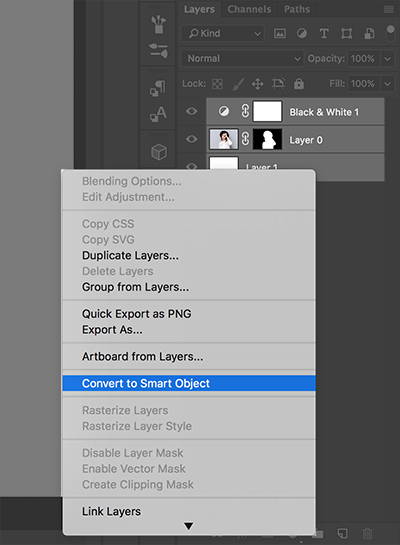
Select all of the layers, right click, and select Convert to Smart Object. You will now have a single layer.
Step 6. (Optional) Rasterize the Layer.
Note: Steps 6 – 10 are optional. For this photo, we want to create more contrast around the woman’s shirt. Pop art turns out best with high contrast images.
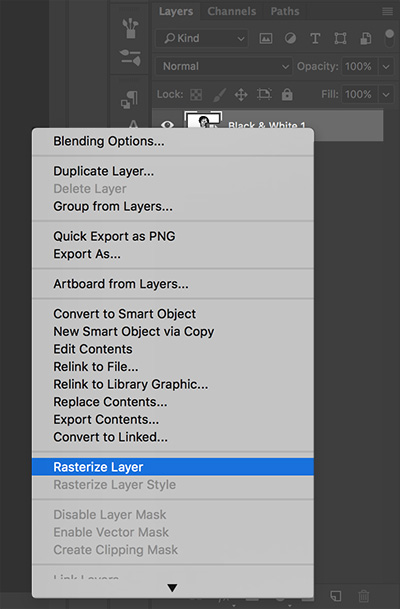
Right click on the layer and select Rasterize Layer.
Step 7. Select the Shirt.
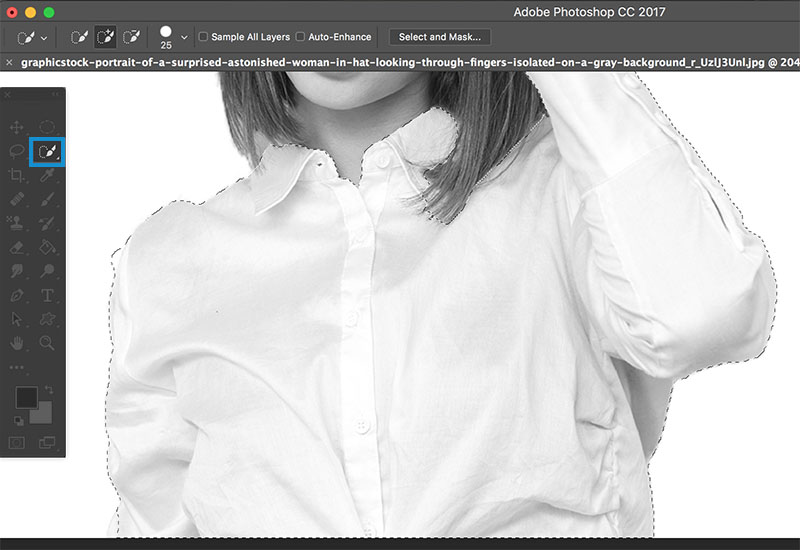
Click on the Selection Tool, then click and drag within the shirt area until the entire shirt is selected.
Step 8. Make a New Layer Via Copy.
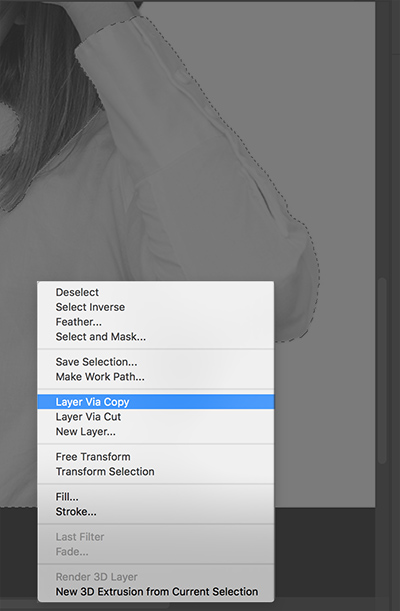
With the shirt still selected, right click and select “Layer Via Copy.”
Step 9. Use the Burn Tool.
With the new Layer selected (Layer 1), click on the Burn Tool. This tool darkens the image wherever you drag your cursor. Use the right and left bracket keys “[ ]” to adjust the size of the Burn Tool. Click and drag across the shirt to darken the shadows and creases.
Pro tip: Hiding the bottom layer will make it easier to focus on the area of the image that you want to burn. To hide a layer, click on the eye symbol next to the layer icon.
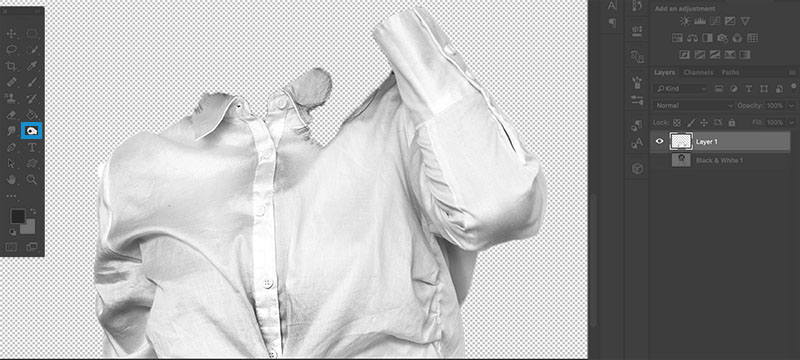
Step 10. Convert to Smart Object.
Once you are satisfied with the contrast of the shirt, select both layers, right click, and select Convert to Smart Object.
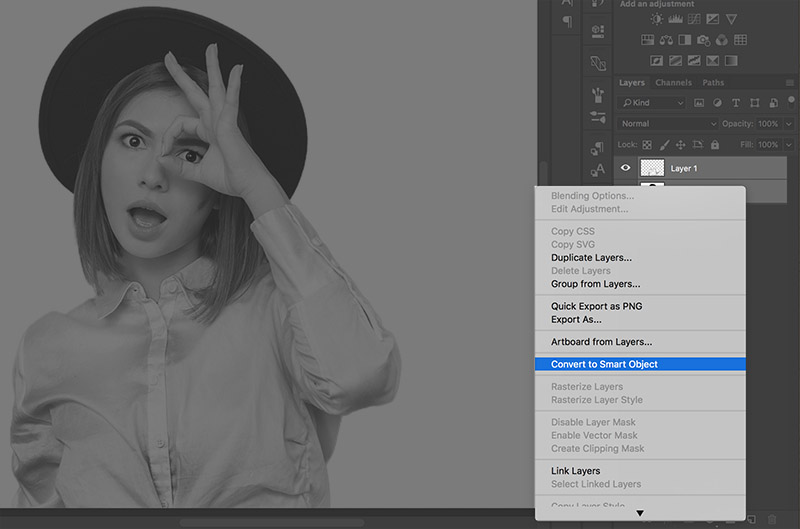
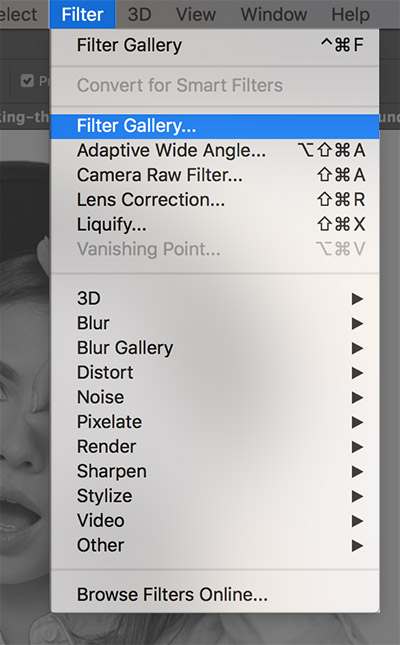
Step 11. Apply the Filter.
Open the Filter Gallery by going to Filter > Filter Gallery.
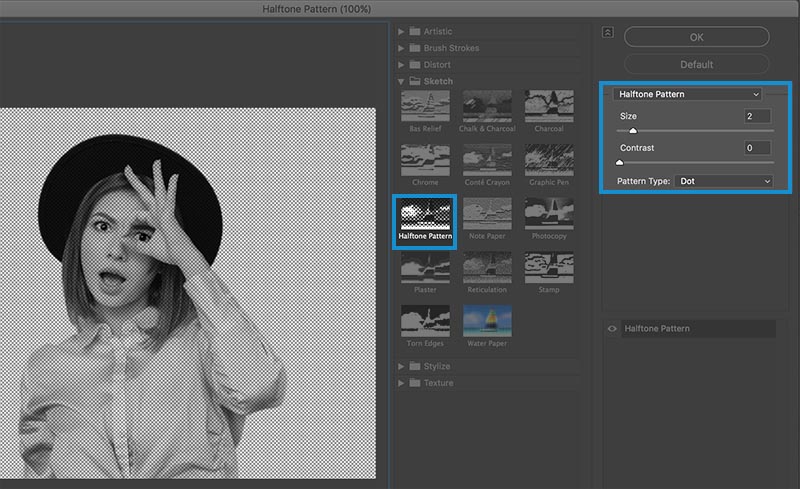
Select the Halftone Pattern filter. Set the size to 2 and make sure that the Pattern Type is set to Dot. The contrast should remain at 0. Click OK.
Step 12. Sharpen.
Go to Filter > Sharpen > Smart Sharpen.
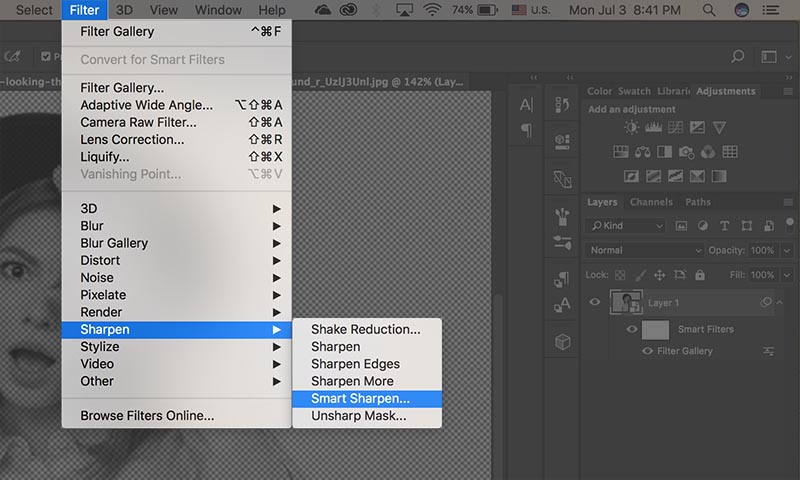
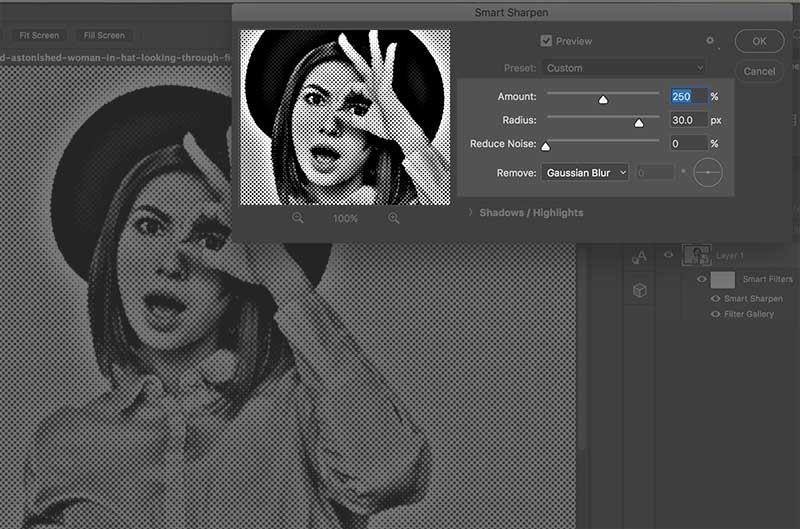
Experiment with the sliders until you decide that the image has enough contrast. You want a lot of contrast to make the image pop.
Once you are satisfied with the overall contrast, click OK.
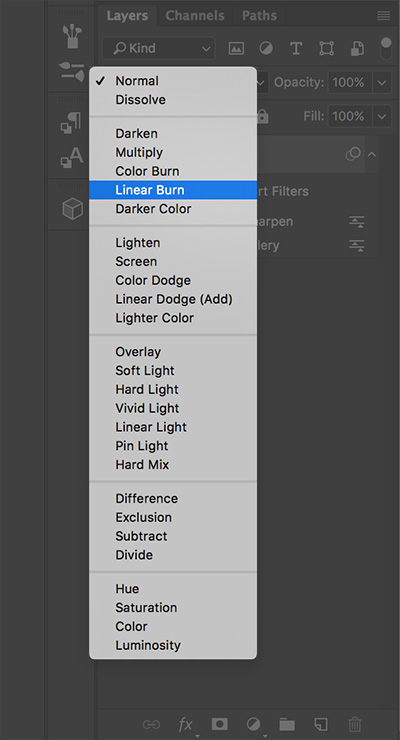
Step 13. Set the Blending Mode.
Set the blending mode to Linear Burn. This will allow us to paint underneath the black dots.
Step 14. Get Coloring!
Now for the fun part! Create a new layer underneath the current one, then select the foreground color and pick a new color.
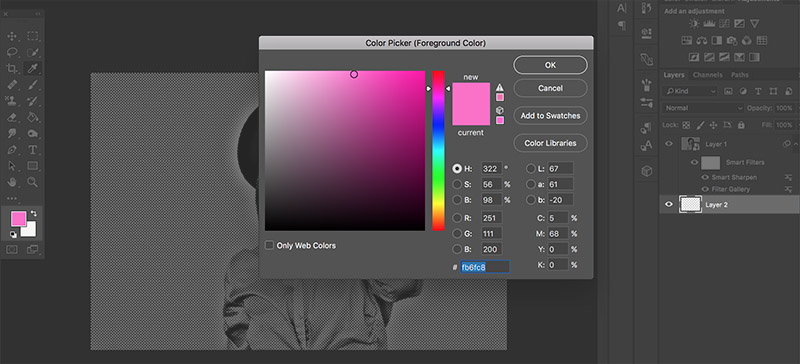
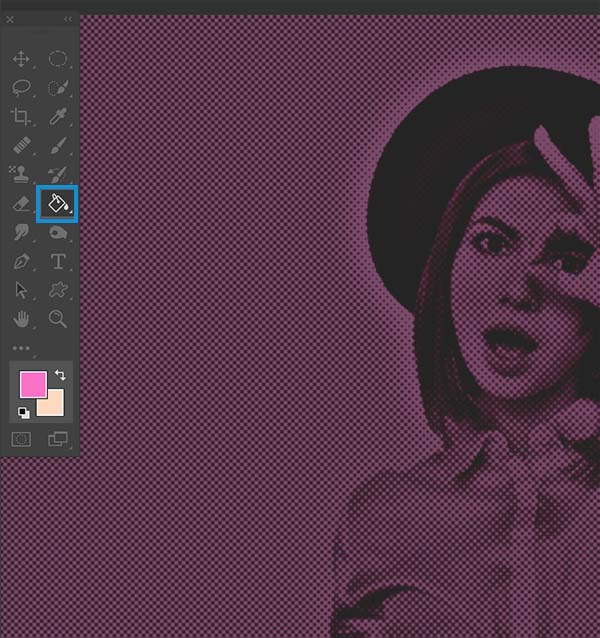
Click on the bottom layer (the one that you just created), select the Paint Bucket Tool, and click on the canvas. The entire image will turn pink, but the black outline of the woman will still be over the pink.
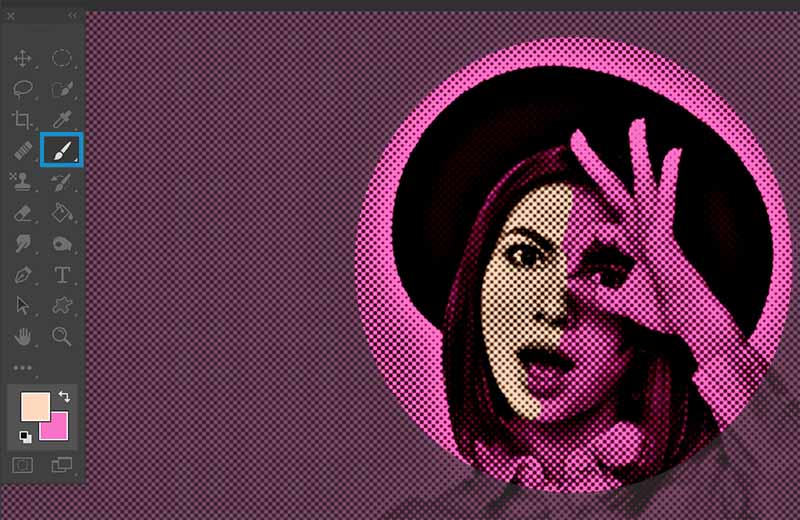
Click on the foreground color again and select your next color. Select the Paintbrush Tool and start painting over specific areas.
Now go crazy with color!
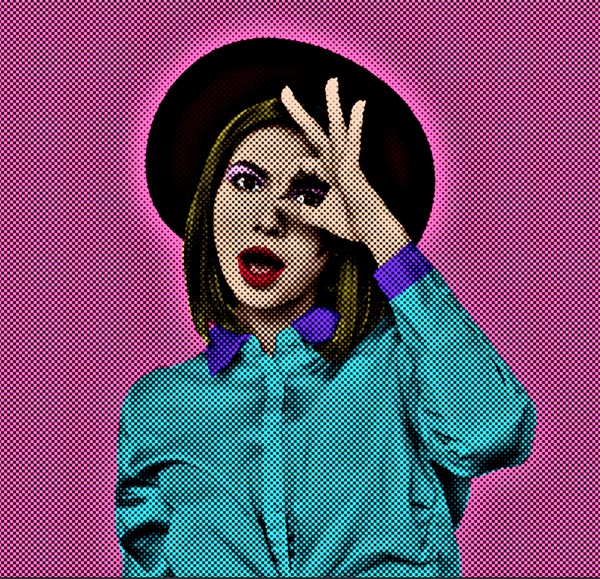
And WHAM, there you have it! You’re now a pop art master. Looking for more inspiration? Check out our collection of portraits and get ready to make them POP!
| Get Poppin’ with Stock Images |
