Maker is an easy, intuitive video editor that empowers creators of all experience levels to create professional-quality videos in minutes. Built for users who want to experiment quickly and avoid the complexity of other video editing tools, Maker integrates directly with Storyblocks’ library to save users time while optimizing their creativity. If you’re looking to promote your brand and grow your social media presence with short-form video, Maker is the solution for you! Now, all that you have to do is get started.
Step 1: Kick off your first video from scratch or from a customizable template
Once you log into Maker, you can either start your first project from scratch or using a customizable template.
If you start from scratch, you can choose from a variety of aspect ratios, including 1:1, 16:9, 9:16, and more, depending on your social media platform of choice. Decide on your aspect ratio and select “Make a Video” to move into the editor!
If you decide to start from a template, scroll down to browse Maker’s collection of hand-crafted templates that are fully customizable. On the left, you’ll see the ability to filter templates by category. On the right, you’ll see an option to filter by your aspect ratio of choice. Once you’ve found the right template, click “Customize” to move into the editor!
If you’re using Maker with a team on our Business Plan, you can start a project by repurposing a team member’s project in the “Team Projects” space. You can also choose to use Maker Brands to leverage the fonts, colors, overlays and logos that your organization has set up for you. Simply click “Start Project with Brand” to quickly and easily apply your pre-set customization settings.
Step 2: Add content to your video in the editor
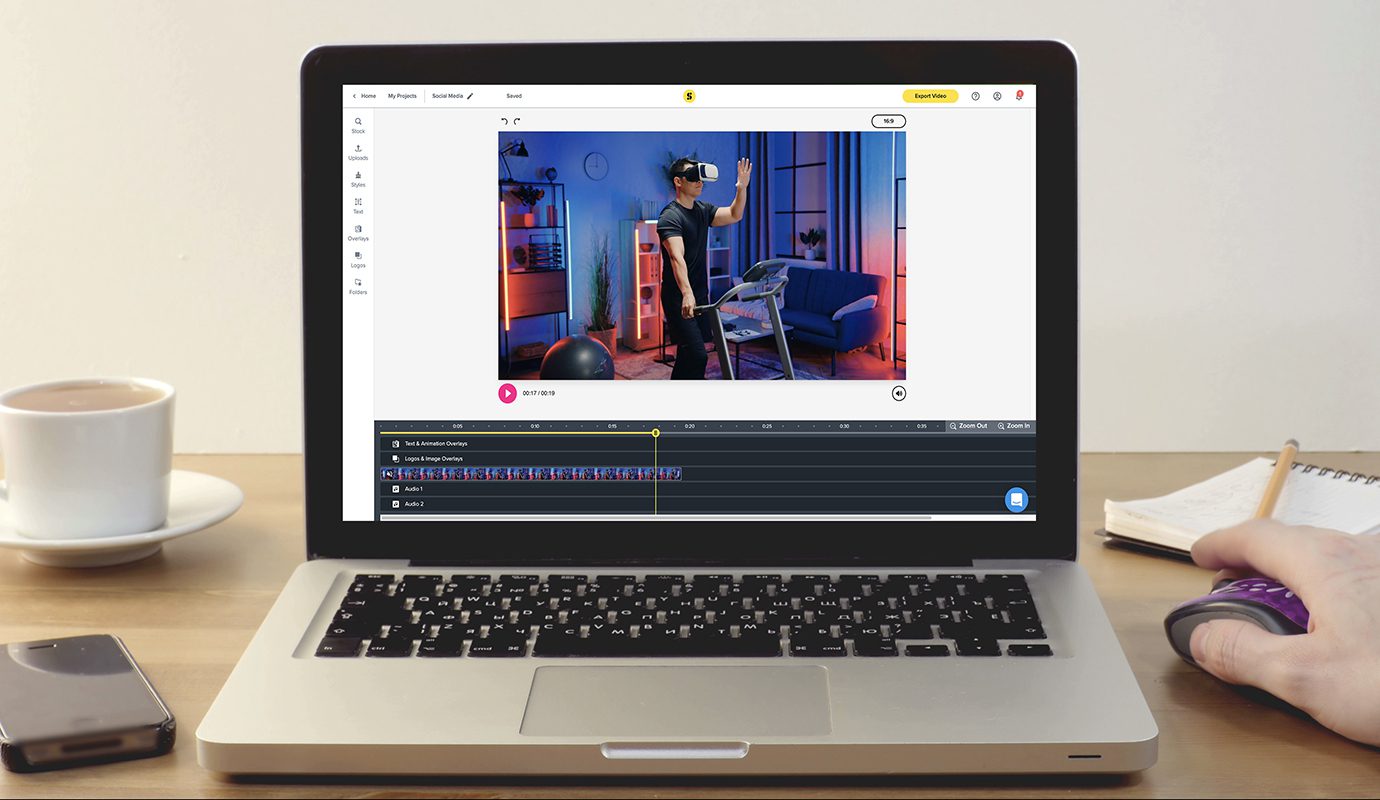
Welcome to the Maker editor interface! Before diving in, we recommend you name your project by clicking on “Untitled Project” at the top left of the editor and typing in your project name.
Now it’s time to get started on your project by adding content to your timeline. Check out the left hand side of the editor to explore content you can add to create your project. Select “Stock” to browse Storyblocks’ demand-driven video, audio, and image library to find exactly what clips you need. Select “Upload” if you are looking to pull in your own clips or “Text” if you want to add static or animated text to your project.
Once you find what you’re looking for, simply drag and drop that content element onto the timeline at the bottom of the editor. If you discover later you want to replace something, just drag and drop a new piece of content over the content you want to replace. Maker was built for rapid iteration, so don’t hesitate to play around until you find that right video or audio clip!
If you’re using Maker with a team on our Business Plan, you can also pull in content to your project from shared folders that you and your team can all access in Maker. You can also choose to use Maker Brands to leverage the fonts, colors, overlays and logos that your organization has set up for you. Simply click “Start Project with Brand” to quickly and easily apply your pre-set customization settings.
Step 3: Brand and customize your video
Once your content is in place, it’s time to customize! With Maker, you can update your fonts, colors, tints, and more in seconds. Just select the element you want to customize and check out the properties panel on the right hand side of the editor for all of the properties you can update with just a few clicks. You can also trim, split, and duplicate your media directly in the timeline using the timeline toolbar.
Looking to update multiple text elements at once to the same font and color? Check out “Styles” on the left hand side of the editor to bulk edit elements in your project and to set a default for new elements you add to your project. Don’t worry if you make an update you don’t like – just use the undo and redo arrows in the timeline toolbar to revert previous changes.
Step 4: Export your video
If you have finished customizing your project, then you’re ready to export your video. Begin exporting by clicking “Export Video” at the top right of the editor. You’ll then be prompted to select your export resolution before kicking off your export.
Exports in general are quick, but if you want to leave the exports page to work on a new project or close out your browser all together, no problem! Maker will send an email once your video finishes exporting.

Step 5: Share your video
Now you’re ready to share your video with followers, customers, or clients! You can download your project onto your device, share using the share your video URL, or decide to access this export later by visiting the “My Projects” space in Maker.
If you’re using Maker with a team on our Business Plan and want your team members to have the ability to access your video, duplicate it, and edit it later, go to “My Projects” and toggle Team Access to on.
Be sure to check back for updates on Maker and other videos that show you how to get the most out of your Storyblocks subscription. Happy creating!
![[Re]introducing: The Storyblocks Plugin for Adobe Creative Cloud](https://www.storyblocks.com/resources/wp-content/uploads/2023/03/Screen-Shot-2023-03-07-at-10.22.48-AM-e1678203001433-500x382.png)