
Feeling ignored in the Instagram algorithm? Try posting a Reel! Instagram Reels are a great way to boost your engagement, reach more people and build a larger community on the platform.
Reels are short-form, vertical videos that can be up to 60 seconds long. When Instagram CEO Adam Mosseri announced in 2021 that Instagram was “no longer a photo sharing app,” was when Reels started to take priority in the algorithm.
Looking to create your first Instagram Reel? Here’s how to do it:
First, access the Reels Feature. Then, there are three different ways to start:
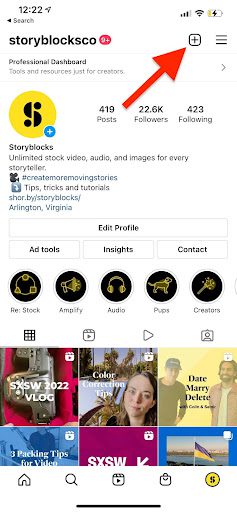
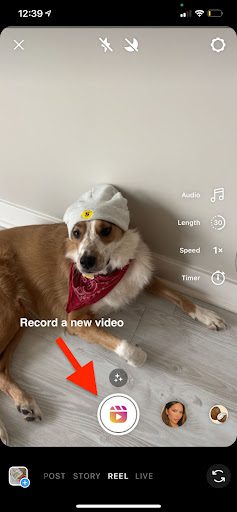
1. Tap the plus (+) button at the top of your home screen and select “Reel”

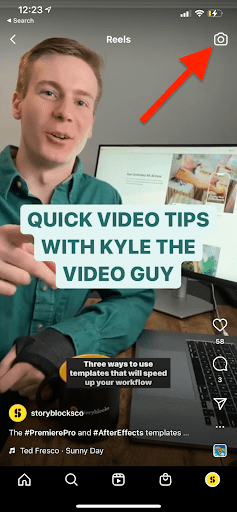
2. Tap the camera icon on the top right corner of an existing Reel. Note: this option will automatically prompt you to use the audio of the original reel.
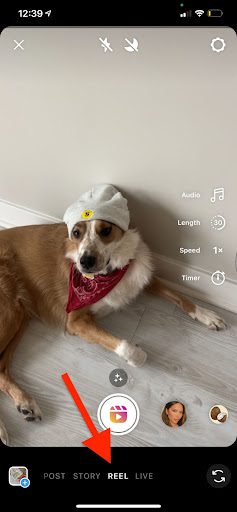
3. Scroll to the “Reel” option when in the Instagram Stories camera.
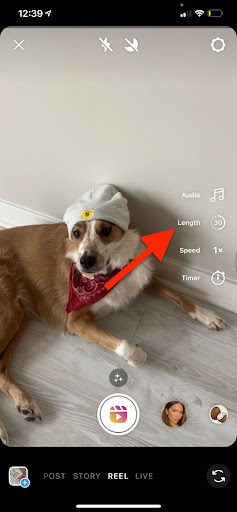
Once you have the Reels camera open, select how long you want your Reel to be (15, 30 or 60 seconds).
Record Video or Add Clips:
From there, you can either record clips from within the app or upload your own videos or images from the bottom left hand corner of the screen. Once you’ve added your clips, you can trim, edit, reorder or add additional clips by hitting the arrow to the left of the record button.
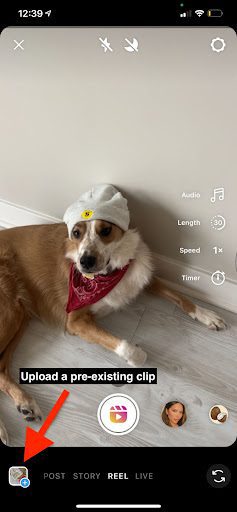
You can also toggle the speed of your video, create a layout or set a timer to record.
Add Audio:
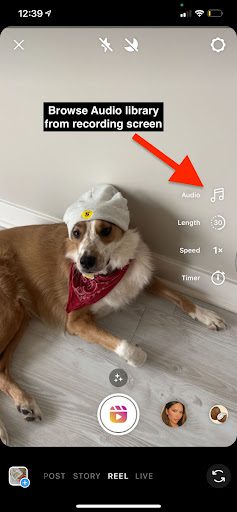
Once you’re ready to add audio, explore these options:
Record your own audio while filming
Use the audio from an existing Reel
Search for music in Instagram’s music library
Use the voiceover feature and narrate your video
To record your own audio, simply press record and start filming!
To use the audio from an existing Reel, head to the explore page and find an audio that you like and/or want to use. Tap on the audio name at the bottom of the Reel and press the “Save Audio” button to add it to bookmark it for easy reference later. Or you can select “Use Audio” at the bottom of the screen. If you’re wondering how to select the best audio for your Reel to increase your video’s engagement, we’ve gathered some tips for you.


To search for music available in Instagram’s music library, tap the Audio button on the recording screen or the Preview screen (when you’ve finished recording your Reel) and browse through the available music. You can also access your Saved Audio clips on the same screen. Note: Most business accounts on Instagram cannot use music from recording artists due to copyright restrictions. You are limited to using music categorized as “Original Audio” or other royalty-free audio options.


To use the voiceover feature, record your Reel and tap the Preview button which will bring you to a new screen. Once you’re there, tap the Audio icon which will give you the option to select the voiceover feature.
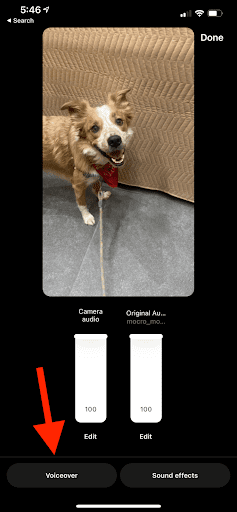
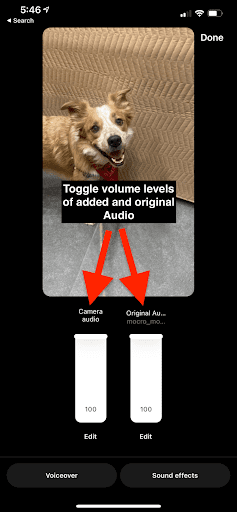
You can also use the Audio screen to change and remix the volume levels of both the original and added audio.
Add Text and Effects:
So your clips are edited and your audio is selected. In the same Preview screen, you can access all of the same features in Instagram Stories including text, filters, stickers, filters and draw.
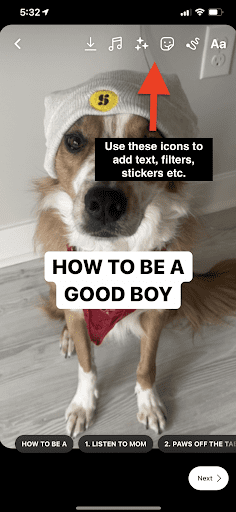
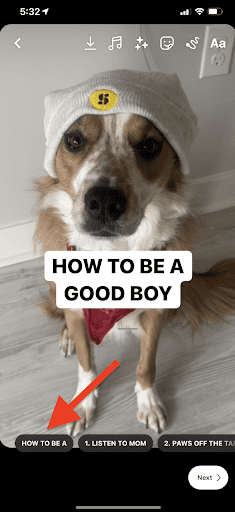
You can add multiple “text blocks” to pop-up in various places during your Reel. Add your text blocks and select the text layer at the bottom to adjust the start and end time you want the text to appear in your video.

Publish Your Reel:
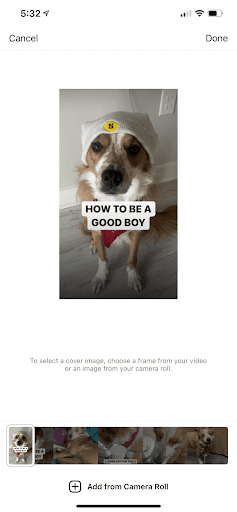
Time to share your Reel with the IG world! Hit “Next” and choose a cover photo for your Reel. This cover photo can either be a screengrab from the Reel or an image you select from your library.
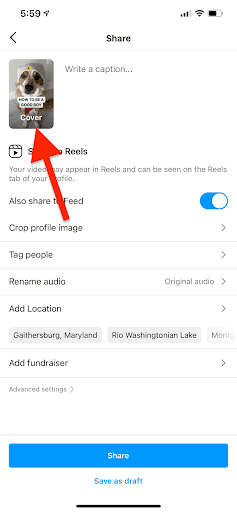
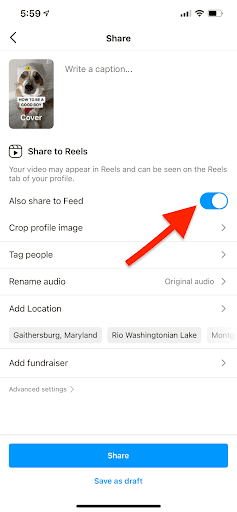
Turn on the “Also share to Feed” option if you want the Reel to show up in your main profile. If it’s turned off then your Reel will only show up in your Reel library with the rest of your Reels. Regardless of which one you choose, your Reel will be shared to your followers (like any other post) and the Reels discovery feed.
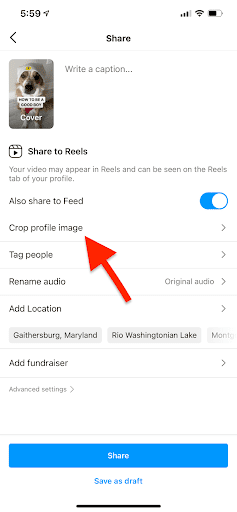
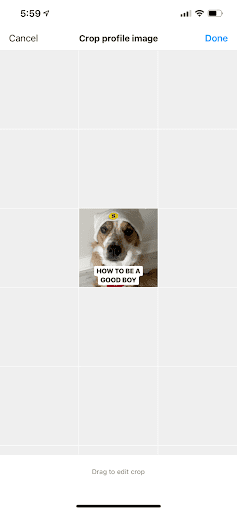
Select “Crop your image” to preview how the cover photo will look like on your main feed.
From there, write your caption, tag people, add a location and share!
But wait…before you hit “Share” check out our blog post on How To Increase Views on Your Instagram Reels to optimize your content!