
Love them or hate them, GIFs are a cornerstone of the internet. Whether you’re sending one in a group chat or creating one to stand in for a video, they’re a convenient way to grab people’s attention and spark engagement.
One of the best aspects of GIFs is also how they can be made from virtually any video file with Adobe Photoshop. In just five easy steps, you can take a snippet from a piece of footage or clip and turn it into a looping animation. Choose a stock video from our library and follow along with the tutorial below to learn how to make a GIF in Photoshop.
Learn how to make a GIF in Photoshop
Step 1. Import your video into Photoshop
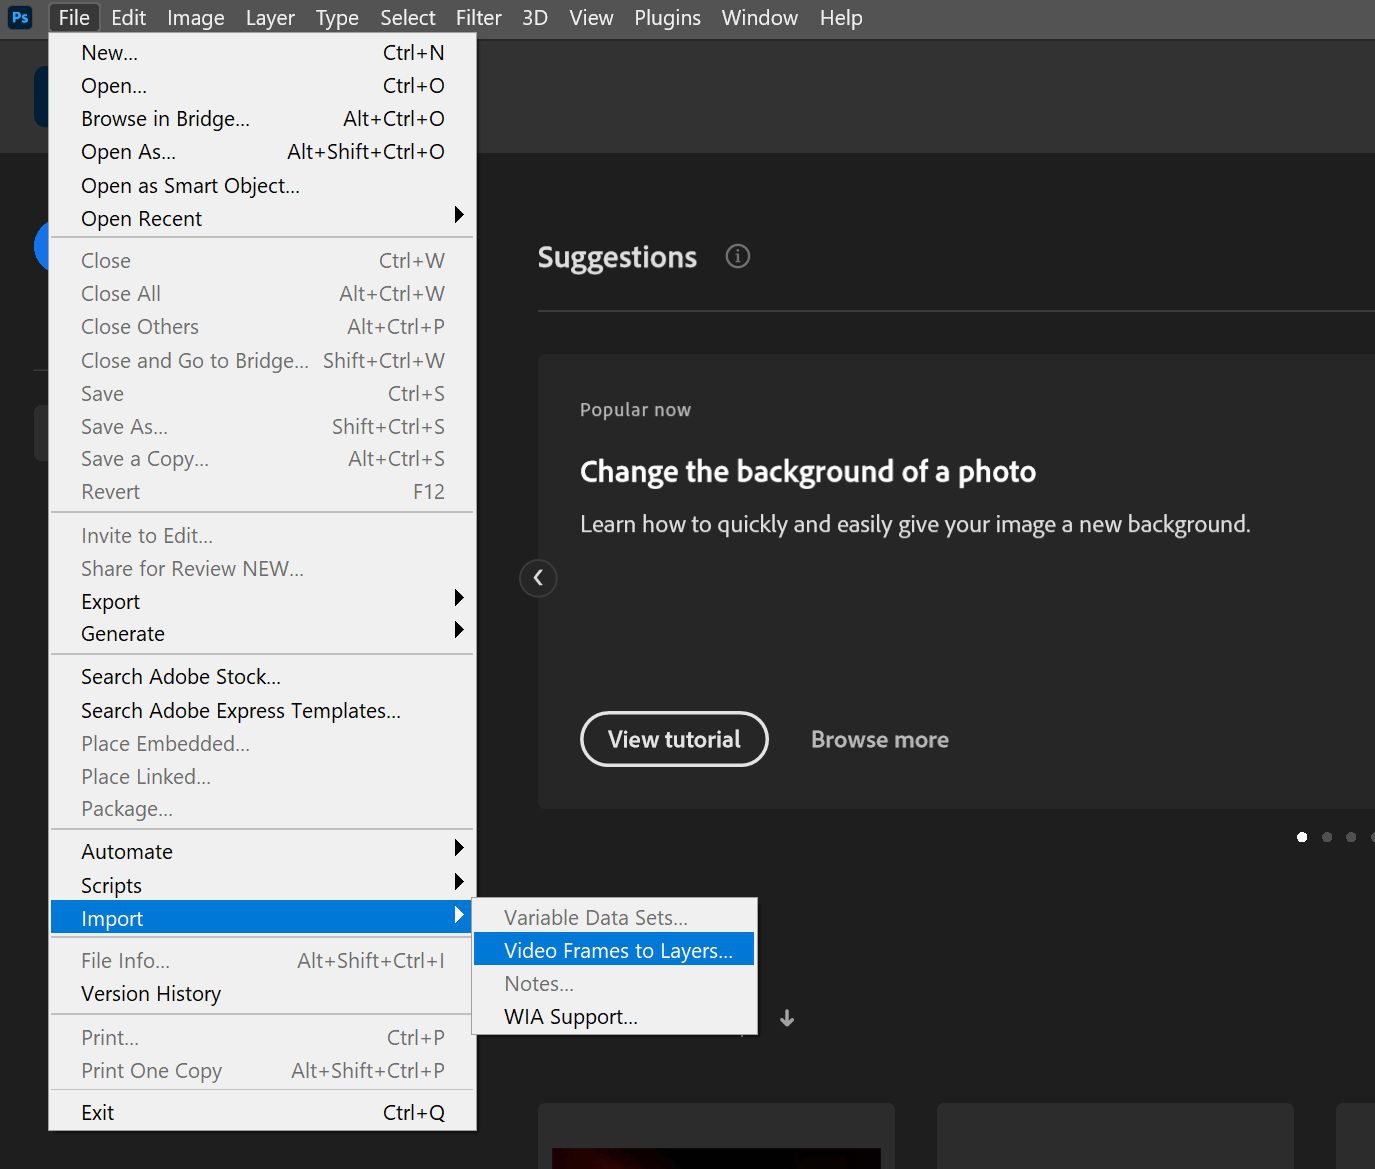
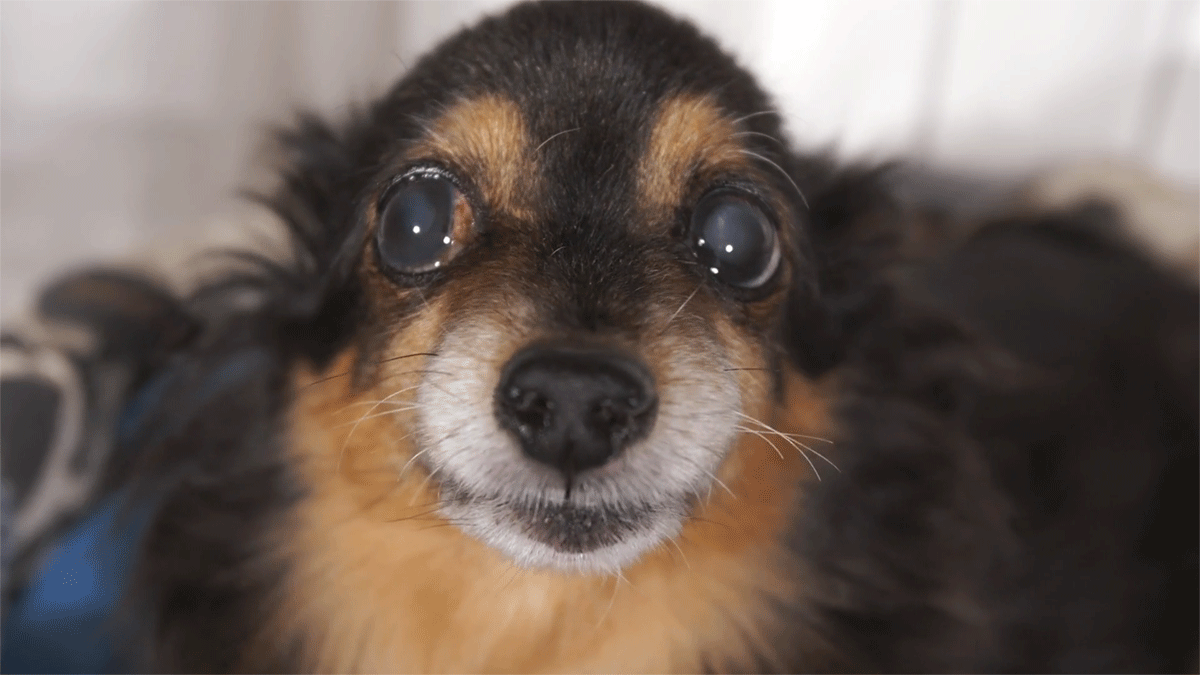
Open up Adobe Photoshop and navigate to the top menu. Under File, select Import > Video Frames to Layers. This chops up your video into individual layers, making it easier to edit your GIF. For our tutorial, we chose this clip of a smiling dog.
Step 2. Choose the section of your video you want to make a GIF of
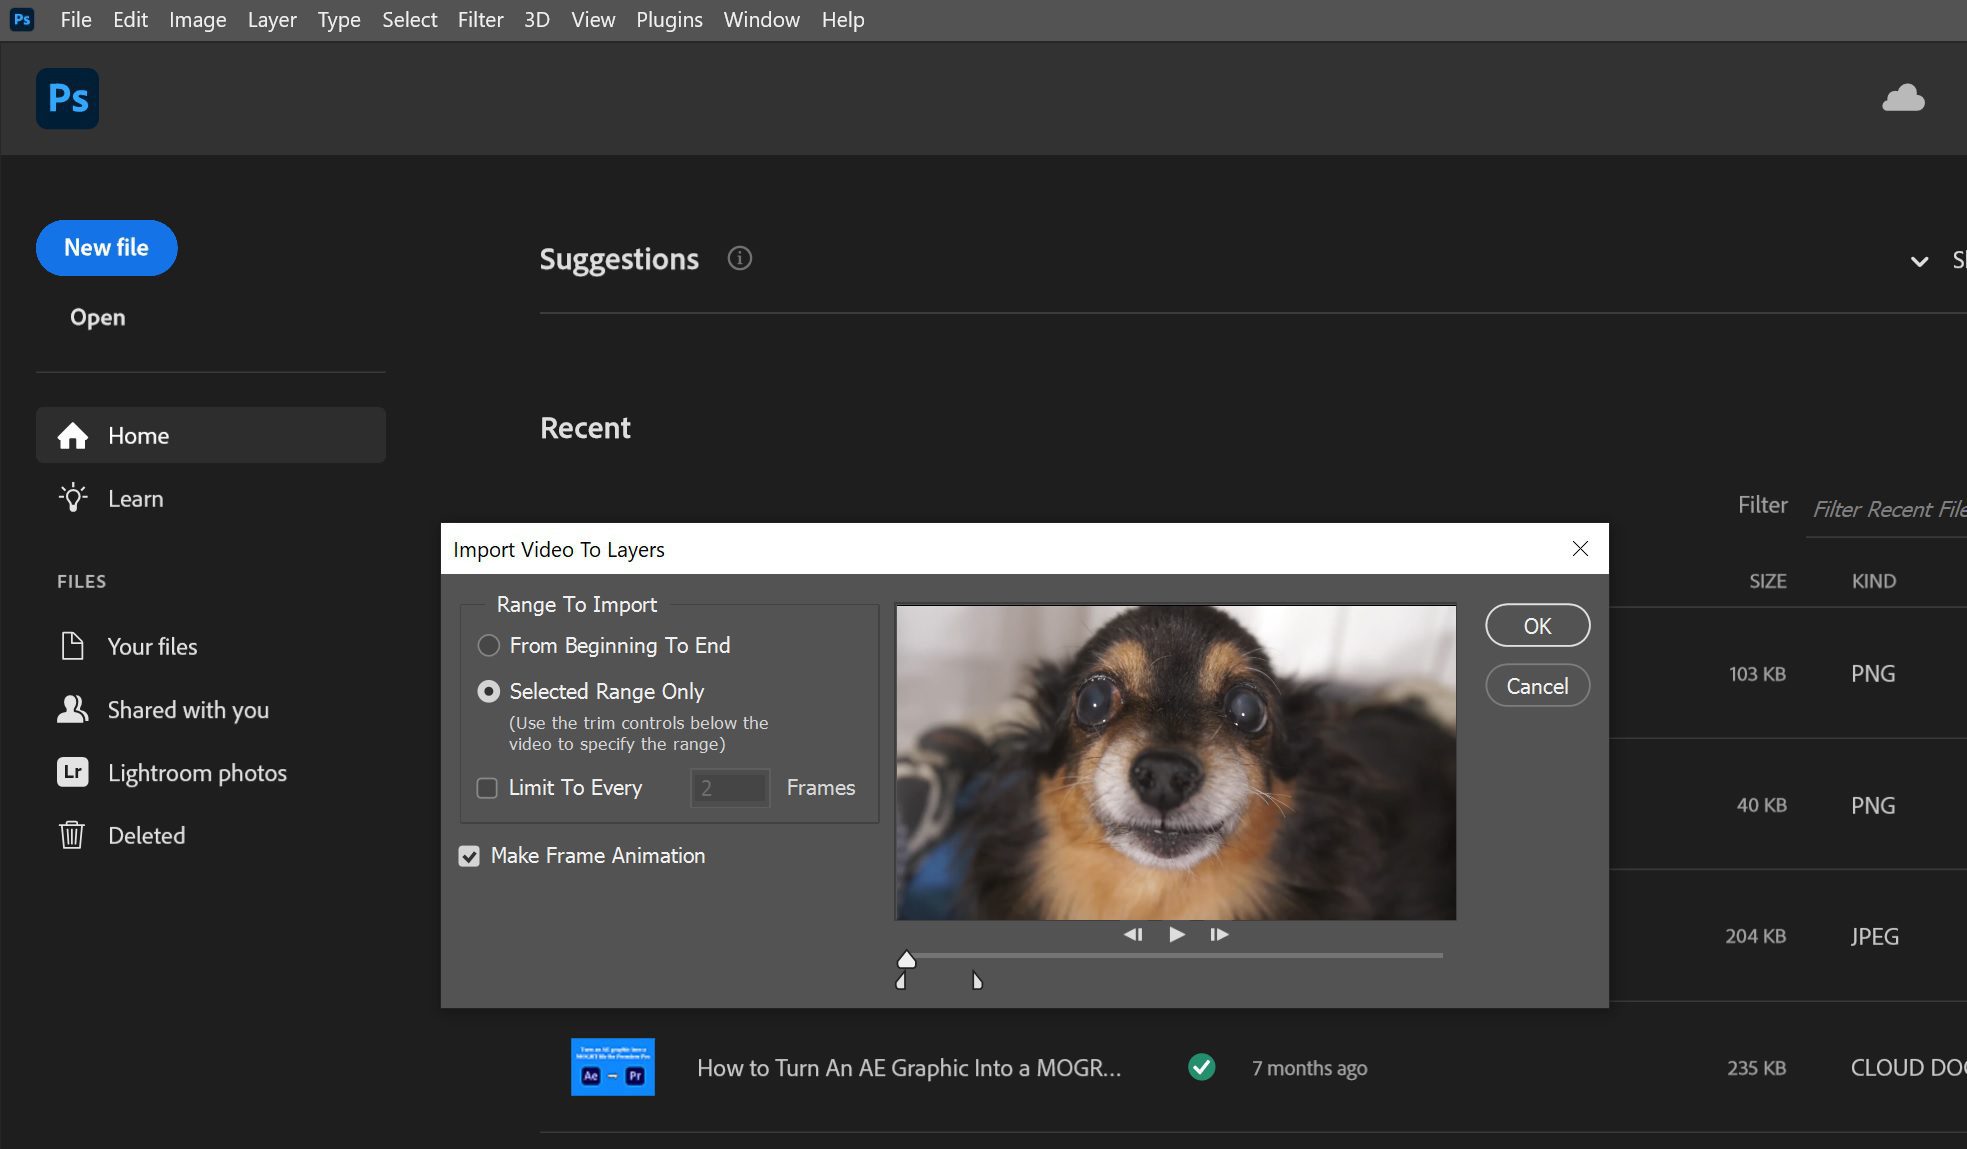
Once you select your video for import, a window pops up that allows you to choose the section of your file that you want to create a GIF of. Adjust the in-point and out-point by dragging the small markers below the video timeline. Once you adjust the markers, you’ll see the radio buttons on the left beneath Range To Import change to Selected Range Only.
You also have the option to limit the number of frames you want to import from your selected range. But be aware that the more frames you skip, the choppier the GIF will be. We recommend just importing every two frames for an authentic GIF feel. Test out different options out to see what looks good to you.
Step 3. Adjust the time of each frame
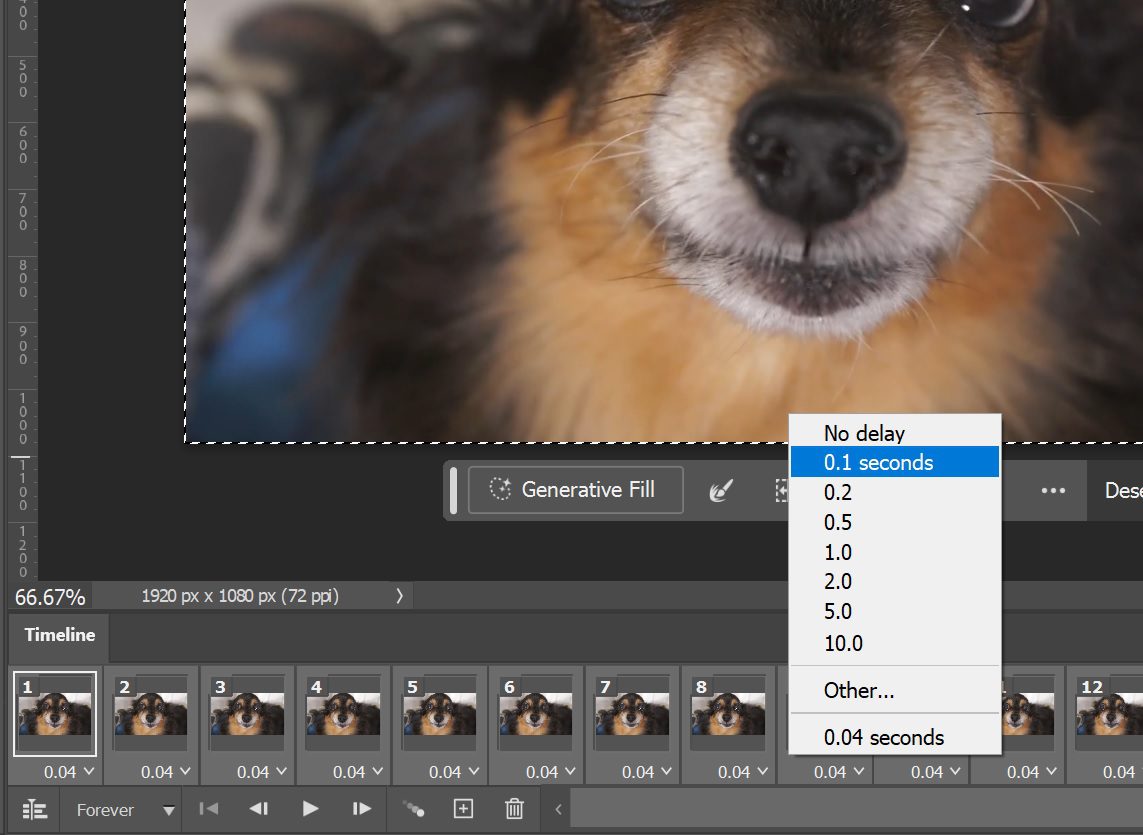
The next step is to adjust the speed of your GIF. Highlight all of the frames in the timeline window and click on the scroll down button in the bottom left corner of any frame panel. This setting is completely up to you, so pick whichever time works best for your project. Experiment with different times and play your GIF through to see how each speed changes your GIF. The closer to 1 second your GIF is, the slower it’ll be.
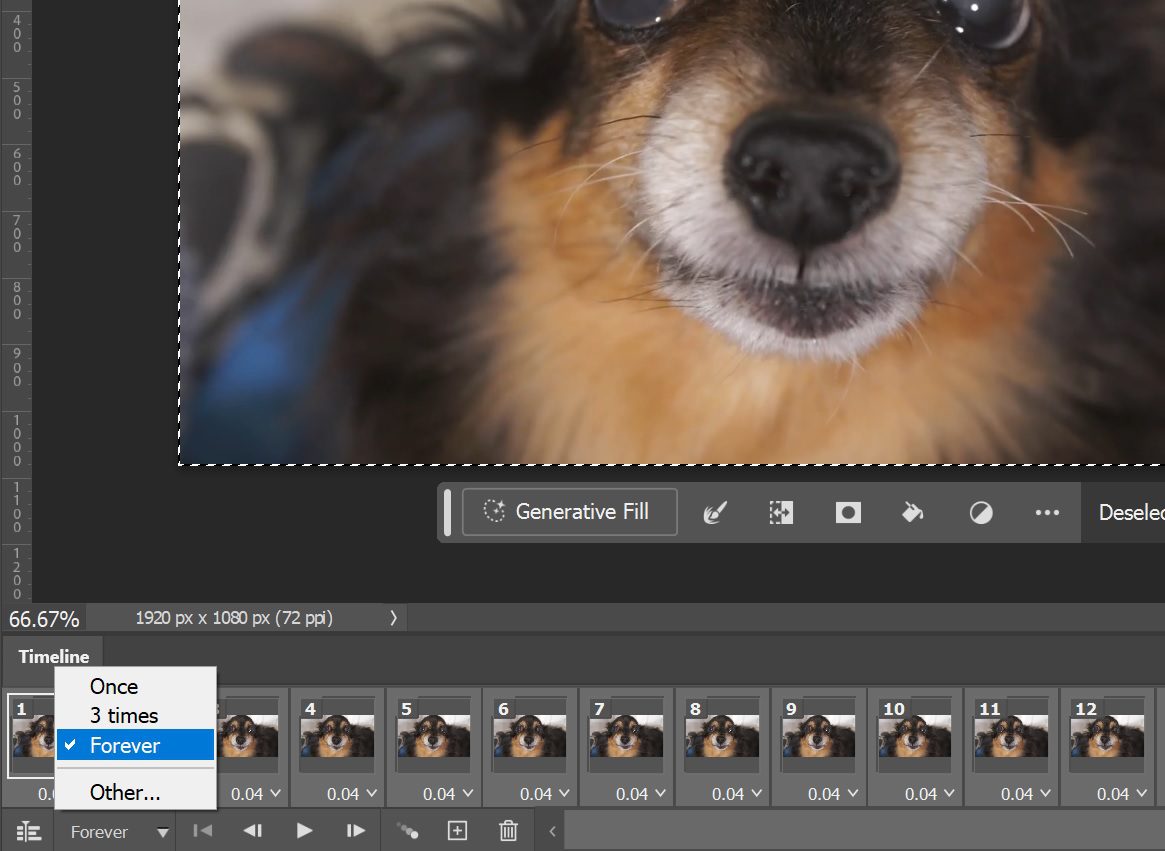
Step 4. Set the loop
At the bottom of the timeline window, there is a drop-down menu that allows you to change the looping setting. GIFs typically operate on an endless loop, so set the loop to “Forever” unless you need to specify a specific number of loops.
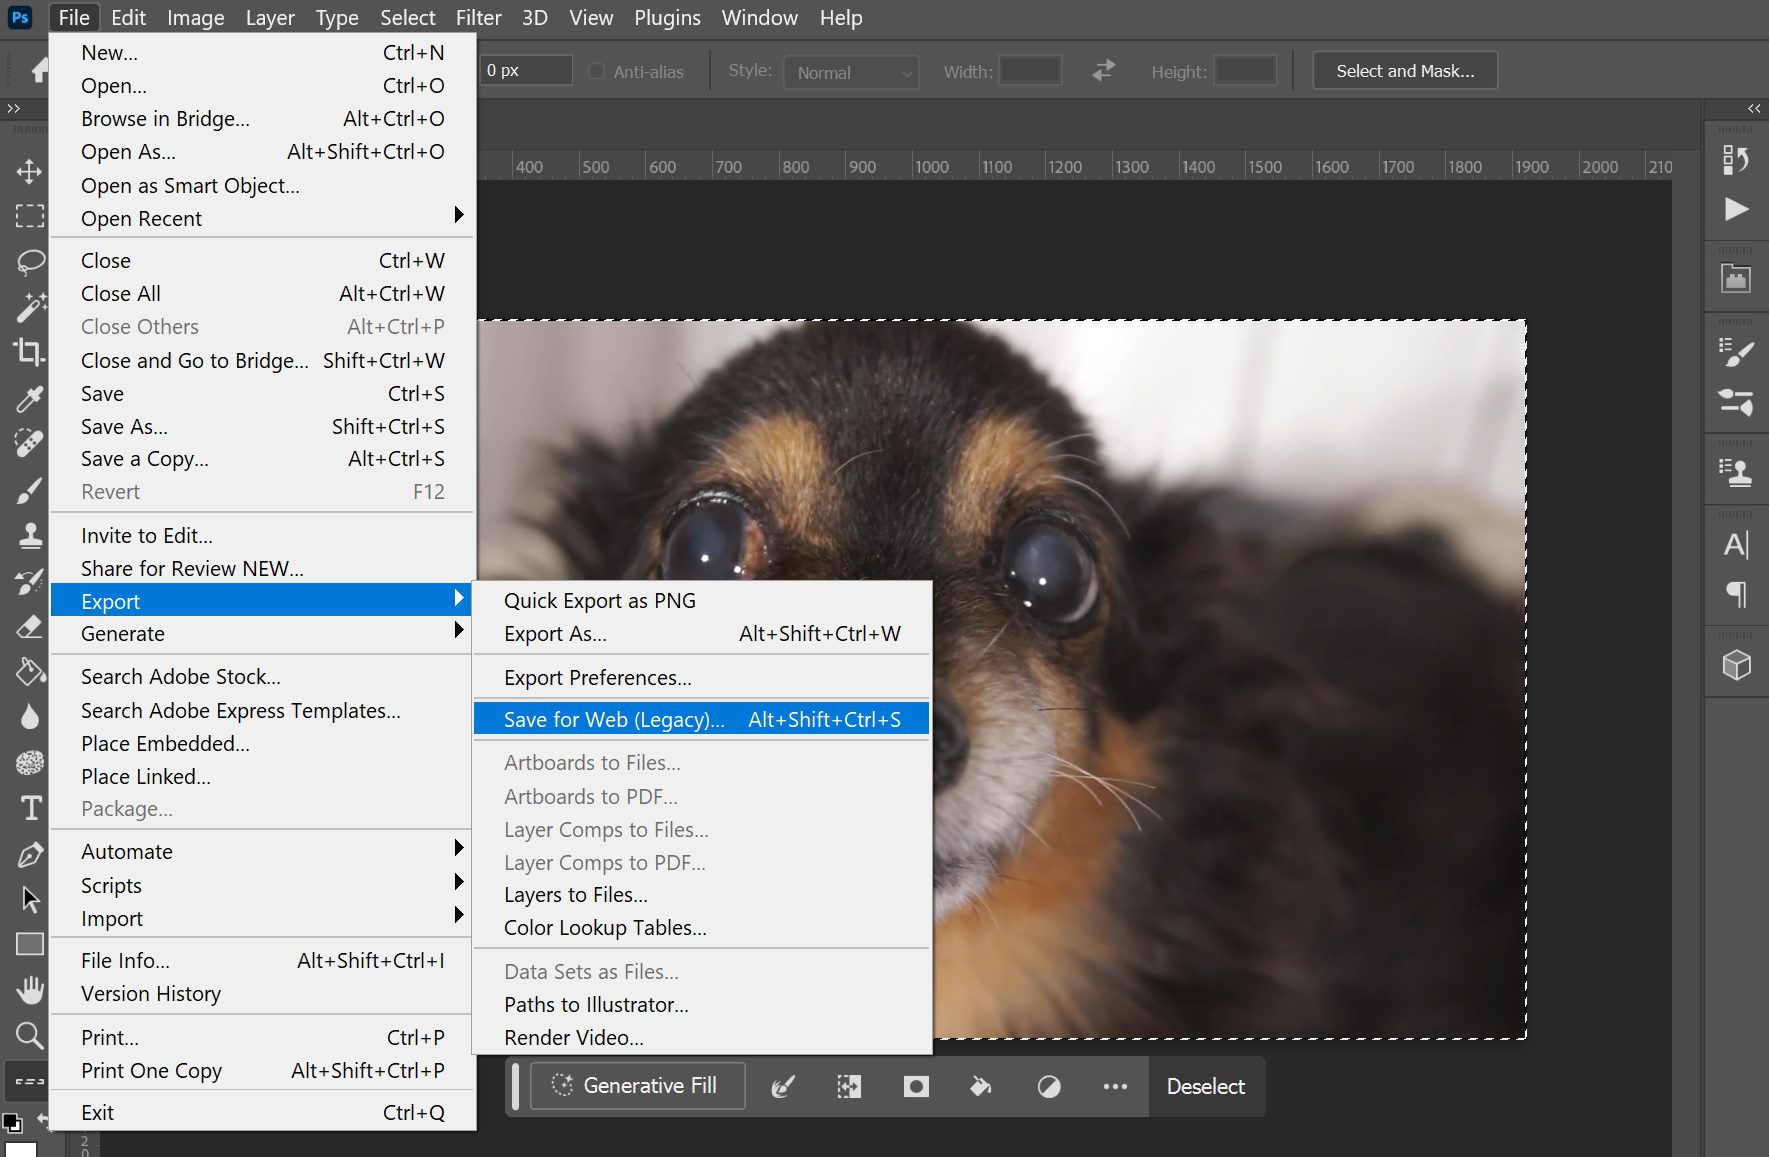
Step 5. Export your GIF
When you’re done perfecting your settings, click File > Export > Save for Web and change the file type to GIF.
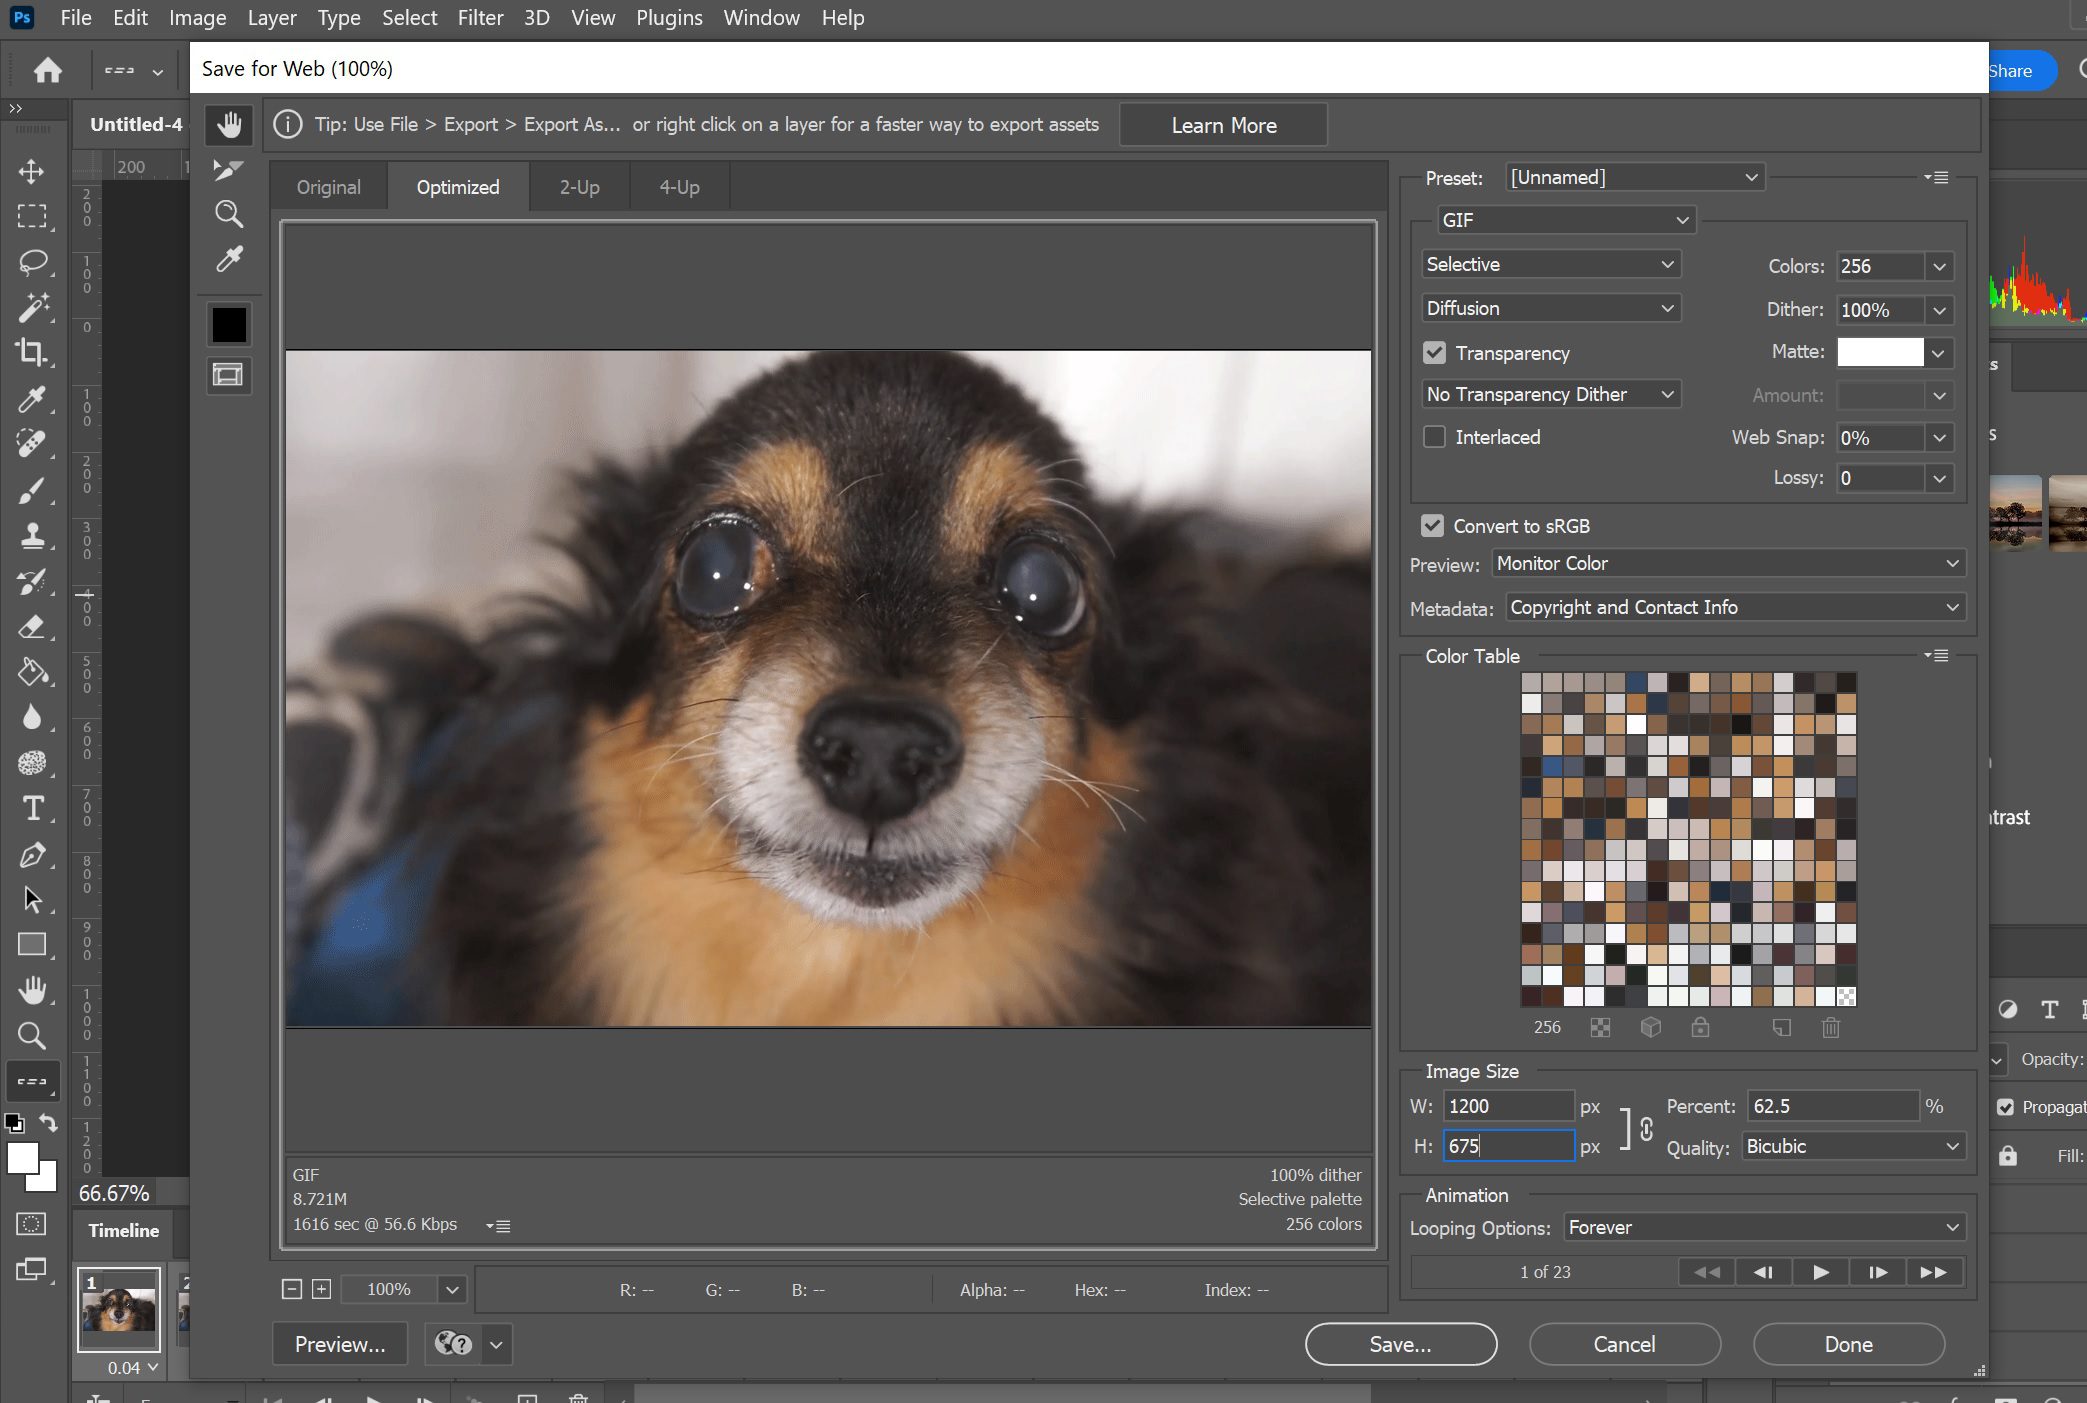
From here you can adjust certain settings—like the lossy compression, dither, image size, and colors. Adjust these to make your GIF a nice, small size for uploading on the web. Adjusting these settings may lower the quality of the final product, but GIFs aren’t known for being high-definition, cinematic masterpieces. Below the preview, you can see the file size as you adjust settings.
Smile – you did it! You’ve created a GIF in Photoshop and now hold the power to take any section of a video file and loop it forever.
Learn how to do even more in Photoshop
As you can see, making GIFs isn’t all that difficult. Now that you know how to create your own in Photoshop, you can customize your own to share with friends or use for marketing materials. Storyblocks’ library of royalty-free footage is perfect for making practically any GIF you can dream of. If you found this tutorial helpful and want more like it, read through our tutorial on how to animate vectors in Photoshop. Then explore our collection of Adobe After Effects tutorials to become a pro-level animator.
Editor’s Note: We updated this post to include additional information. It was originally published on March 28, 2018.


