For small business owners, product mockups are an essential part of pitching ideas, generating business, and even brainstorming new ideas and product capabilities. Whether you’re looking to use your mockups in the boardroom or on a billboard, showcasing your product in action is a great way to get people excited. While there are lots of ways to generate high-quality mockups—including pricey professional help—mockups are actually pretty easy to make using Adobe Photoshop. To show you how, why we’ve put together this simple tutorial using stock photos. Check out our plans here! Pro Tip: Reducing the opacity in the layers panel will allow you to see the image underneath more easily. Click and drag the corners to get the necessary size and shape. Remember that electronics usually show a thin black border around the edges of the display window, so we don’t want to fill the screen completely. If you have a rounded shape or something (like a person or object) is entering the frame, requiring a more customized shape, you can use a layer mask to “delete” those extra pixels. Just select the layer and add a layer mask by clicking the layer mask icon at the bottom of the layers panel. You can then use your paintbrush with the color set to black to paint over any pixels you don’t want. If you paint out something you wanted to keep, simply switch the color to white and paint over the area again to make them reappear. Click ENTER to apply your changes, and bring the layer opacity back up to 100%. Open your product image in Photoshop (FILE > OPEN). Now, drag and drop your new image into this screen using the “Move” tool. Resize the image to fill the screen. Now, click SAVE and close the window. Make sure you don’t close all your Photoshop windows because we still need our original background image! Pro Tip: If you hold down shift, it will drop the new image directly into the center of the Smart Object. At this point, you may be able to leave your mockup as-is, but there are a few tricks you can use to make it even more realistic. And there you have it folks! We can’t think of anything more inspiring than seeing your ideas come to life. Thanks to royalty-free stock photos and Adobe Photoshop, anyone can master this simple technique and transform vision into reality. Once you’ve mastered this skill, you can move on to learn how to create video mockups.
What will you create?
Step One:
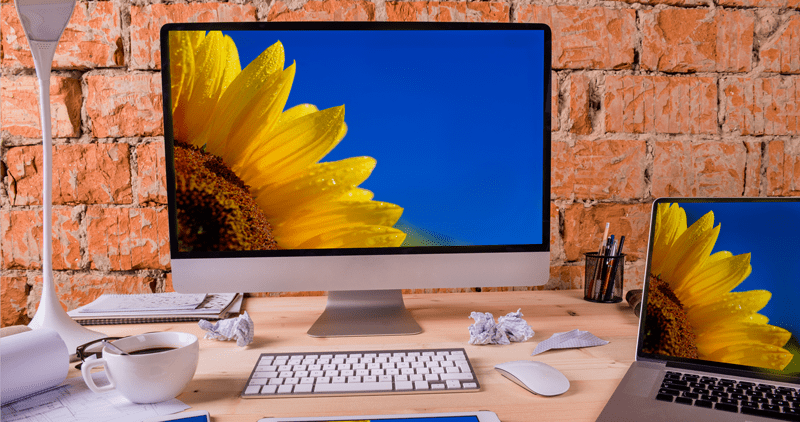
Download your background stock image and open it in Adobe Photoshop This step is hardly a step at all, but there are a few important things to remember when choosing a background image. Ideally, your screen should be black, and the simpler the perspective the easier the following steps will be. Also, if you download a photo from most stock providers, you can only use that edited image for personal use. In other words, if the mockup is going to make you money, it’s off limits, unless you want to risk a copyright lawsuit. Luckily, our images are all royalty-free so you can use these mockups in marketing campaigns and for other professional uses. For our mockup, we used this background photo and this sunflower photo.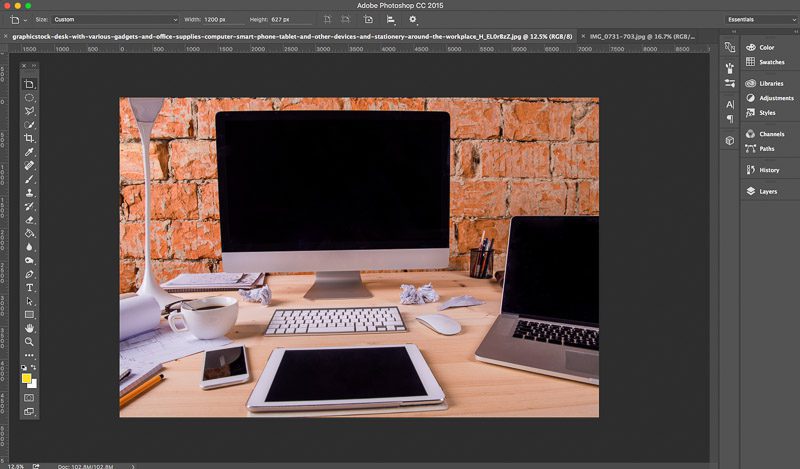
Step Two: Draw your shape
Draw a simple shape using the “Shape” tool in the toolbar. It doesn’t have to line up perfectly, but make sure it covers the whole figure entirely. Pro Tip: Using your guides will make this process easier and more foolproof.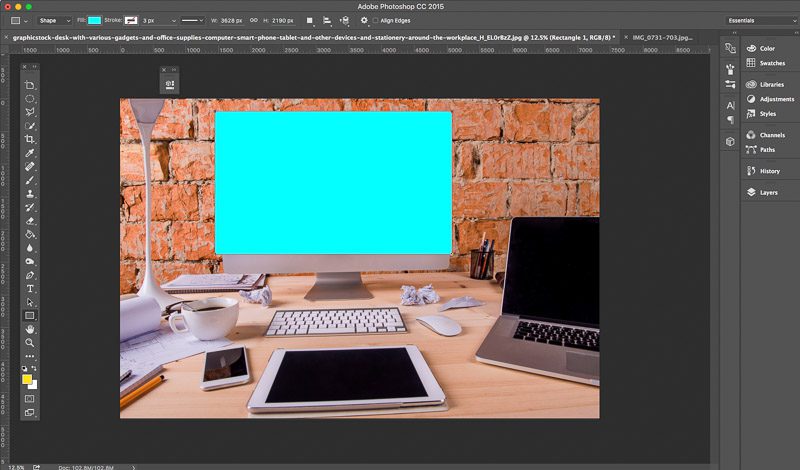
Step Three: Convert your shape to a Smart Object
It’s important that you do this step before adjusting the image to fit the screen in the photo better (Step Four). To convert a shape to a Smart Object, simply right-click on your layer in the layer panel on the right, then select “Convert to Smart Object” from the drop down menu.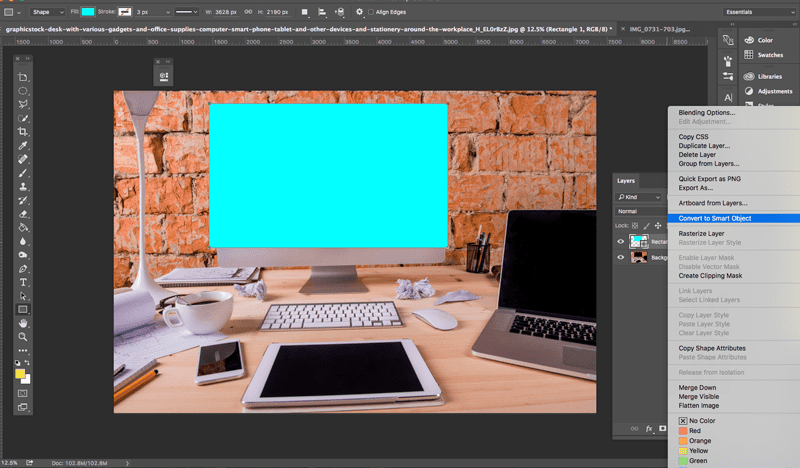
Step Four: Adjust the perspective
Now we’re going to make our Smart Object fit the monitor screen in the photograph using the “Transform tool”. Go to Edit > Transform > Distort to start editing the shape of your Smart Object.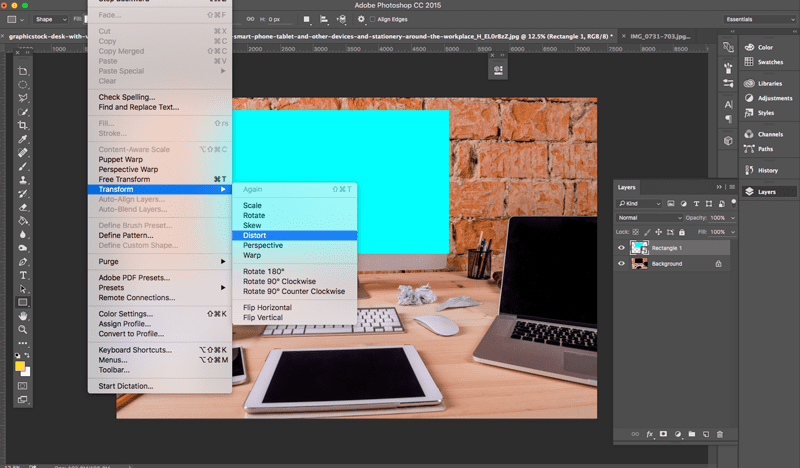 Pro Tip: Reducing the opacity in the layers panel will allow you to see the image underneath more easily. Click and drag the corners to get the necessary size and shape. Remember that electronics usually show a thin black border around the edges of the display window, so we don’t want to fill the screen completely.
 If you have a rounded shape or something (like a person or object) is entering the frame, requiring a more customized shape, you can use a layer mask to “delete” those extra pixels. Just select the layer and add a layer mask by clicking the layer mask icon at the bottom of the layers panel. You can then use your paintbrush with the color set to black to paint over any pixels you don’t want. If you paint out something you wanted to keep, simply switch the color to white and paint over the area again to make them reappear. Click ENTER to apply your changes, and bring the layer opacity back up to 100%.
Step Five: Drop in your image
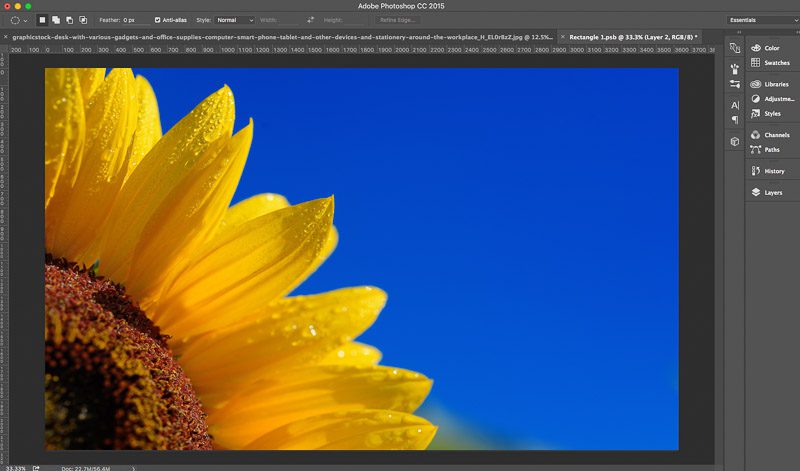
Now it’s time to add your actual product image to the mockup. To do this, first double-click on your Smart Object Thumbnail in the layers panel. If you simply double click on the layer itself, this won’t work. You must click on the image icon next to the layer name. Once that’s done, you will see a new screen pop up that appears to be the same shape as your Smart Object back in Step Three. As you can see below, we now have a large rectangle that looks an awful lot like our original rectangle before we applied the transformation.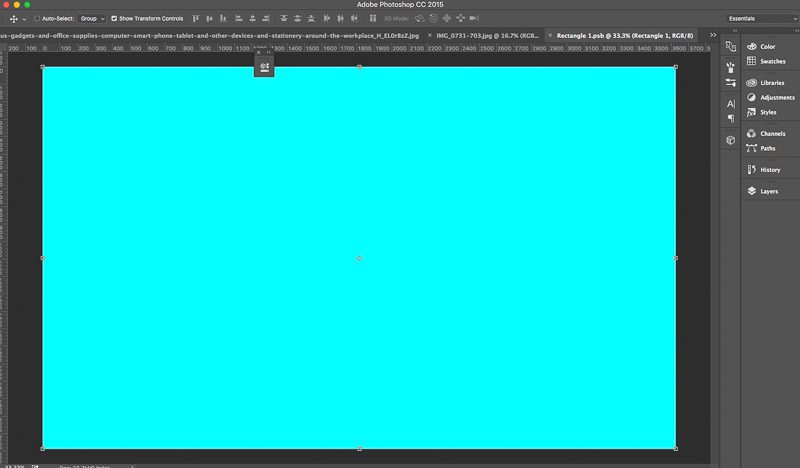 Open your product image in Photoshop (FILE > OPEN). Now, drag and drop your new image into this screen using the “Move” tool. Resize the image to fill the screen. Now, click SAVE and close the window. Make sure you don’t close all your Photoshop windows because we still need our original background image!
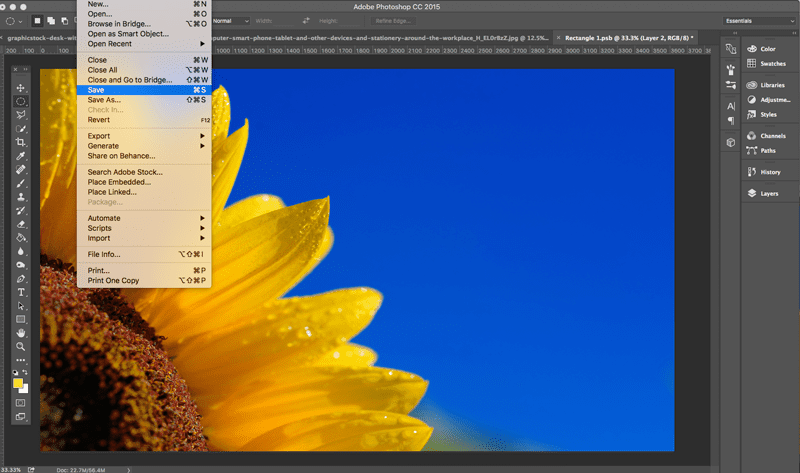
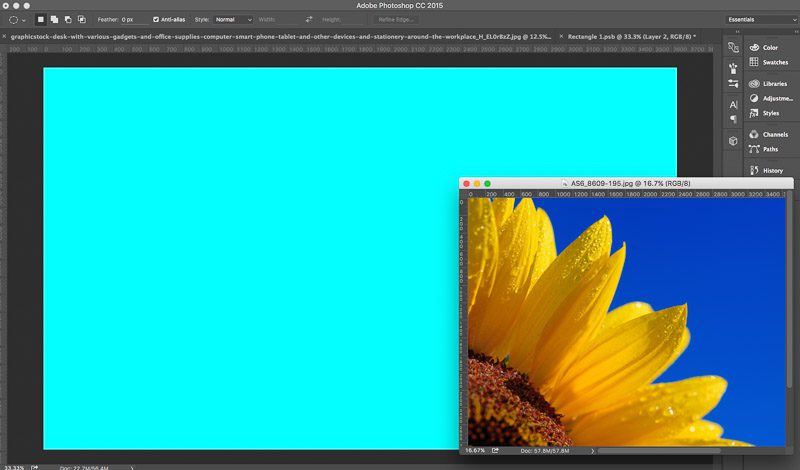
 Pro Tip: If you hold down shift, it will drop the new image directly into the center of the Smart Object.
Step Six: Voila!
When you return to your original background image, you’re in for a surprise! There’s your image, magically inserted and adjusted in your original background image!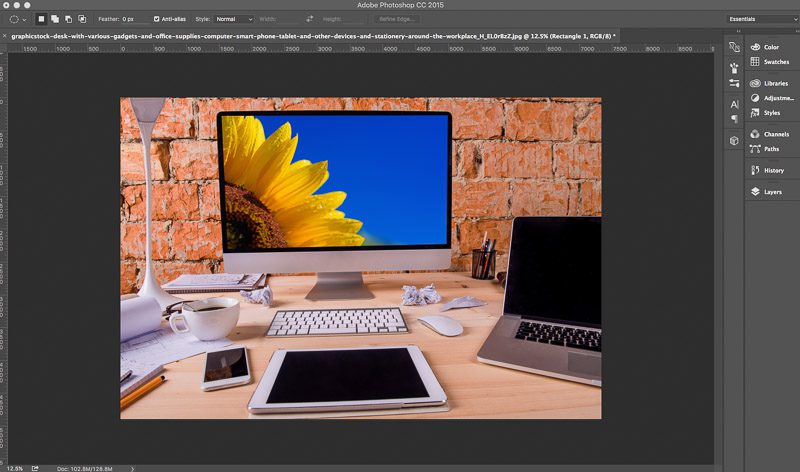 At this point, you may be able to leave your mockup as-is, but there are a few tricks you can use to make it even more realistic.
- Is the screen too bright? If your original image had a black background, just reduce the opacity on your Smart Object layer to darken things up.
- Play around with Burn, Multiply and the other image options in the layers panel.
- Add shadows. There are many ways to do this in Photoshop, but one of the simplest is to use the Color Burn effect with your paintbrush. Be careful, however, not to alter the image too much. If you mess up, just Ctrl + Z!
Bonus Round!
Now that we’ve got the steps down pat, We went ahead and applied the same process to the rest of the screens in the image, giving us our completed mockup!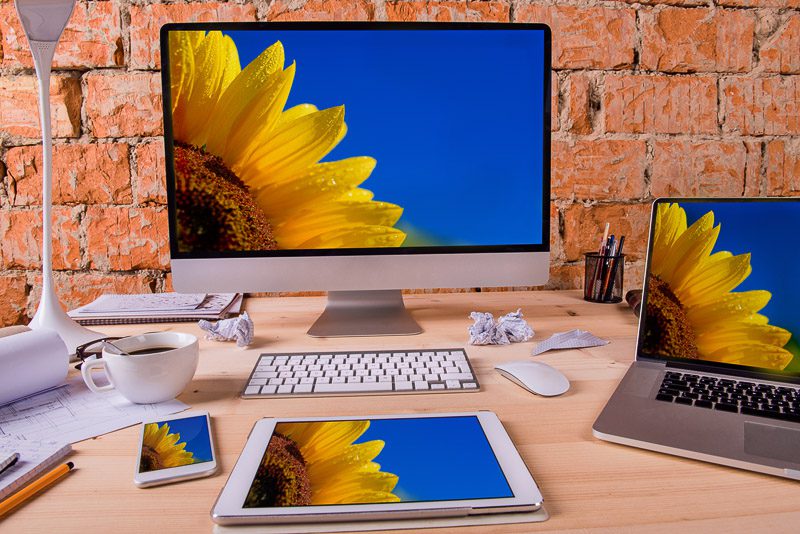 And there you have it folks! We can’t think of anything more inspiring than seeing your ideas come to life. Thanks to royalty-free stock photos and Adobe Photoshop, anyone can master this simple technique and transform vision into reality. Once you’ve mastered this skill, you can move on to learn how to create video mockups.