Have you ever watched a video where the sound doesn’t exactly match with what you’re seeing? Poorly synced audio has the power to drive you crazy, and it can easily ruin anyone’s viewing experience. Unfortunately, a lot of filmmakers run into this problem when they record audio and video separately. The good news is, this problem is very easy to fix. This Adobe Premiere tutorial will take you through three methods to get perfectly synced audio and video.
But before we jump into the swing of things, there are a few important tips you should know to efficiently sync your files. In order to sync external audio, you need some sort of reference audio. This usually comes from the camera’s built-in microphone and is referred to as a scratch track. The scratch track generally sounds a lot worse than any external recording from a microphone, but it’s necessary to get that perfect sync. Within the reference audio should be a reference point. This is a sound that is loud and abrupt and creates a spike in the audio’s waveform, which makes for a good target to pair up the tracks. The most common way of getting this sound is through a slate, or—for those small-budget projects—a clap. Now let’s start synchronizing.
Need sounds to sync to your video clips? Then explore our library of royalty-free audio and synchronize to your heart’s desire.
Merging Audio and Video
Merging audio and video clips is the fastest and easiest way to get your files in perfect sync before you begin editing. This method combines the video track with the external audio file and creates a whole new clip that is fully synced—and the best part is that Premiere does all the work for you! To learn how to merge audio and video clips, follow the steps below.
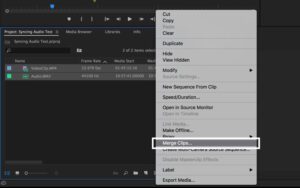
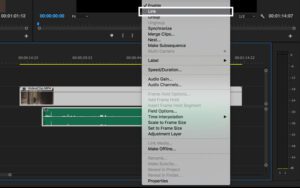
Step 1: Highlight both tracks, right click, and select Merge Clips.
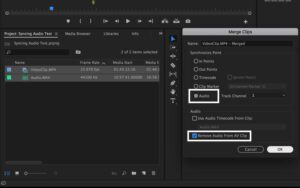
Step 2: Select Audio as the synchronization point and check the box next to Remove Audio From AV Clip.
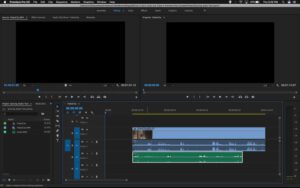
Step 3: Drag the merged footage into the sequence.
Synchronizing Audio and Video
Synchronizing is similar to merging, but it doesn’t create an additional file. This method also takes a little longer than merging, but Premiere still does most of the work. All you have to do is place the audio and video files into the timeline before syncing. This process is also helpful if you’re in the middle of editing a project. Follow the steps below to learn how to sync tracks with this method.
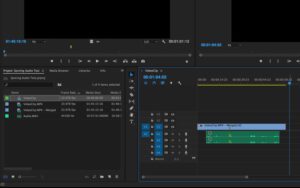
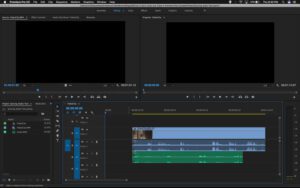
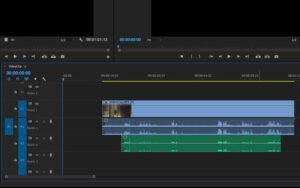
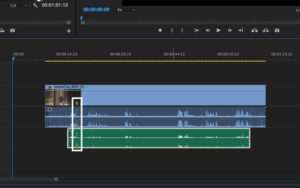
Step 1: Place the audio and video files in the timeline on top of one another.
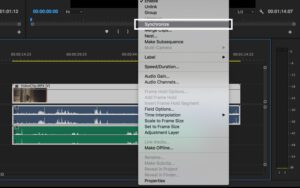
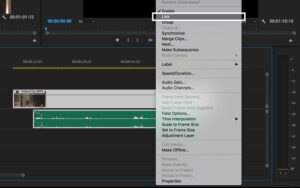
Step 2: Highlight both tracks, right click, and select Synchronize.
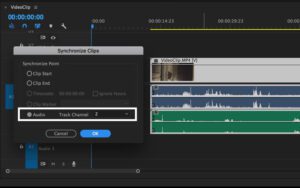
Step 3: Select Audio as the synchronize point and the track that you want to sync.
Step 4: Delete the scratch track and link the clips.
Manual Synchronization
Unfortunately, Premiere won’t perfectly sync audio and video every time. Whether it couldn’t find a good reference point or it just made a huge error, there is always a solution—doing it yourself. It may not be the fastest or most luxurious method, but it is the most accurate and it gets the job done. Manually syncing audio and video is also the best way to get back on track if things end up mismatching during the edit. Follow these steps to learn how to manually sync audio and video in Premiere.
Step 1: Place the audio and video files in the timeline on top of one another.
Step 2: Scrub through to a good reference point and mark the frame where you first hear the sound for both audio tracks.
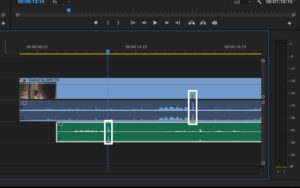
Tip: Press the “M” key on your keyboard to mark a highlighted clip
Step 3: Align the tracks using the markers.
Step 4: Delete the scratch track and link the clips.
That’s it! Now that you can sync audio and video like a pro, your projects will look good and sound even better. If you want to learn more about editing audio, check out these 7 Audio Editing Tips.